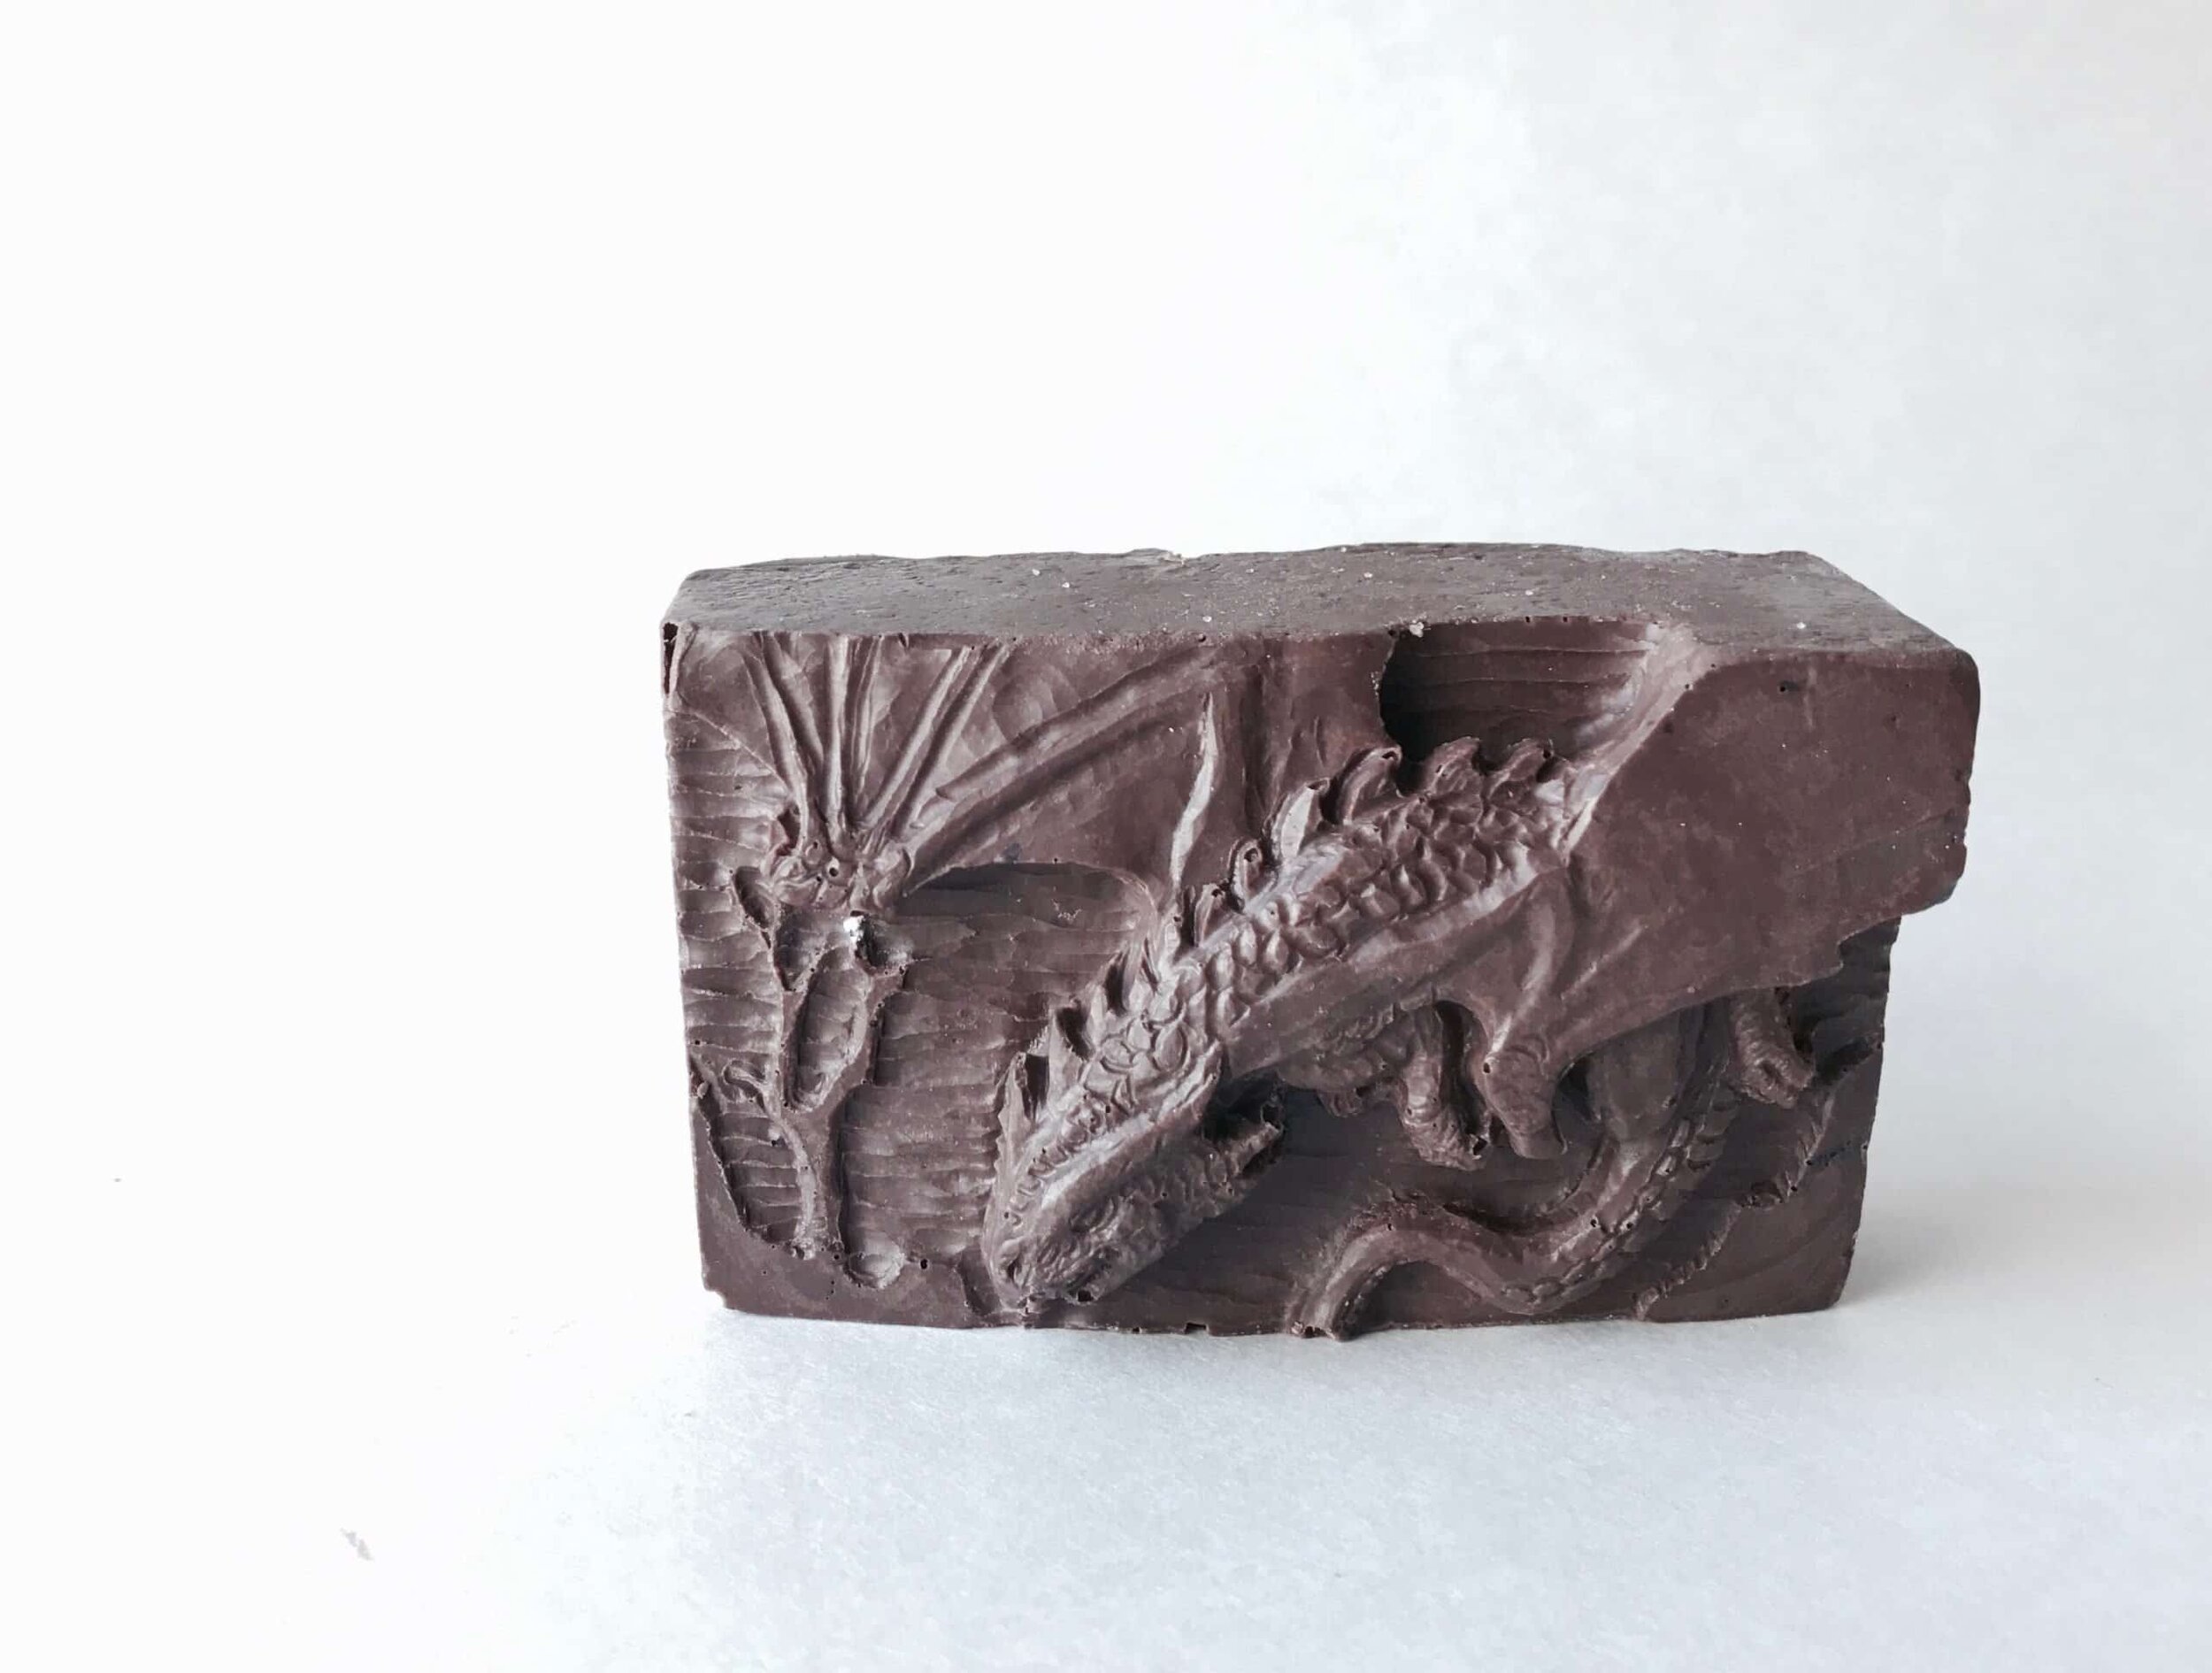
Dragon Chocolate Bars

*Disclaimer: This post contains affiliate links. To learn more, please go here.
Mmmm, chocolate! I love chocolate, but playing with it can be such a messy situation. The only way I think that it would be fun is with super fun molds to use it with. Like these dragon molds that made these dragon chocolate bars!
I found these super cool molds on Etsy. There are so many fun homemade things on that website. It's fun to see how other's can be so creative and in turn use their products to make something of your own. Originally these molds were for soap! Really any kind of mold can be used for food, but always make sure to ask if the silicone they use to make the molds are food safe. It wouldn't be great to find out the mold you purchased isn't supposed to be used for food and could contain harmful chemicals. No one wants to consume chemicals when they eat chocolate.
When I made these I was at my parent's house back in North Dakota, and the town grocery store is super small with hardly anything to choose from. Meaning that these dragon chocolate bars were pretty basic with only using good ole' almond bark chocolate, peanut butter, and a caramel filling. They were so fun to make though and I can't wait to find other fun molds to use and try other flavor combos!
Fillings galore.
What makes chocolate even more fun is that you can get pretty crazy with flavor combinations. You can always stick to classic flavors like peanut butter or caramel. Or you can go out of the box and do something like cookie butter or something more fun like stuffing it with little candies like a little surprise!
I find that using nice big soap molds for chocolate can leave endless possibilities since it's so thick and big! When I made these it can literally feed 3-4 people or just one person in a few portions. It's at least a 4 serving chocolate bar.


Products I recommend.
__________________________________________________________________________
chocolate bars
- Food safe chocolate mold
- chocolate
- i used almond bark, but any kind of chocolate can be used. like candy melts in fun colors!
- fillings
- peanut butter
- caramel
- ganache
- coconut filling
- cookie butter
- almond butter
- little candies
- marshmallow fluff
- nuts
Start by melting the chocolate. I find it easier to melt in a piping bag. Place the mold on a flat surface. Completely fill the mold with chocolate and then place into the freezer until the sides have become solid but the middle is still melted.
If you are using small molds, then fill them with the chocolate and then flip over to let the excess chocolate drip out. Scrape the edges and let set.
Carefully tip the excess chocolate out of the mold. Place your choice of filling in the center, but don't fill it completely to the top. Make sure you leave a little room to top with more chocolate to lock the filling in.
Put more melted chocolate on top and put into the freezer once again until completely solid. When the chocolate is solid and no longer soft, carefully remove from the mold.
White Chocolate Cake with Cranberry Buttercream

[wprm-recipe-jump]
*Disclaimer: This post contains affiliate links. To learn more, please go here.
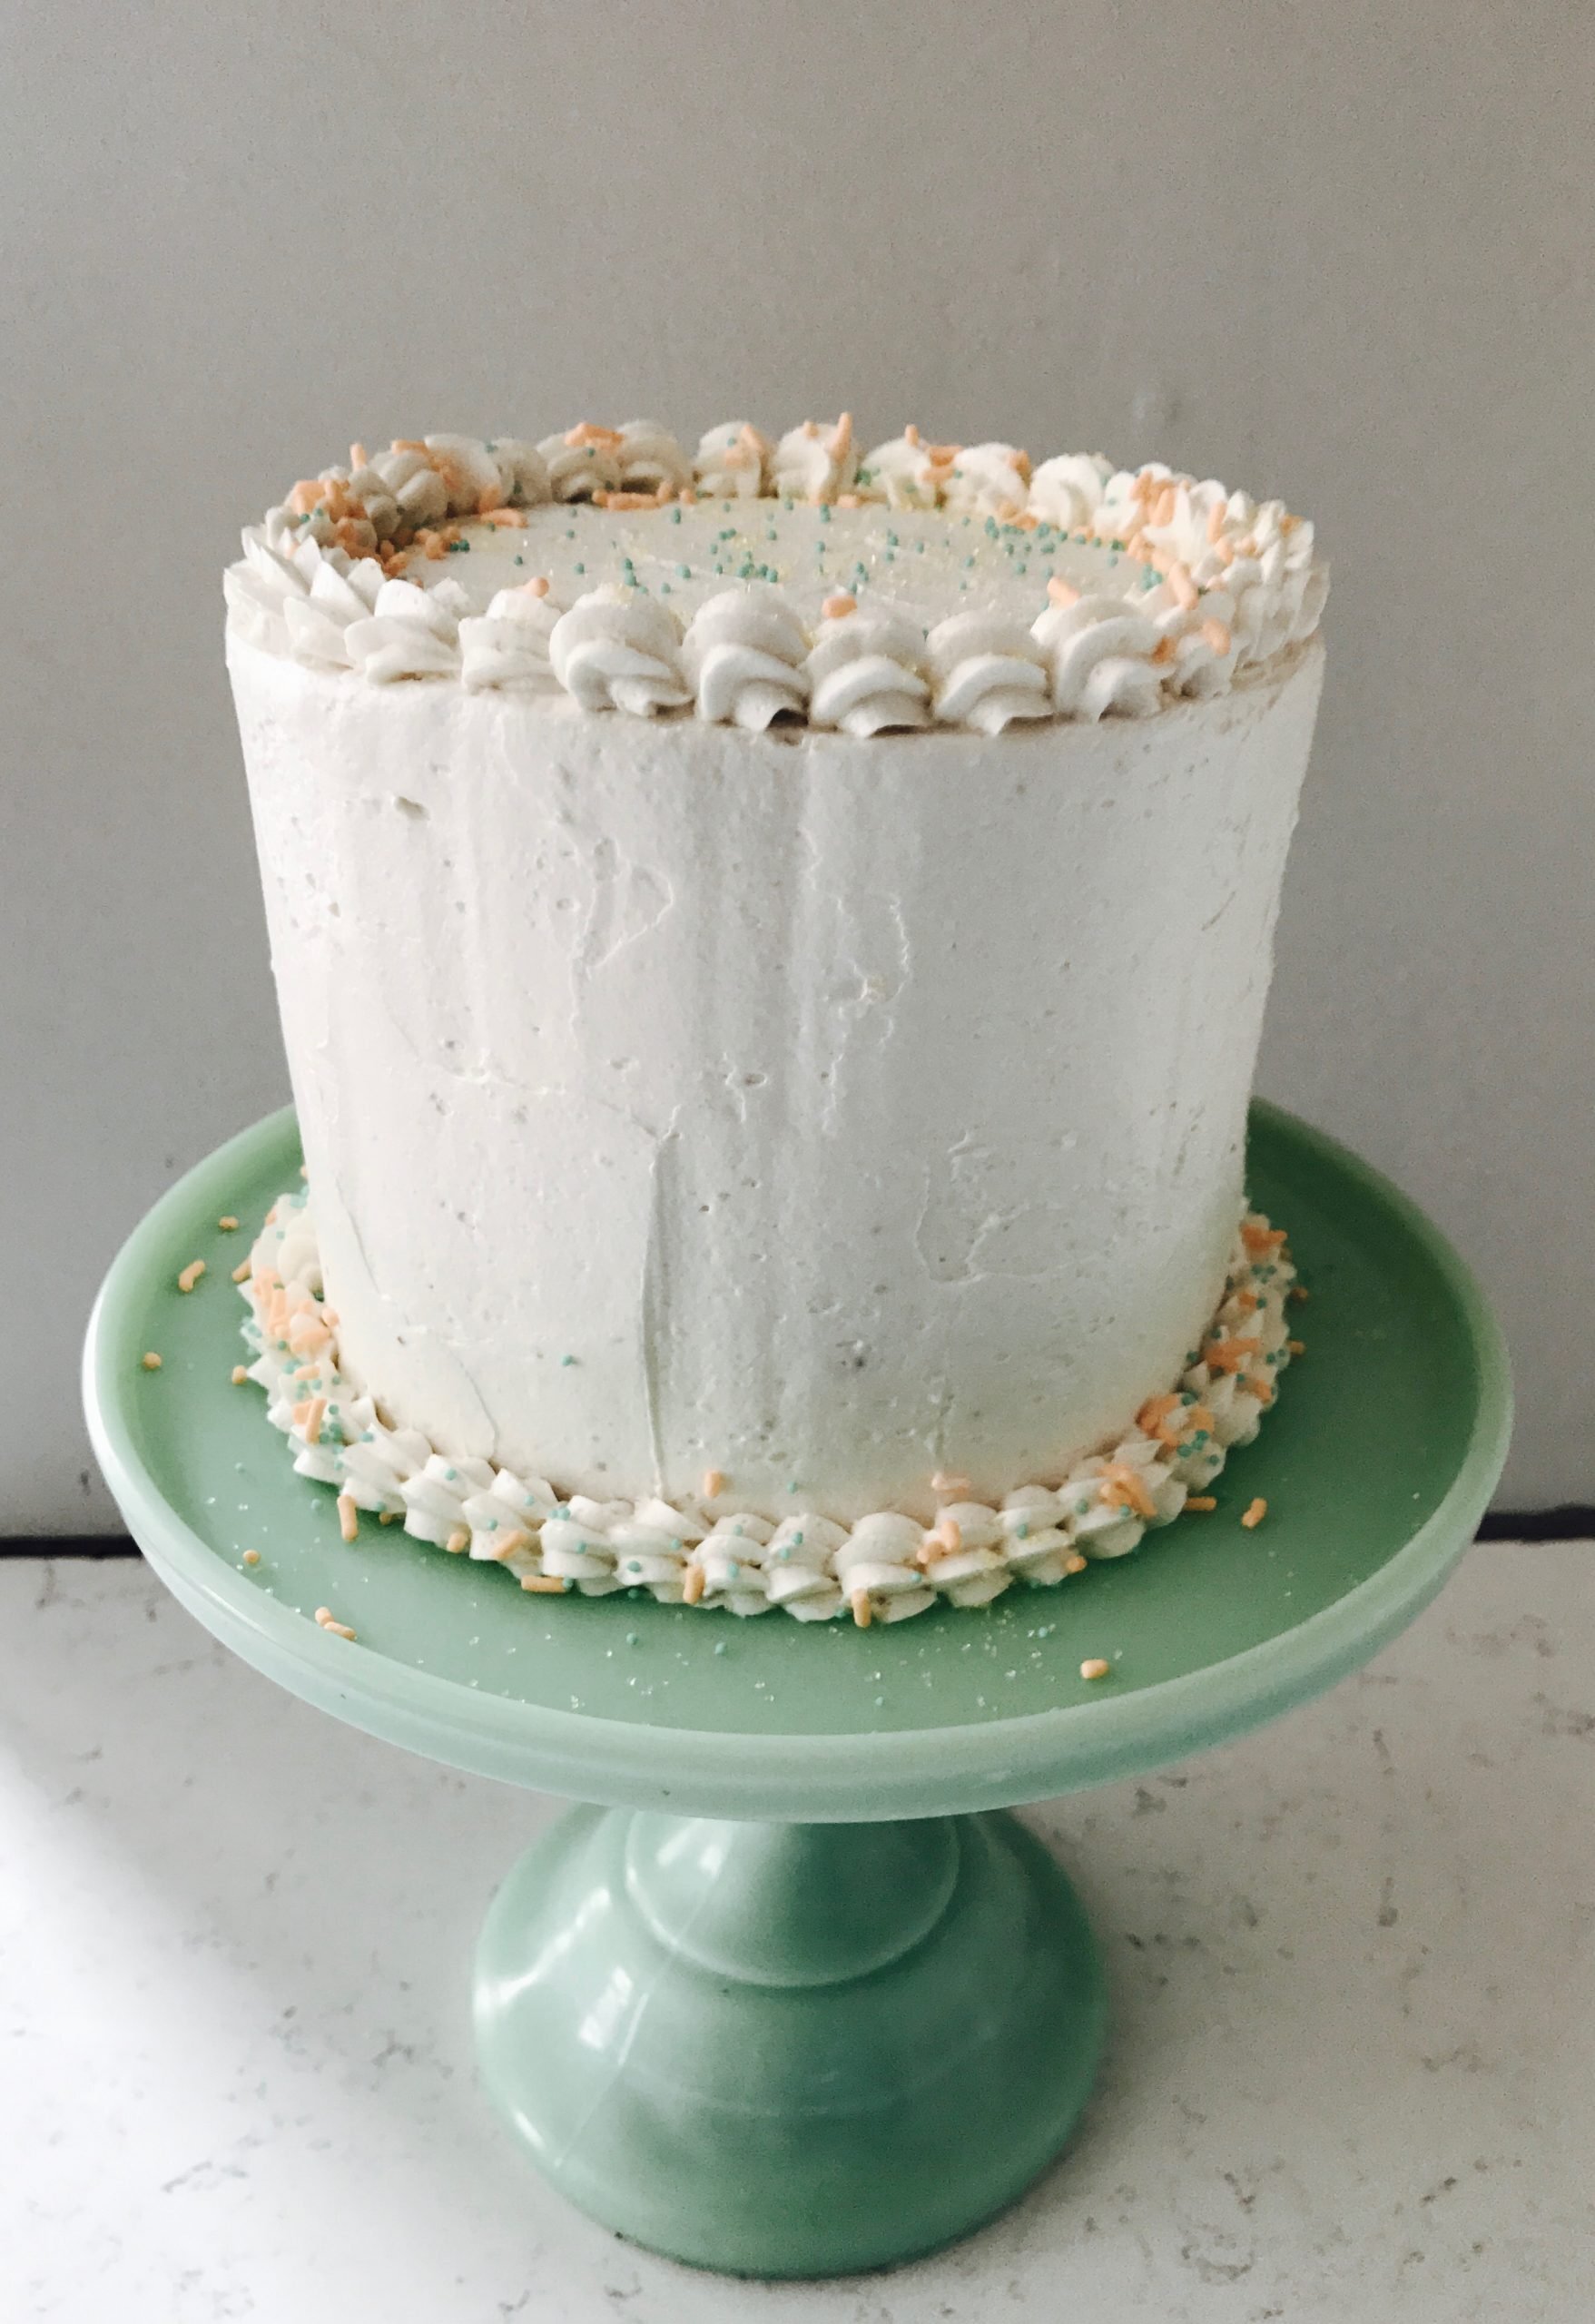
Merry Christmas everyone! This white chocolate cranberry cake is filled with lots of white chocolate, a hint of nutmeg to give it a little spice, and a tart cranberry buttercream. The combination of flavors makes one drool worthy cake for the holiday.
Change it up!
There are a few ways that you can change up this cake. One thing you could do is that instead of adding the cooked cranberries into the buttercream, you could use it as a filling instead. Just keep the buttercream a plain vanilla and make a small dam when stacking the cake and fill it up with the cooked cranberries.
Or you can make whatever filling or buttercream you want! It's a simple white chocolate cake. No need to add in the nutmeg, that's optional. Just make your favorite buttercream and even add in a fun fruit filling! Anything really goes with white chocolate so the possibilities are endless.
Other white chocolate desserts.
White chocolate ice cream with roasted strawberries
White chocolate cut out cookies
Peppermint white chocolate cake


Products I recommend.
Above are some products that I personally use and recommend for this recipe and to have for everyday use. My absolute favorite is the BlueQ oven mitts. I have a collection of them and I love them! They are great quality and it’s nice to have a kitchen item with a sense of humor.
_____________________________________________________________________
white chocolate cake with cranberry buttercream
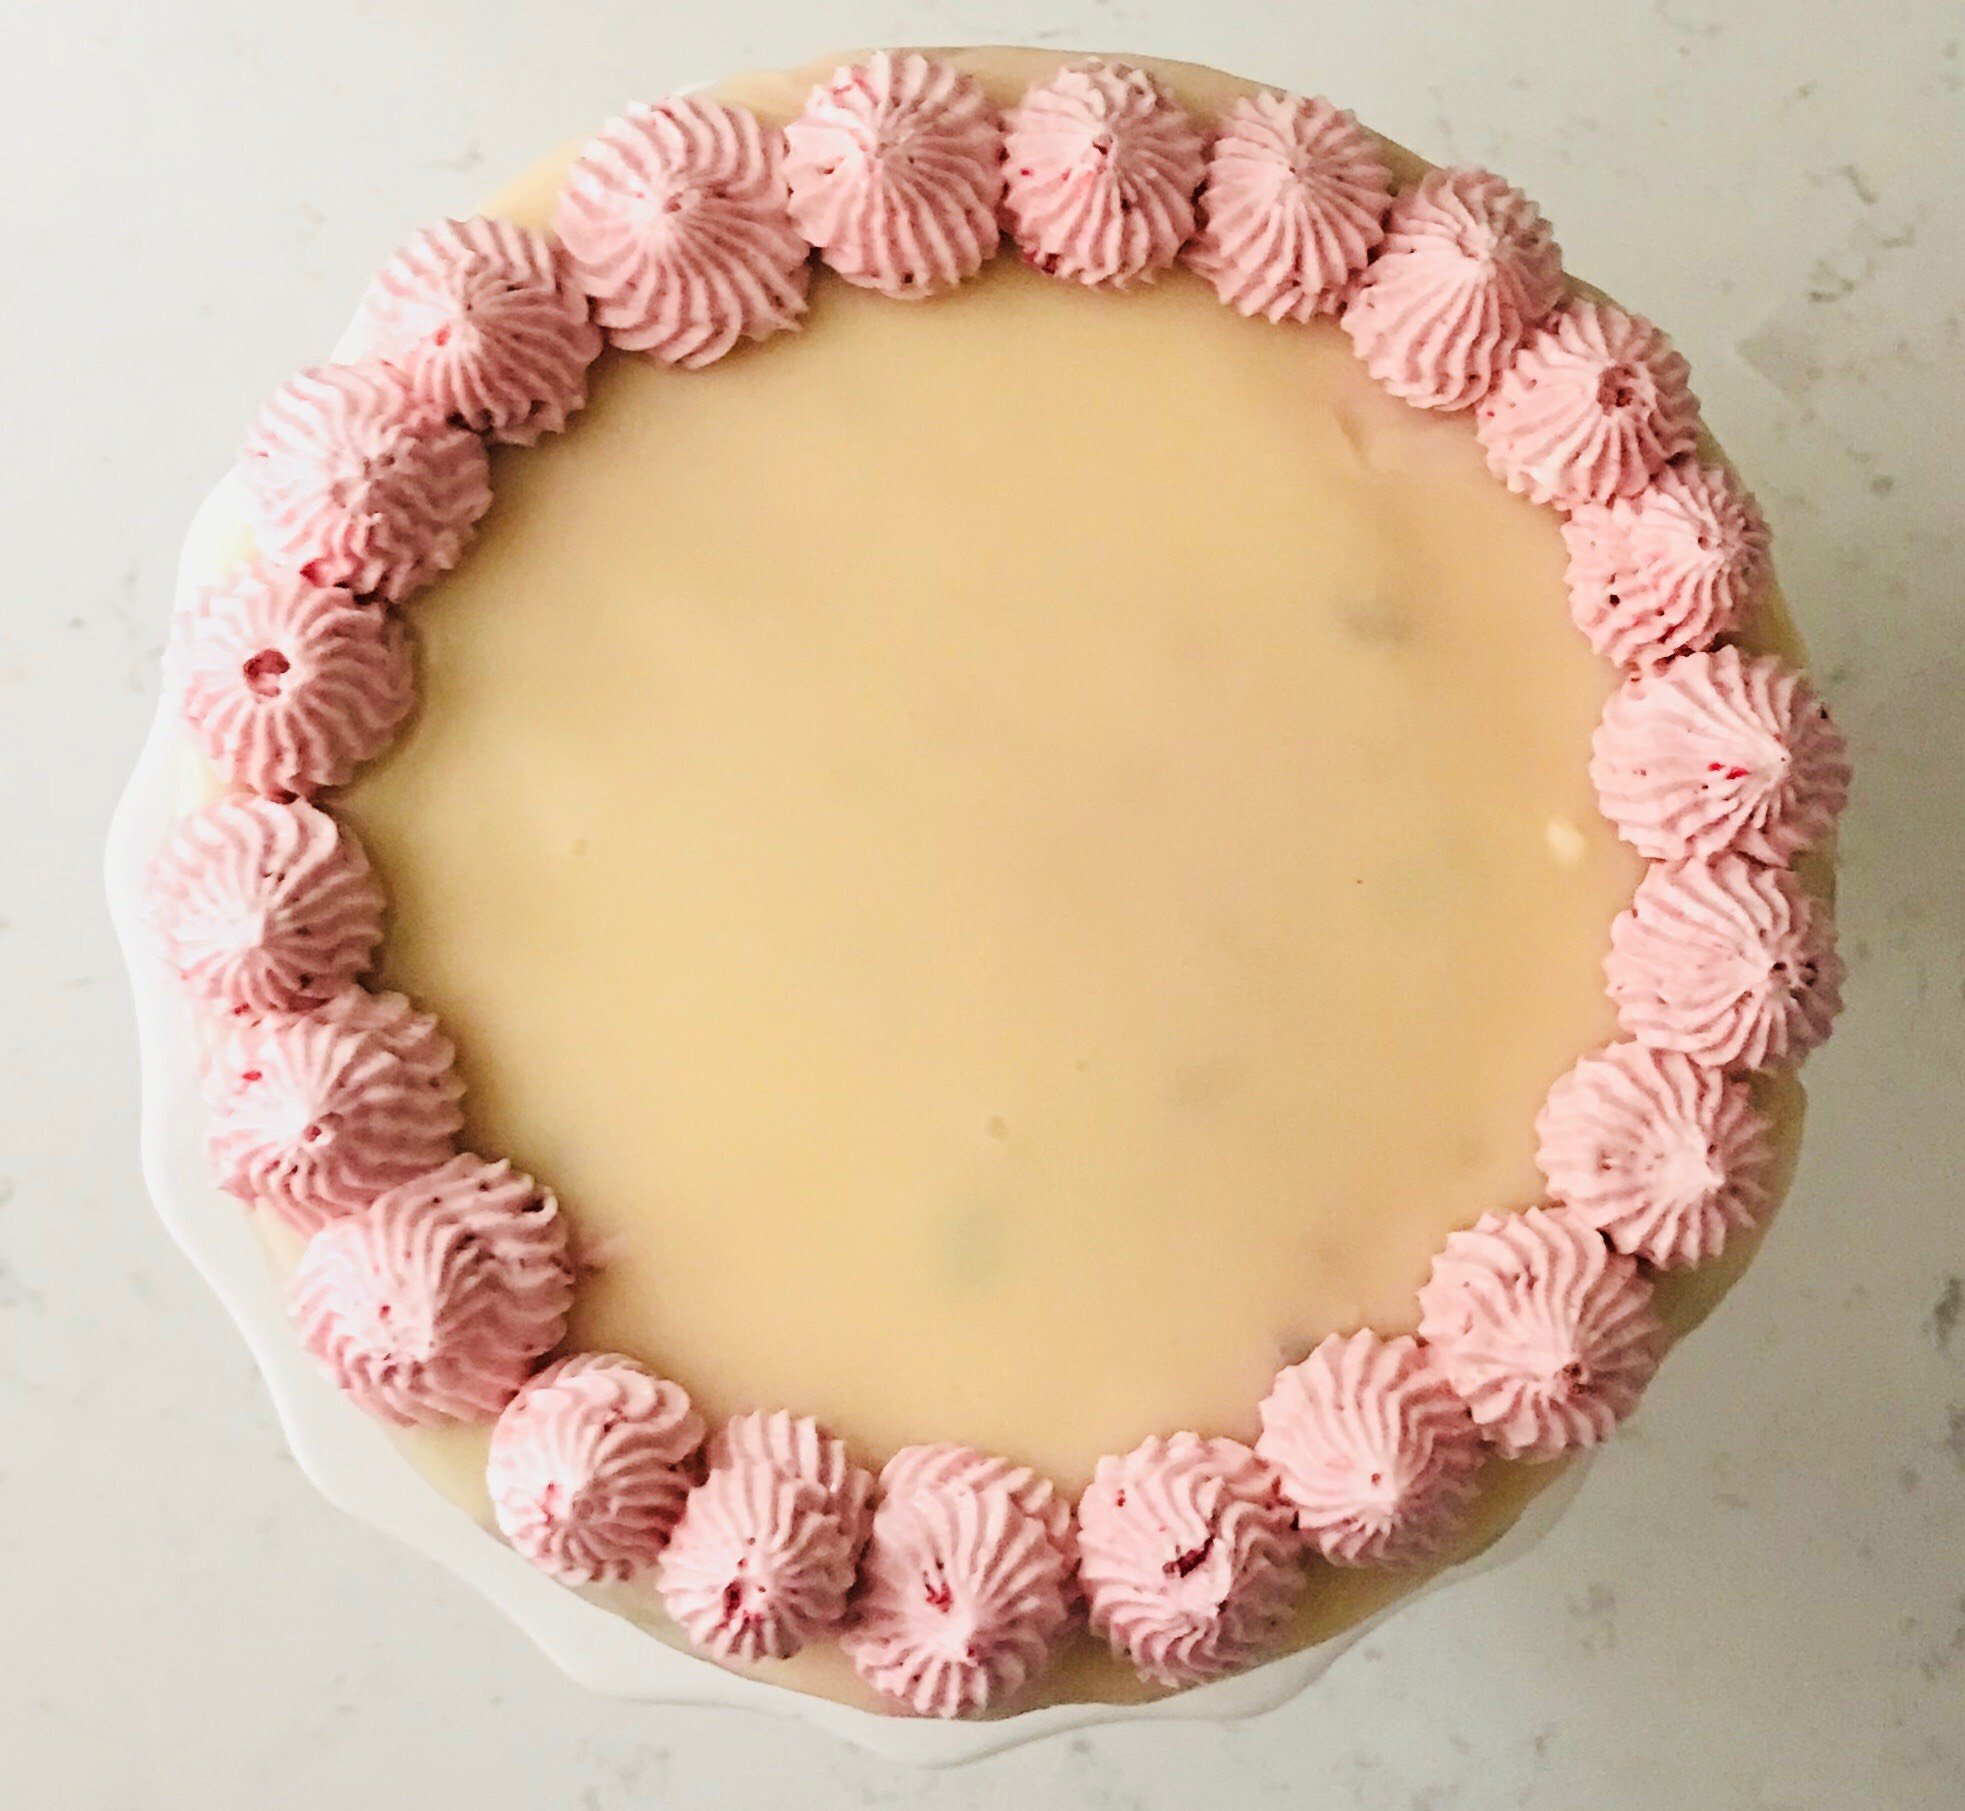
this white chocolate cake has a hint of nutmeg for a lovely added flavor and is lightly frosted with a tart cranberry buttercream
cake
- 2 cups all-purpose flour
- 3/4 cup granulated sugar
- 1 1/2 tsp baking soda
- 1 tsp salt
- 1/2 tsp nutmeg
- 3 eggs
- 1/2 cup vegetable oil
- 1 tsp vanilla extract
- 1 1/3 cup milk
- zest of 1 orange
- 1 cup white chocolate (melted)
buttercream
- 1 cup fresh cranberries
- 2 tbsp granulated sugar
- 1 tbsp water
- 4 oz egg whites
- 3/4 cup granulated sugar
- 2 sticks unsalted butter (room temp)
- 1/2 tsp vanilla extract
ganache
- 3 tbsp heavy cream
- 1/3 cup white chocolate chips
cake
- preheat the oven to 350 degrees F. spray and line three 6-inch cake pans. in a small microwavable bowl, melt the white chocolate in 15 second bursts and set aside. in a large bowl combine the flour, sugar, baking soda, salt, and nutmeg and mix together. in another bowl whisk together the eggs, oil, vanilla, milk and orange zest. add the wet ingredients to the dry and whisk together until fully combined. add in the white chocolate and mix until incorporated. divide the batter evenly among the cake pans and bake for 30-35 minutes or until a toothpick comes out clean. let cool 10 minutes and then carefully remove from the cake pans to continue cooling. wrap in cling wrap until ready to use.
buttercream
- in a small pot, combine the cranberries, sugar and water and bring to a small boil. cook until the cranberries are soft and the mixture starts to thicken, about 10 minutes. remove from the heat and let cool. once cool put the mixture into a food processor and puree until smooth. if there are some small chunks then don't worry about it.
- in the bowl of an electric mixer combine the egg whites and the sugar and place over a pot of boiling water. whisk together until the sugar dissolves. once the sugar is dissolved, place on the mixer fitted with a whisk attachment and whip on high until a meringue forms and the bottom of the bowl is no longer hot. slowly add in the butter and continue whipping until the mixture comes together and doesn't look curdled. add in the vanilla and cranberries and mix until just combined.
ganache
- place both ingredients in a small microwaveable bowl and microwave for about 30-45 seconds. mix together until it comes together. spoon on top of the chilled cake to form a drip down the sides of the cake.
White Chocolate Cut Out Cookies

*This post contains affiliate links. Please read disclosure to learn more.
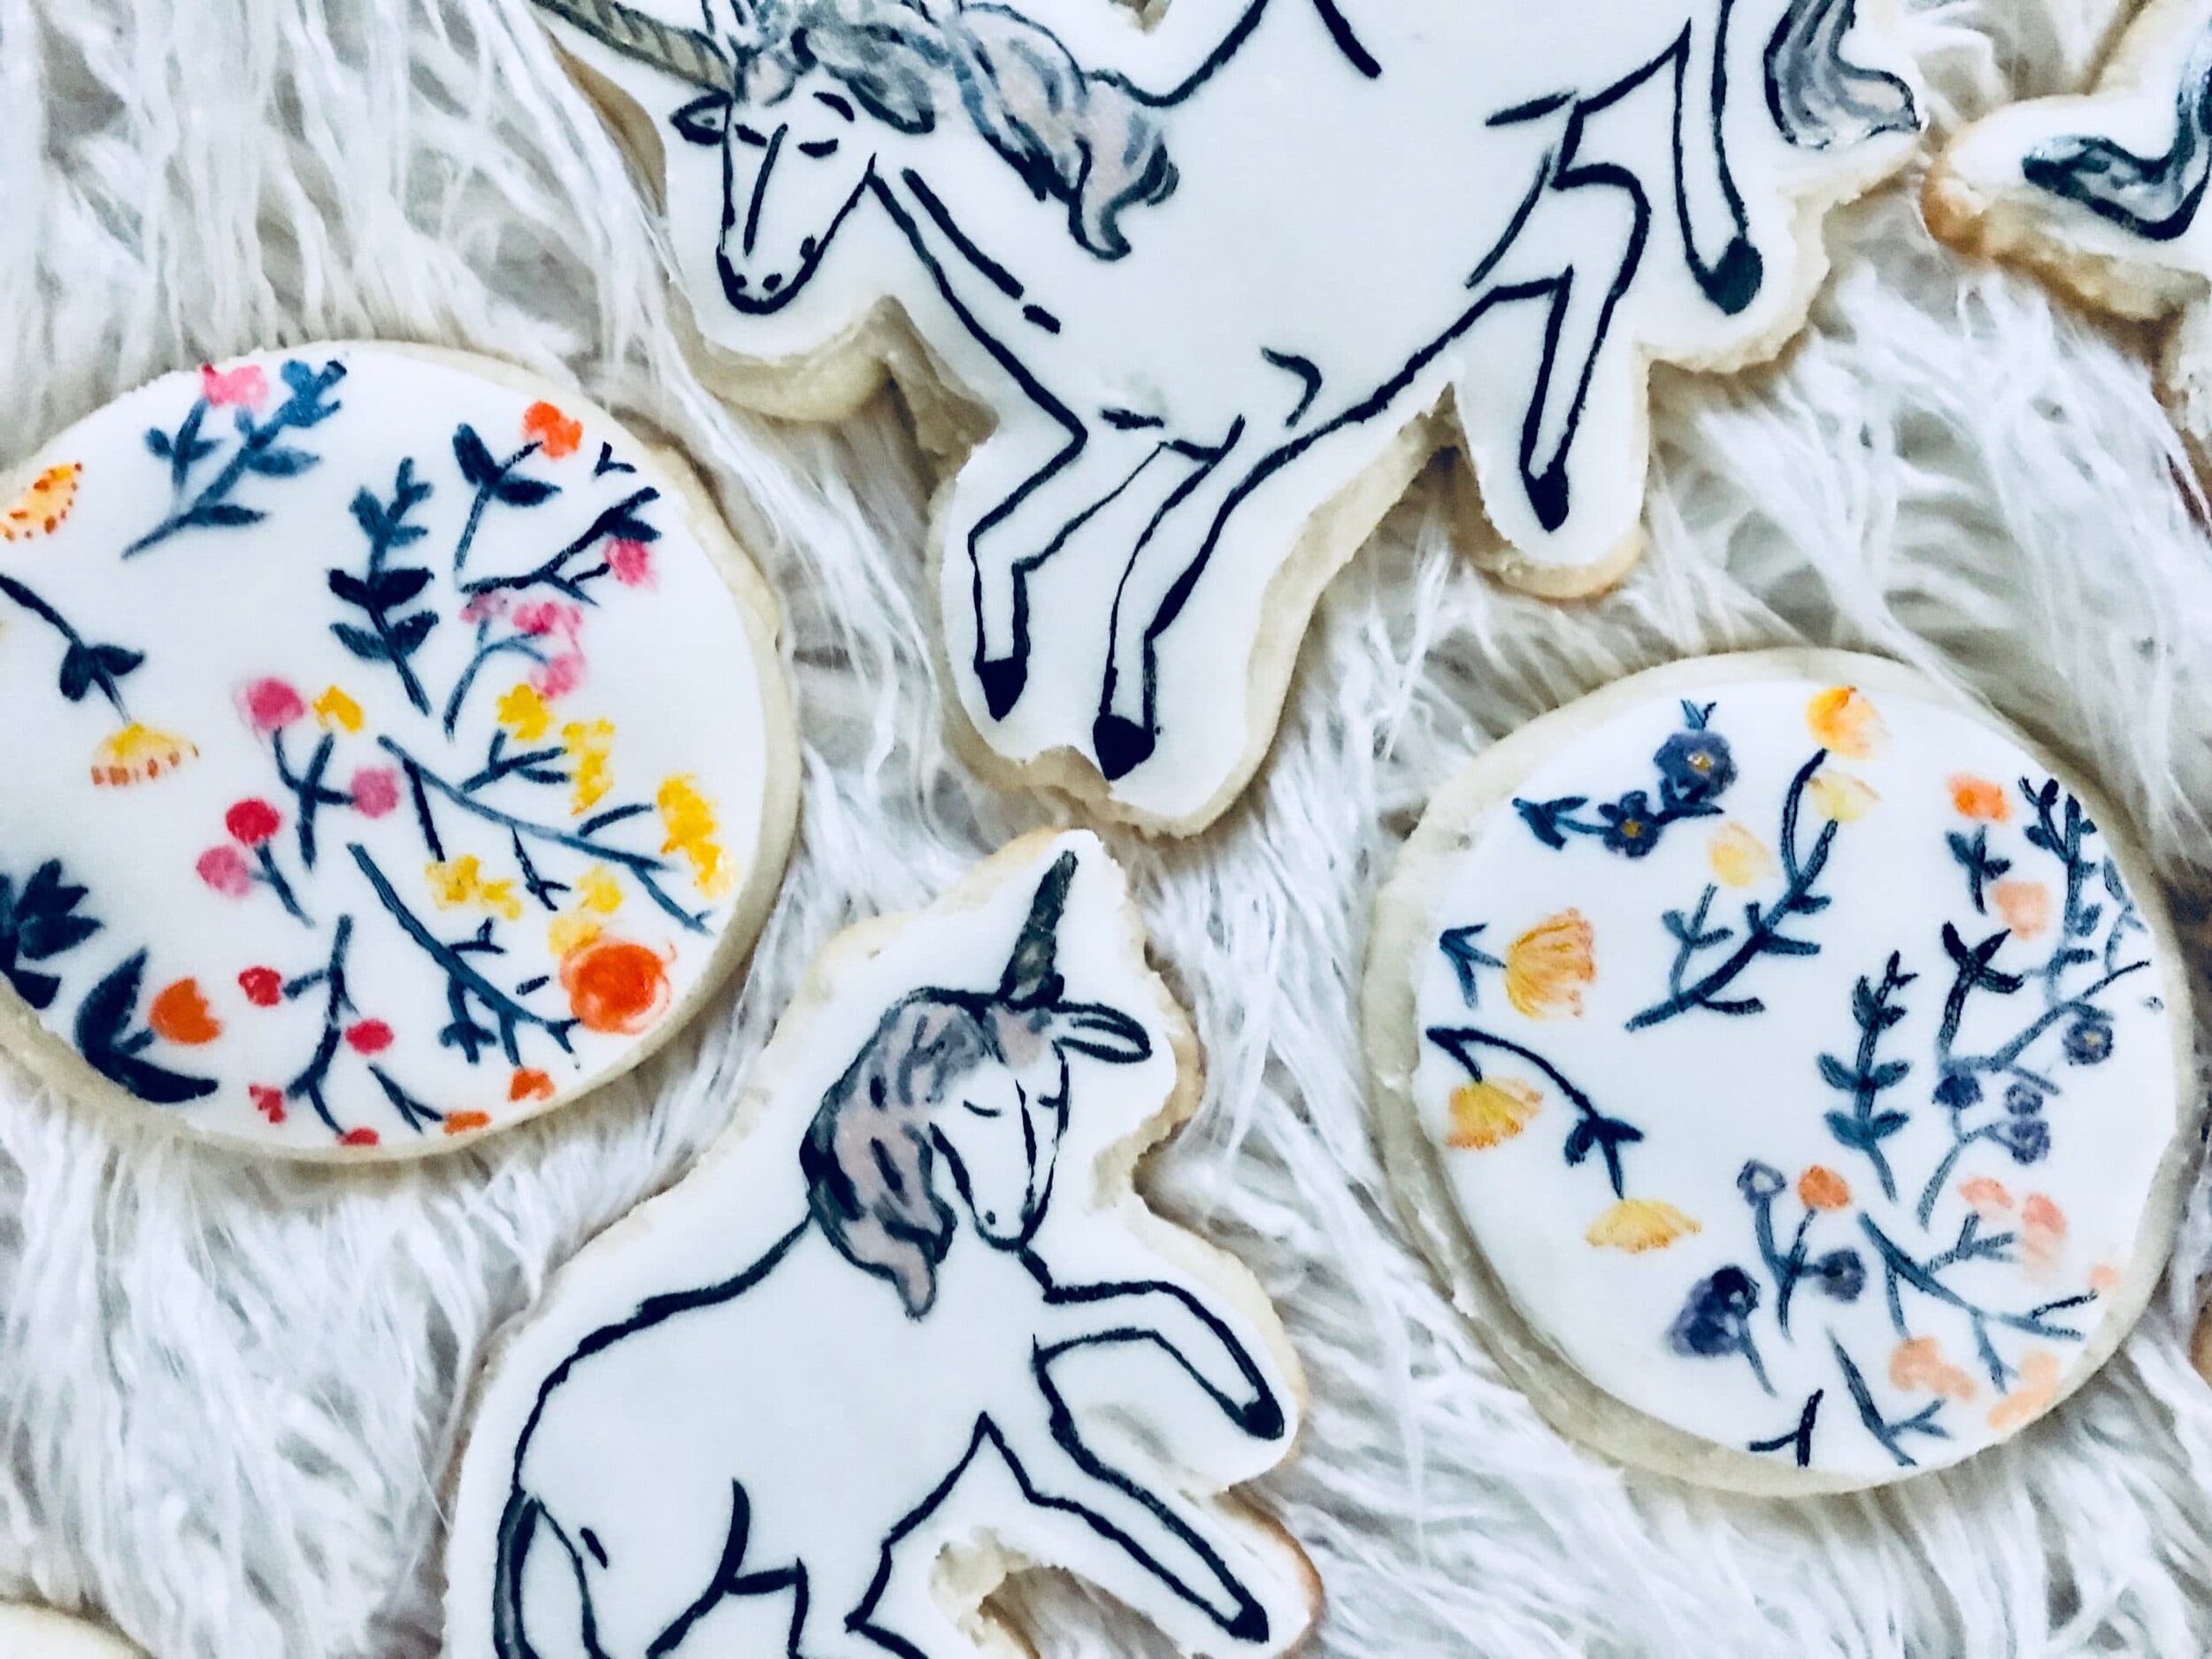
Somehow I seem to just find an idea pop right into my head at a random time. That's what happened with these white chocolate cut out cookies. I had gotten the idea to do something with unicorns from this cute print I found. These adorable unicorn designs on Pinterest by Heather Ross. Super cute right?
Usually I come up with the design before the flavor of one of my creations. It can be a little hard coming up with a flavor profile, so sometimes I take inspiration from the design itself. Colors or the character that is in the design can bring a lot of inspiration. When I think of unicorns, I think of sugar and sparkles. What's more sweet than white chocolate?
Cookie process
Making a cut out cookie with white chocolate was interesting. I wanted it to taste just like white chocolate but I also didn't want them to turn into a hard rock. The recipe did turn out just right and tasty, although the end result is a little crinkly so it resembles more of a classic sugar cookie. I think that with these cookies you could easily just do a drop cookie right when the batter is made; even roll the cookie in some sugar too. If you want to make them into shapes, just wrap the dough and chill it for about an hour in the fridge before rolling.
Make it fun!
I decorated these cookies with a simple buttercream (salt added to cut the sweetness) and topped it with a thin piece of fondant. If you like the idea of decorating them the same way but hate fondant, i'd suggest trying modeling chocolate instead. You can either buy modeling chocolate or use candy melts and make your own. It's super easy to find a recipe for it too!
To decorate the cookies I used my projector to paint the unicorns on them. They turned out scrumptiously cute and taste like sugar cookies to me but with a hint of white chocolate. Soft on the inside and the edges have a slight crunch to it from the white chocolate getting caramelized in the oven.


Products I recommend.
Above are some products that I personally use and recommend for this recipe and to have for everyday use. My absolute favorite is the BlueQ oven mitts. I have a collection of them and I love them! They are great quality and it’s nice to have a kitchen item with a sense of humor.
________________________________________________________________________
white chocolate cookies

these white chocolate cookies are sweet and delicious and what's more fun than cutting your cookies out into cute shapes?
- 2 sticks softened butter
- 12 oz white chocolate (melted)
- 2/3 cup granulated sugar
- 3 eggs
- 3/4 tsp vanilla extract
- 1 tsp salt
- 1 1/2 tsp baking powder
- 3 1/2 cup all-purpose flour
- melt the white chocolate in the microwave for 15 second bursts, stirring each time in between. in the bowl of an electric mixer fitted with a paddle attachment, cream the butter, white chocolate, and sugar until smooth. scrape the sides of the bowl. add in the eggs and vanilla extract and mix until incorporated. add in the salt, baking powder, and the flour gradually until fully mixed. divide the dough in half and wrap in cling wrap. chill for at least an hour.
- preheat the oven to 350 degrees F. dust your counter and rolling pin with flour or powdered sugar. roll the dough to 1/4 inch thick and use cookie cutters to cut out shapes. place onto a sheet pan lined with parchment paper and bake for 8-10 minutes or until the edges are golden brown. let cool.
- you can eat as is or decorate with some simple buttercream!
Sweet Potato Spice Cake

Move over pumpkin! Hello sweet potato spice cake! Who says that you can't put vegetables into a cake? Although sweet potatoes are often eaten with loads of marshmallows on top, I guess it is more of a sweet veggie than a savory one? But adding it into a cake with some spices, a hint of orange, and some cream cheese frosting and you have something super drool worthy to make for the holidays. It is super moist and tender with tons of flavor with hints of spices and a little orange zest here and there.
Change it up!
If you aren't into sweet potato then you can easily replace it with pumpkin puree instead. There's no need to dis pumpkin in this chilly fall weather! Some may even say that fall is pumpkin spice season.
Other fun treats to enjoy this fall!
Ginger cake with pumpkin buttercream


Products I recommend
Above are some products that I personally use and recommend for this recipe and to have for everyday use. My absolute favorite is the BlueQ oven mitts. I have a collection of them and I love them! They are great quality and it’s nice to have a kitchen item with a sense of humor.
__________________________________________________________________________
sweet potato spice cake

a fall cake filled with sweet potatoes, spices and lots of cream cheese buttercream
cake
- 15 oz can sweet potatoes (drained)
- 2 eggs
- 1/2 cup vegetable oil
- 1 tsp vanilla extract
- zest and juice of 1 large naval orange
- 2 cups all-purpose flour
- 3/4 cup granulated sugar
- 1/3 cup brown sugar
- 1 tsp salt
- 2 tsp baking soda
- 1 1/2 tsp cinnamon
- 3/4 tsp ginger
- 1/4 tsp cloves
- 1 1/4 cup milk
buttercream
- 8 oz cream cheese
- 2 sticks unsalted butter (room temp)
- 5 cups powdered sugar
- 1 tsp vanilla extract
- 1 tsp orange zest
- 1 tbsp orange juice
- 1/4 tsp cinnamon
cake
- preheat the oven to 350 degrees F. spray and line three 6-inch cake pans. in a food processor, puree the sweet potatoes, eggs, oil, vanilla, and orange zest and juice until smooth. in a large bowl, combine the flour, both sugars, salt, baking soda, and spices. whisk in the sweet potato mixture and then slowly add in the milk until the batter is smooth. divide evenly among the cake pans and bake 30-35 minutes or until a toothpick comes out clean. let cool 10 minutes, remove from the pans to continue cooling and then wrap in plastic wrap until ready to use.
buttercream
- combine all ingredients in the bowl of an electric mixer fitted with a paddle attachment. start mixing slowly and build up speed. beat until light and fluffy, about 5 minutes.
Banana Pecan Mini Loaf Cakes with Caramel
[wprm-recipe-jump]
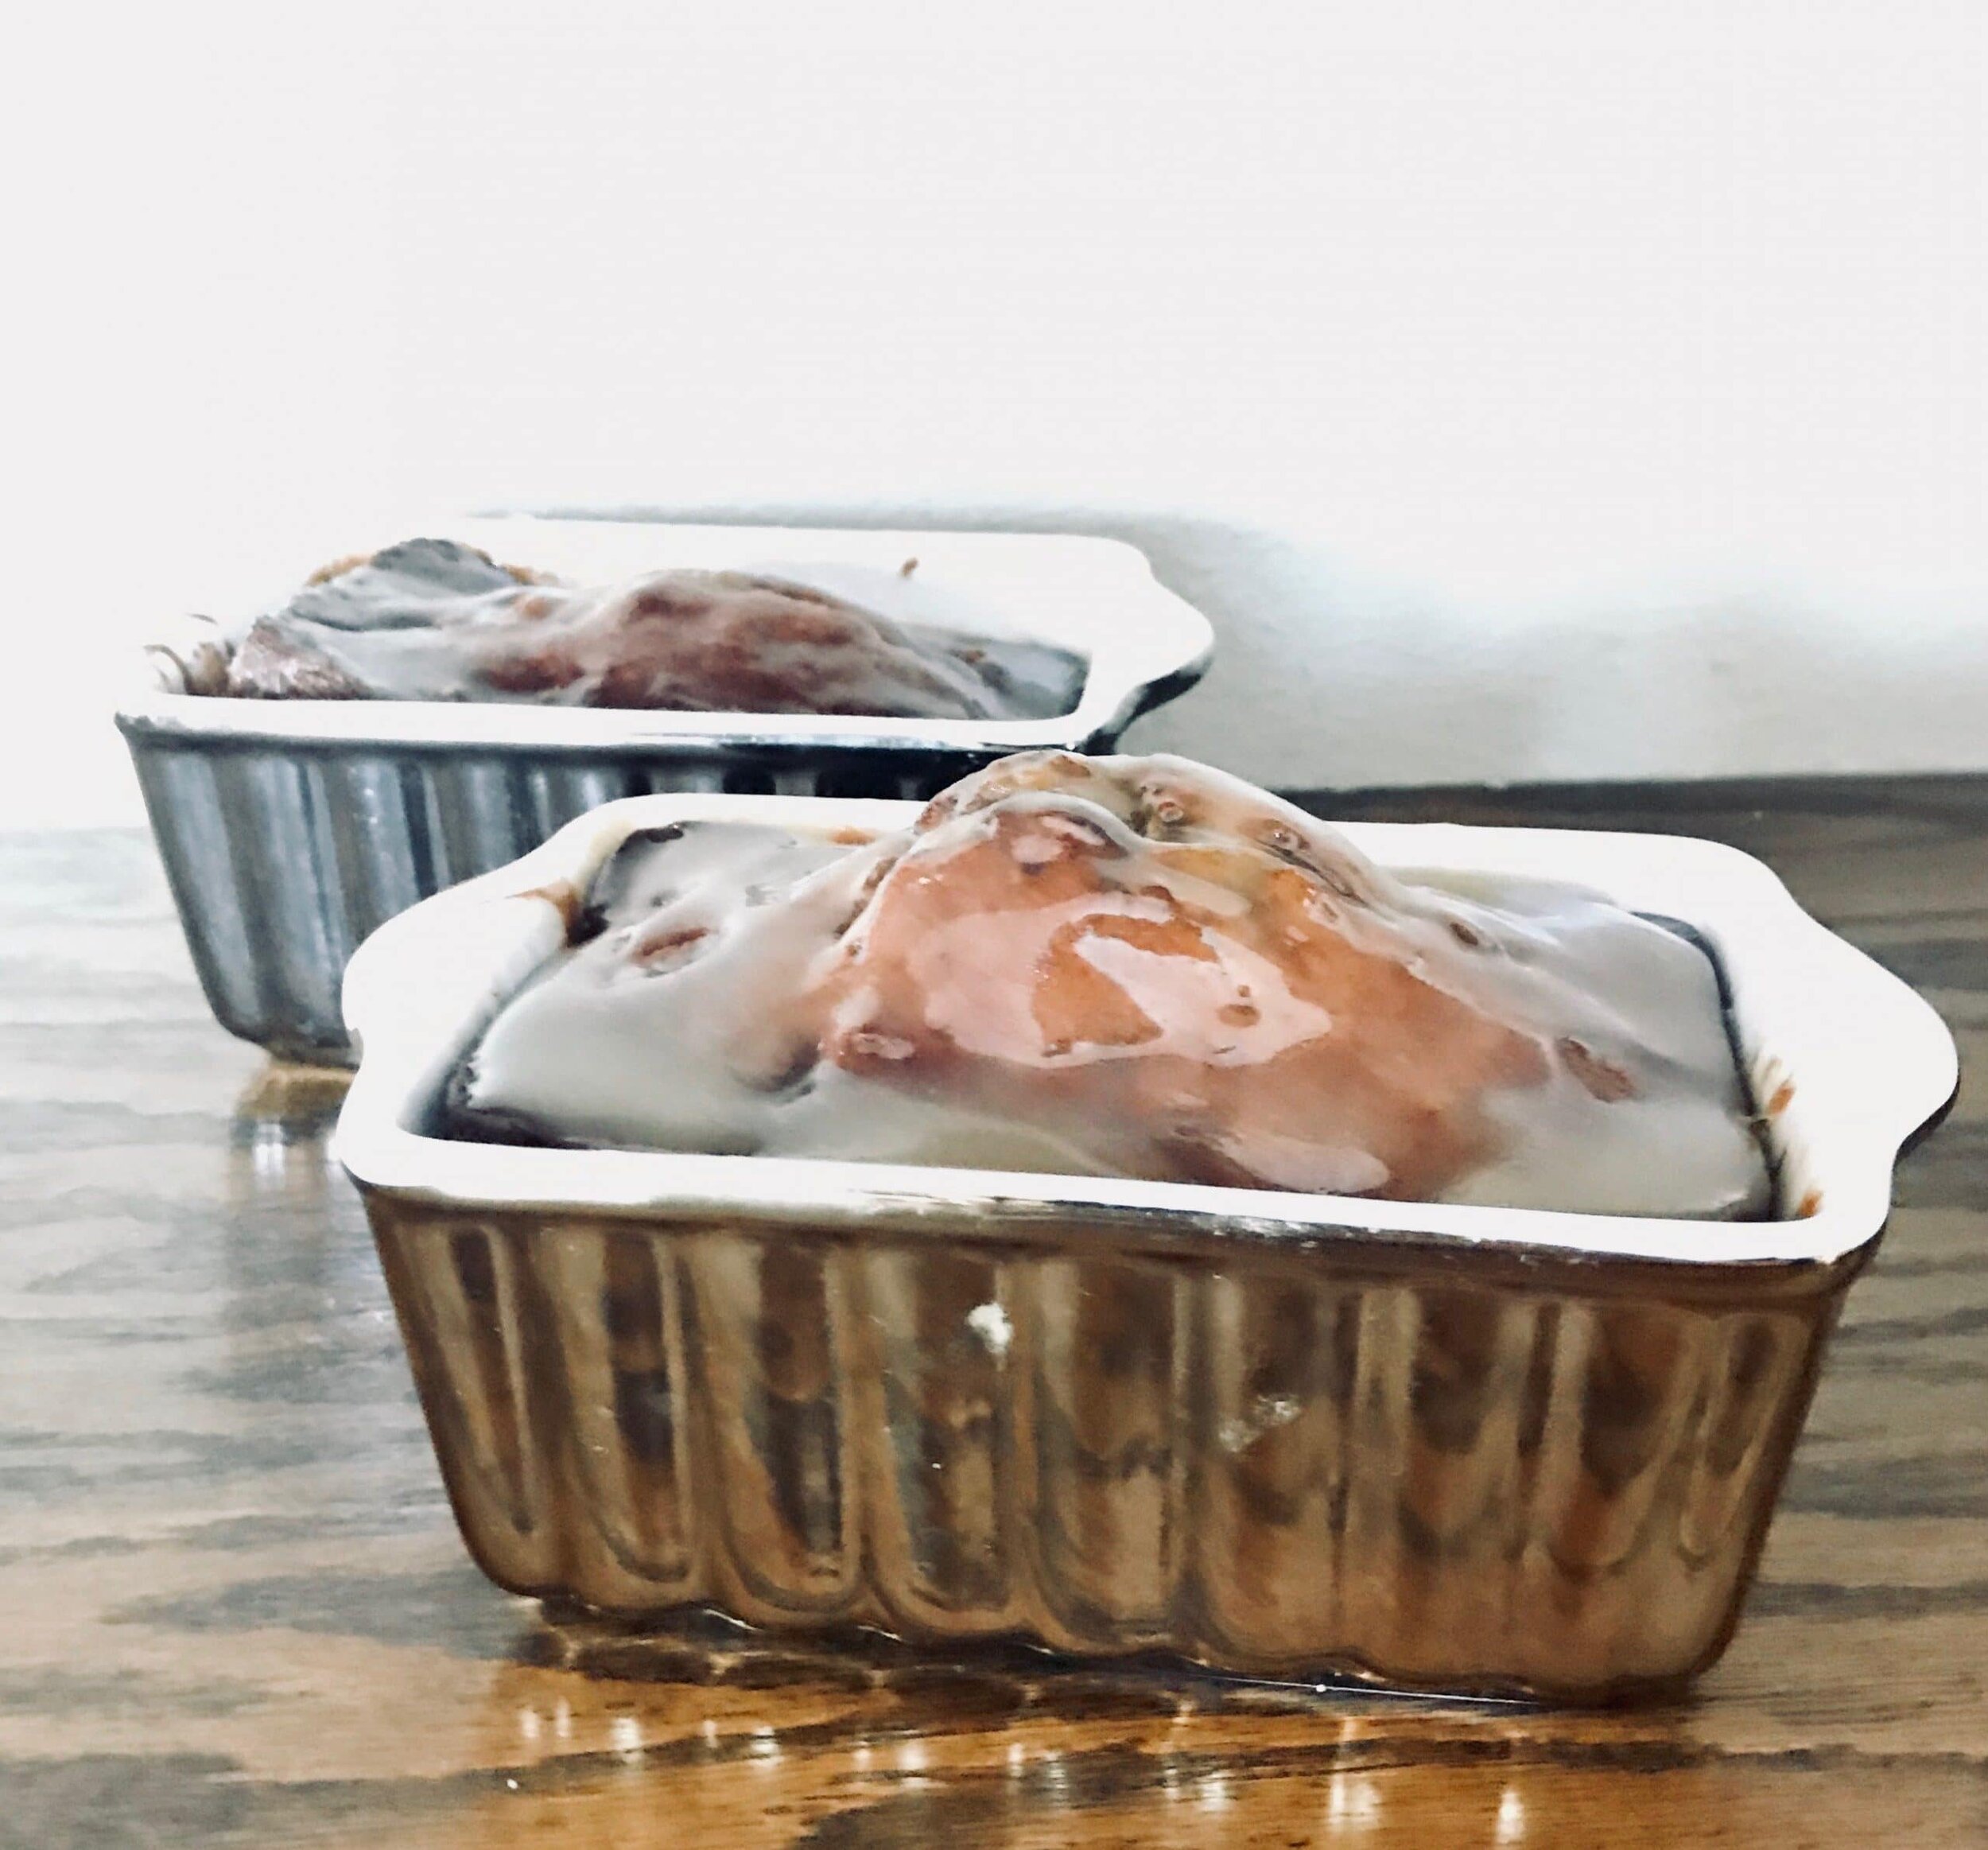
It's almost Christmas! That means lot's of shopping for gifts and Christmas baking too. I find it hard sometimes to come up with a gift idea for some people. You never have any idea on what to get them! Why not just bake them something? I mean it is a holiday where people are making a crap ton of cookies and other baked goods; and we all know that your family isn't going to actually eat all of them. So why not give some of it as a gift? Like these caramel pecan banana mini loaf cakes?
I was in Michael's one day, which is totally a bad thing because I will literally buy everything that I don't own or need. Especially since they always have really good coupons. ALL. THE. TIME! So I was browsing and walking along the baking aisles when I came across some super cute and very reasonably priced mini loaf pans. So I had to buy them and came up with these cute banana loaf cakes to use as cute little gifts!
Change it up!
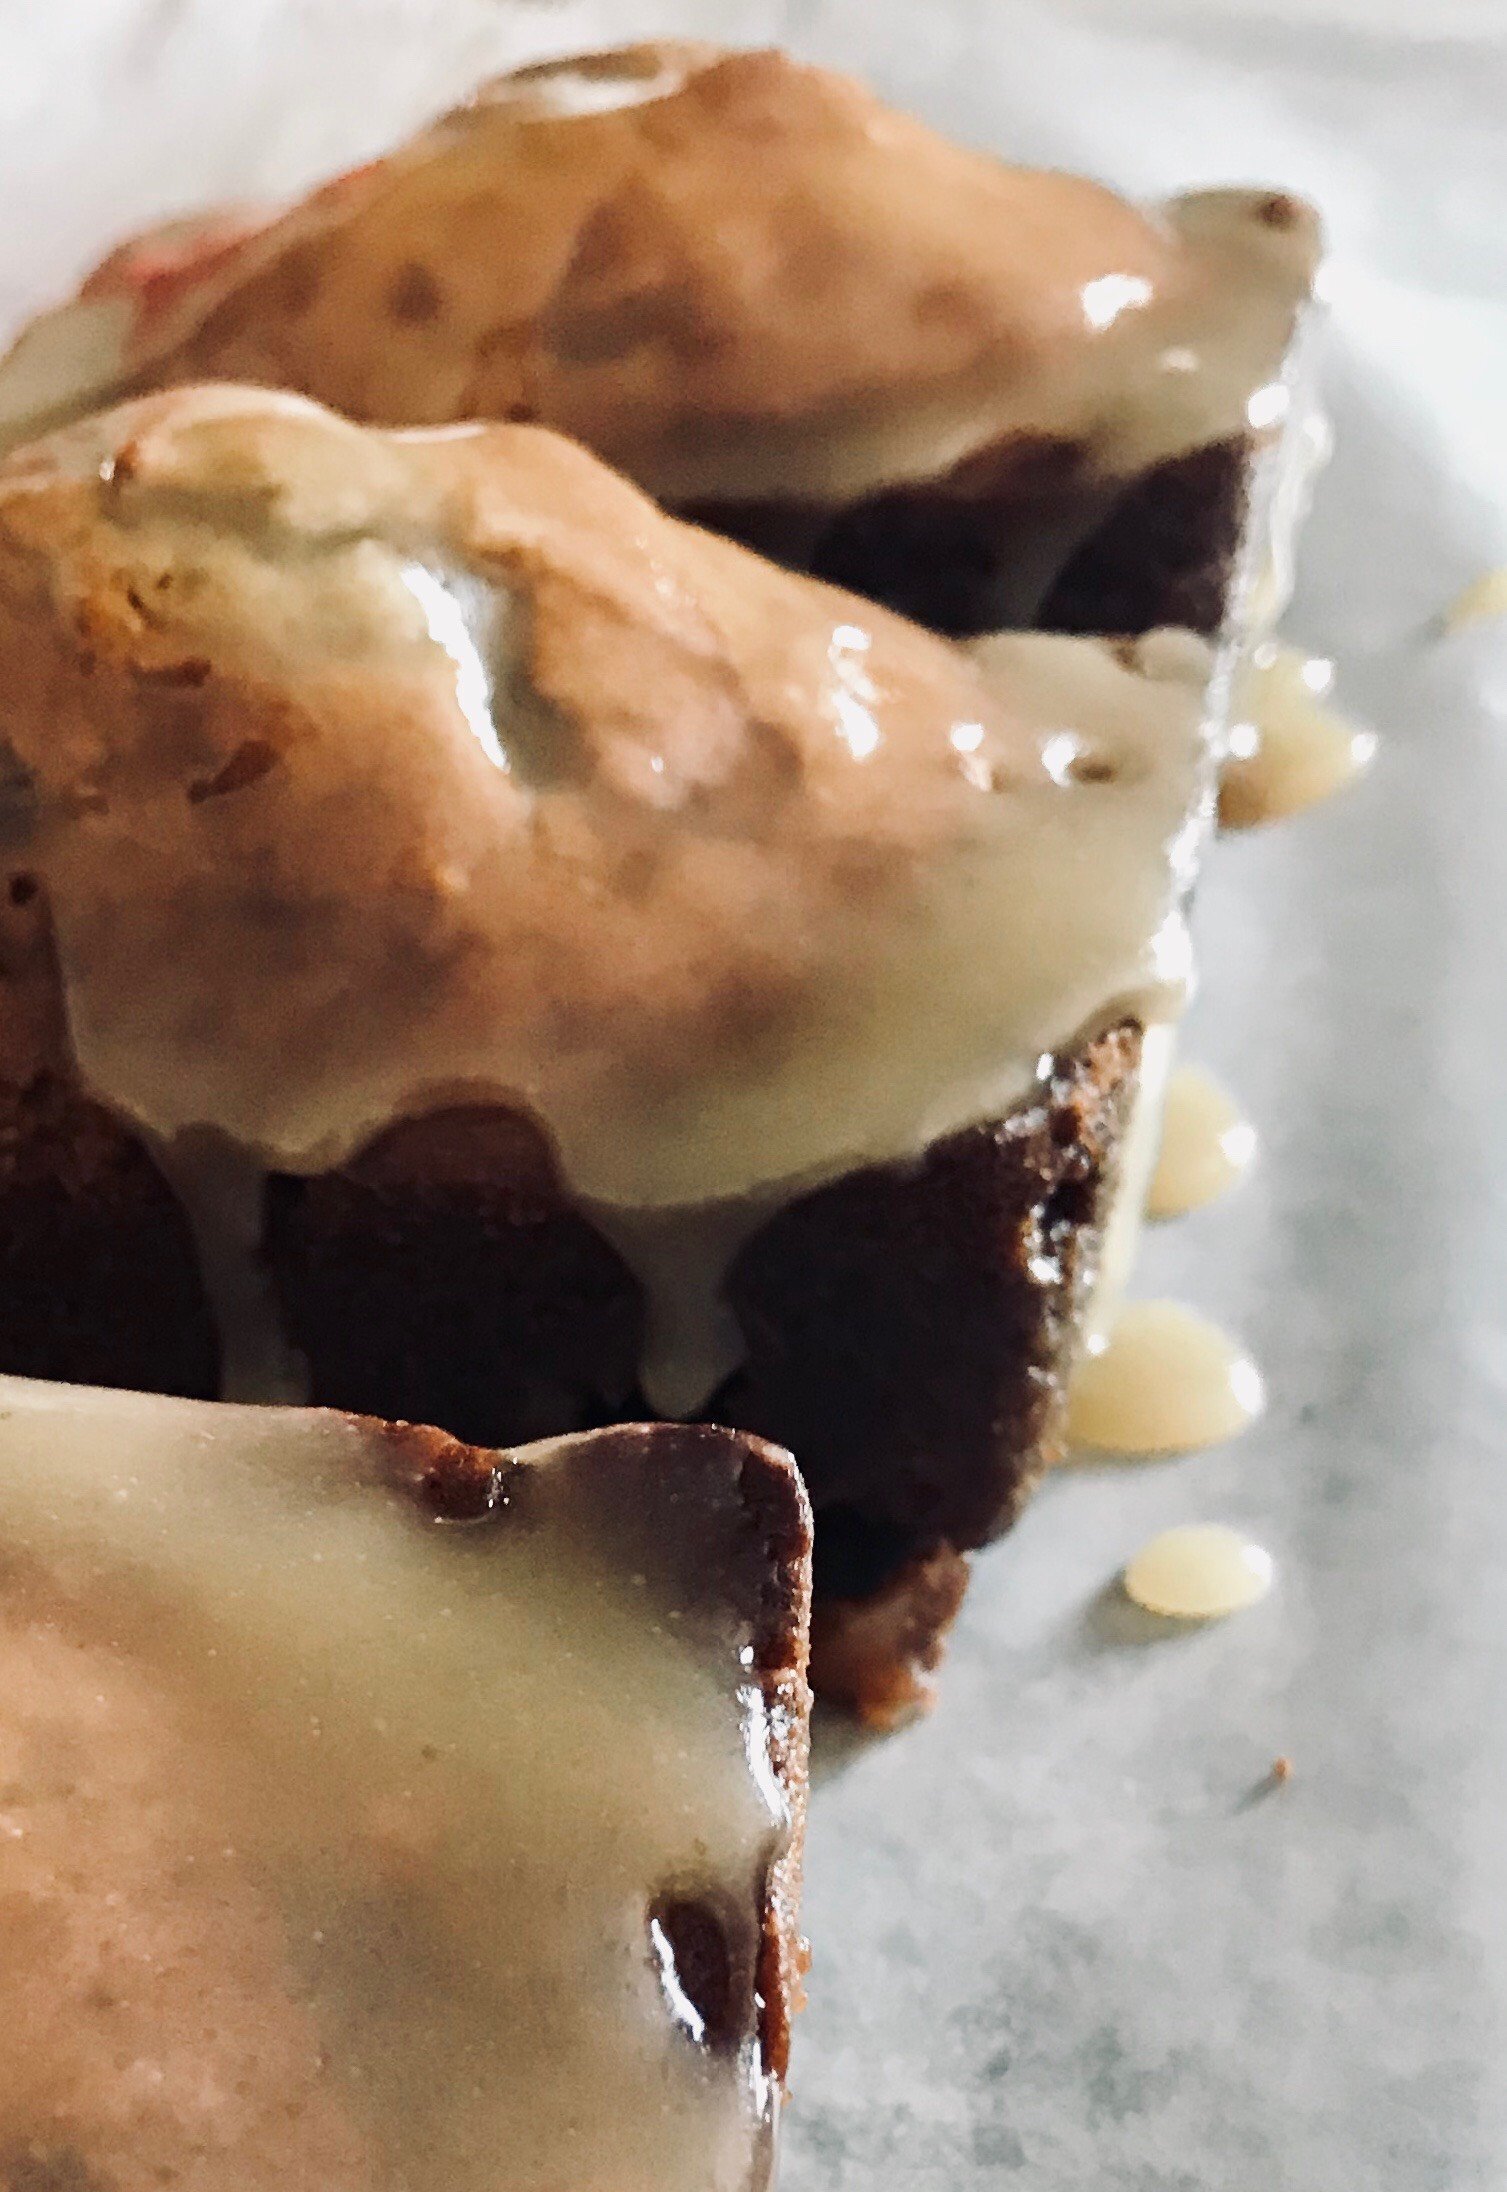
Instead of using pecans you could use walnuts or even almonds! It's also super easy to replace the spices and use your own spice mix instead too. For the glaze, whiskey is completely optional. You can completely omit the whiskey and keep it family friendly.
Other banana flavored treats!
Banana cupcakes with chocolate buttercream

________________________________________________________________________
banana pecan mini loaf cakes

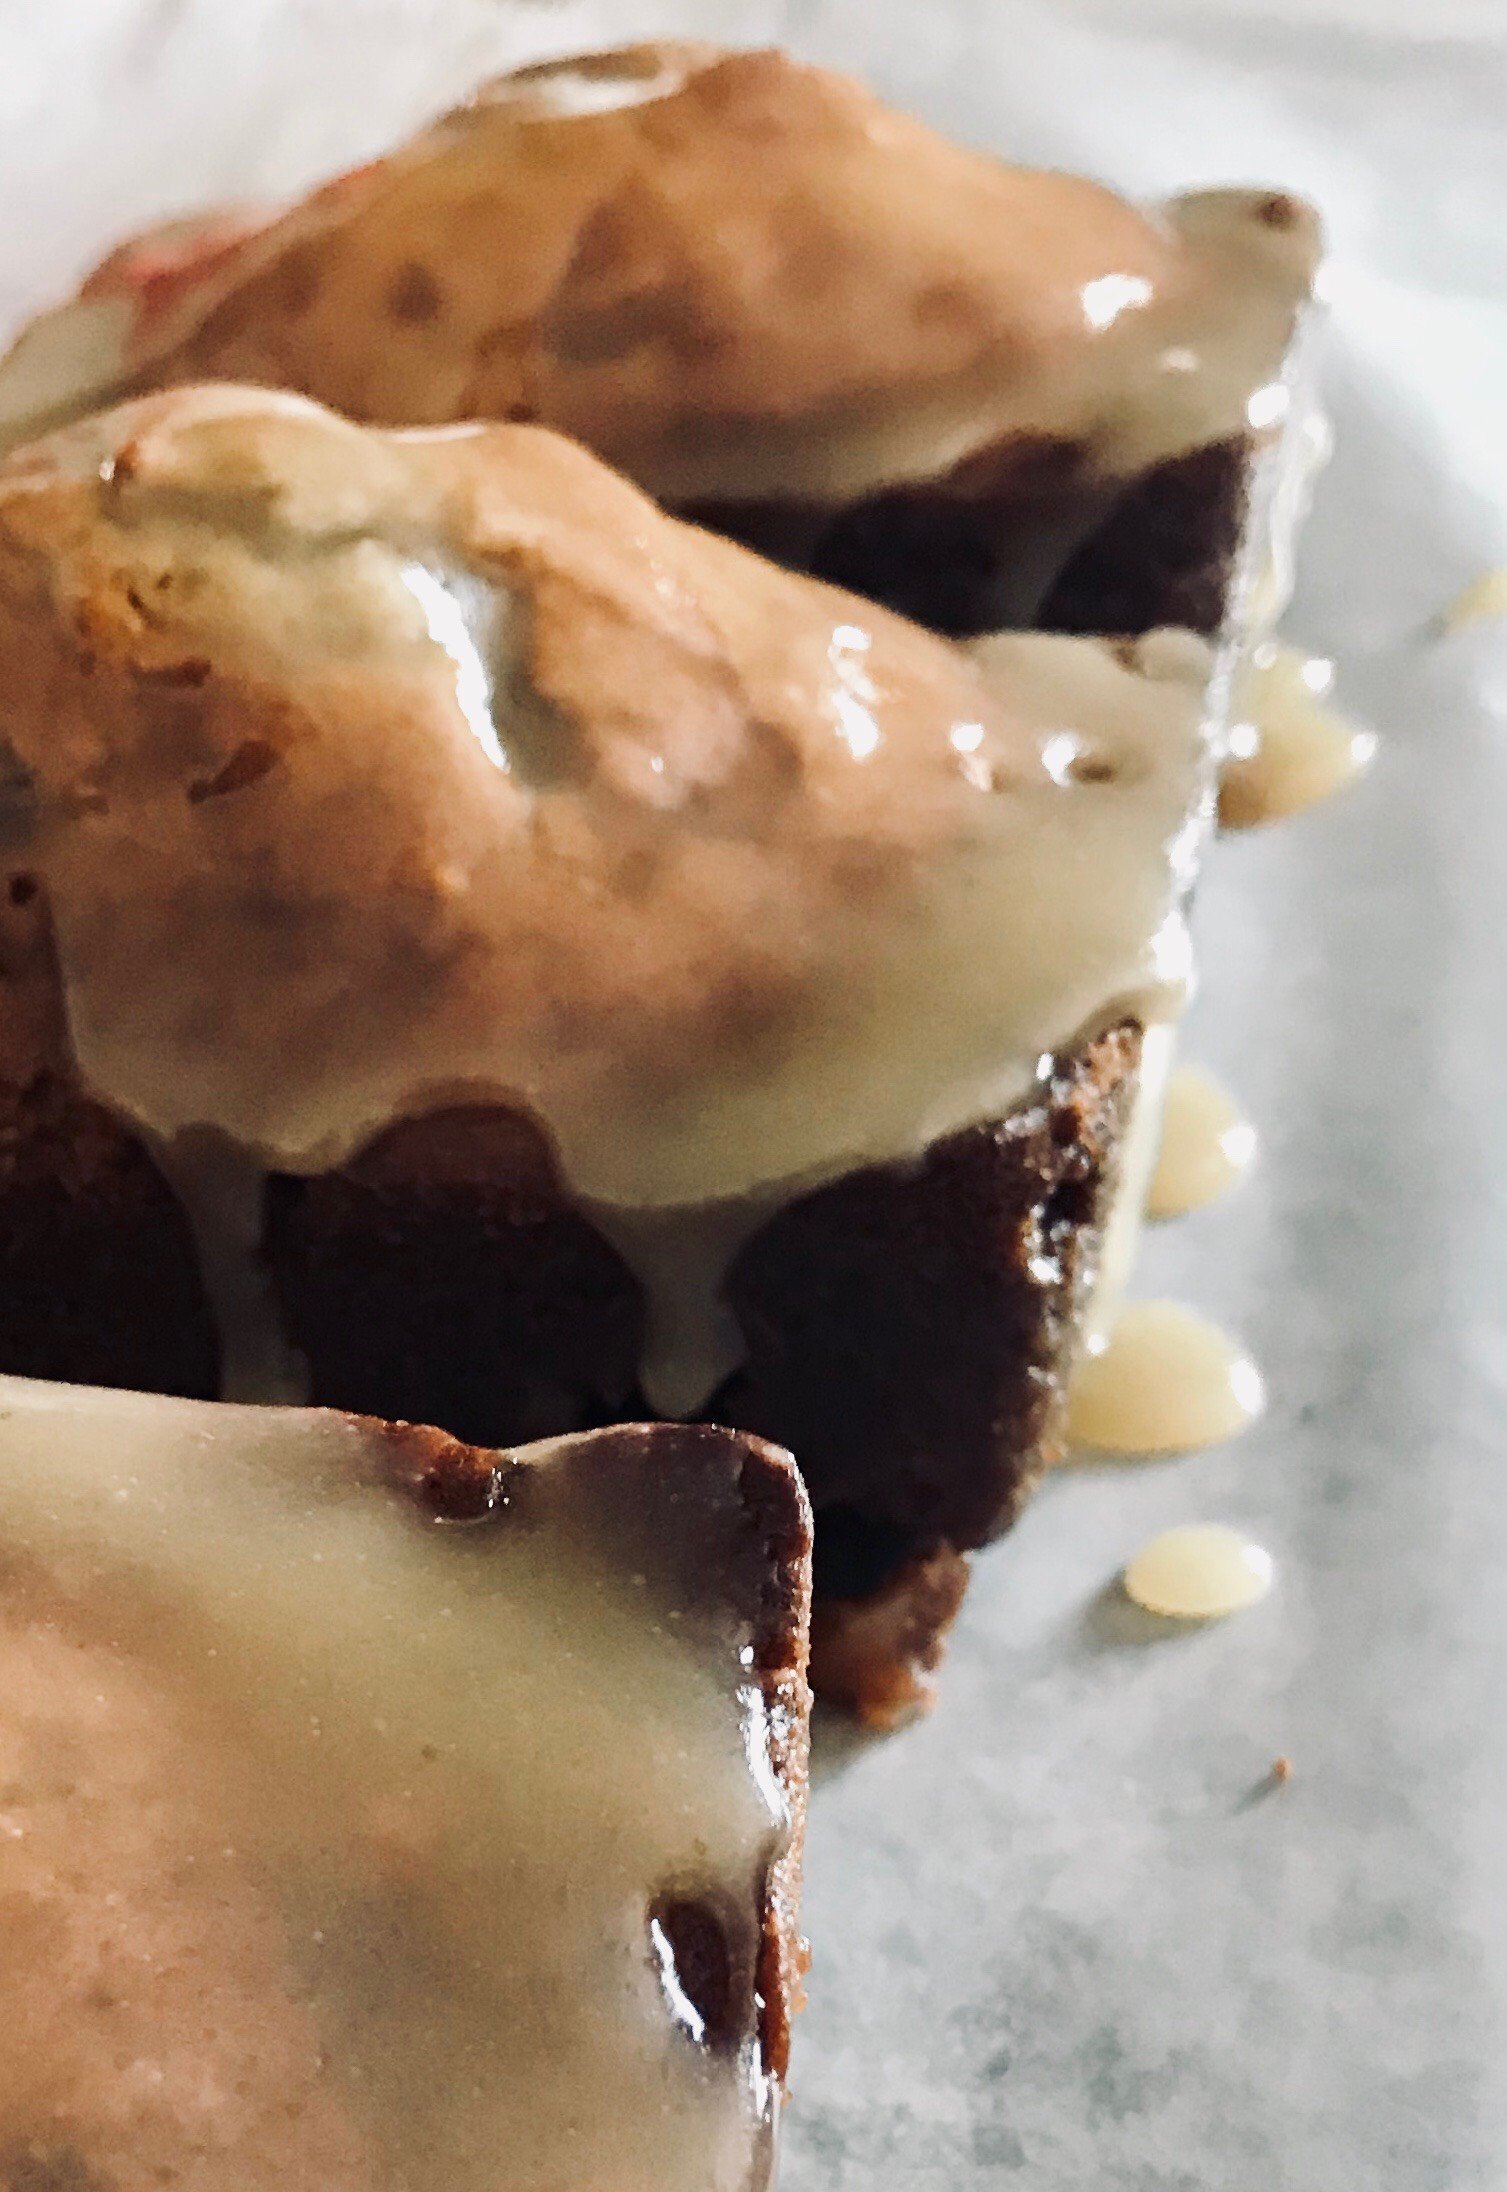
these mini loaf cakes are packed with flavor. spices, pecans, and a caramel whiskey glaze to top it off.
cake
- 2 ripe bananas (mashed)
- 3 eggs
- 1 tsp vanilla
- 1/2 cup vegetable oil
- 1/2 cup granulated sugar
- 1/4 cup brown sugar
- 2 cups all-purpose flour
- 1 tsp salt
- 2 tsp baking soda
- 1/2 tsp pumpkin spice
- 1/2 cup milk
- 1 cup chopped pecans
- 1/2 cup caramel pieces
- 1/2 cup coconut chips (optional)
whiskey glaze
- 1/4 cup evaporated milk
- 1 stick unsalted butter
- 3/4 cup granulated sugar
- 3/4 tsp vanilla extract
- 2 tbsp whiskey
cake
- preheat the oven to 350 degrees F. in a small bowl combine the mashed bananas, eggs, vanilla, oil, and milk and mix together. in a large bowl combine the sugar, brown sugar, flour, baking soda, salt, and pumpkin spice and whisk together. slowly add the wet ingredients to the dry whisking together until fully incorporated. fold in the pecans, caramel pieces, and coconut chips. divide evenly among the mini loaf pans and bake for about 30 minutes or until a toothpick comes out clean. let cool.
whiskey glaze
-
combine all of the ingredients in a small pot and place over medium high heat. bring to a boil, whisking once every minute or so until it starts to thicken. this takes about 10-15 minutes. once it thickens, take off of the heat and whisk. drizzle over the cakes while the glaze is still warm before it starts to harden and becomes unusable.
Brown Butter Coconut Carrot Cake
[wprm-recipe-jump]
*This post contains affiliate links. Please read disclosure to learn more.
It's already started to snow. To me it's too early for snow and I'm not ready to wear more layers to go outside or to be careful where to step so I don't fall. If only it would hold off for a few more weeks, as it doesn't stop snowing until at least March. My plan is to just stay inside all winter in my bed where it's warm. You can't go wrong with being cozy! And you most certainly can't go wrong with eating this brown butter coconut carrot cake either!
I decided that a good carrot cake would be just the right thing to make after Halloween. I mean it has veggies in it. It's like that healthy kick after eating all of that candy you stole from your kids while they were sleeping.
Make it extra
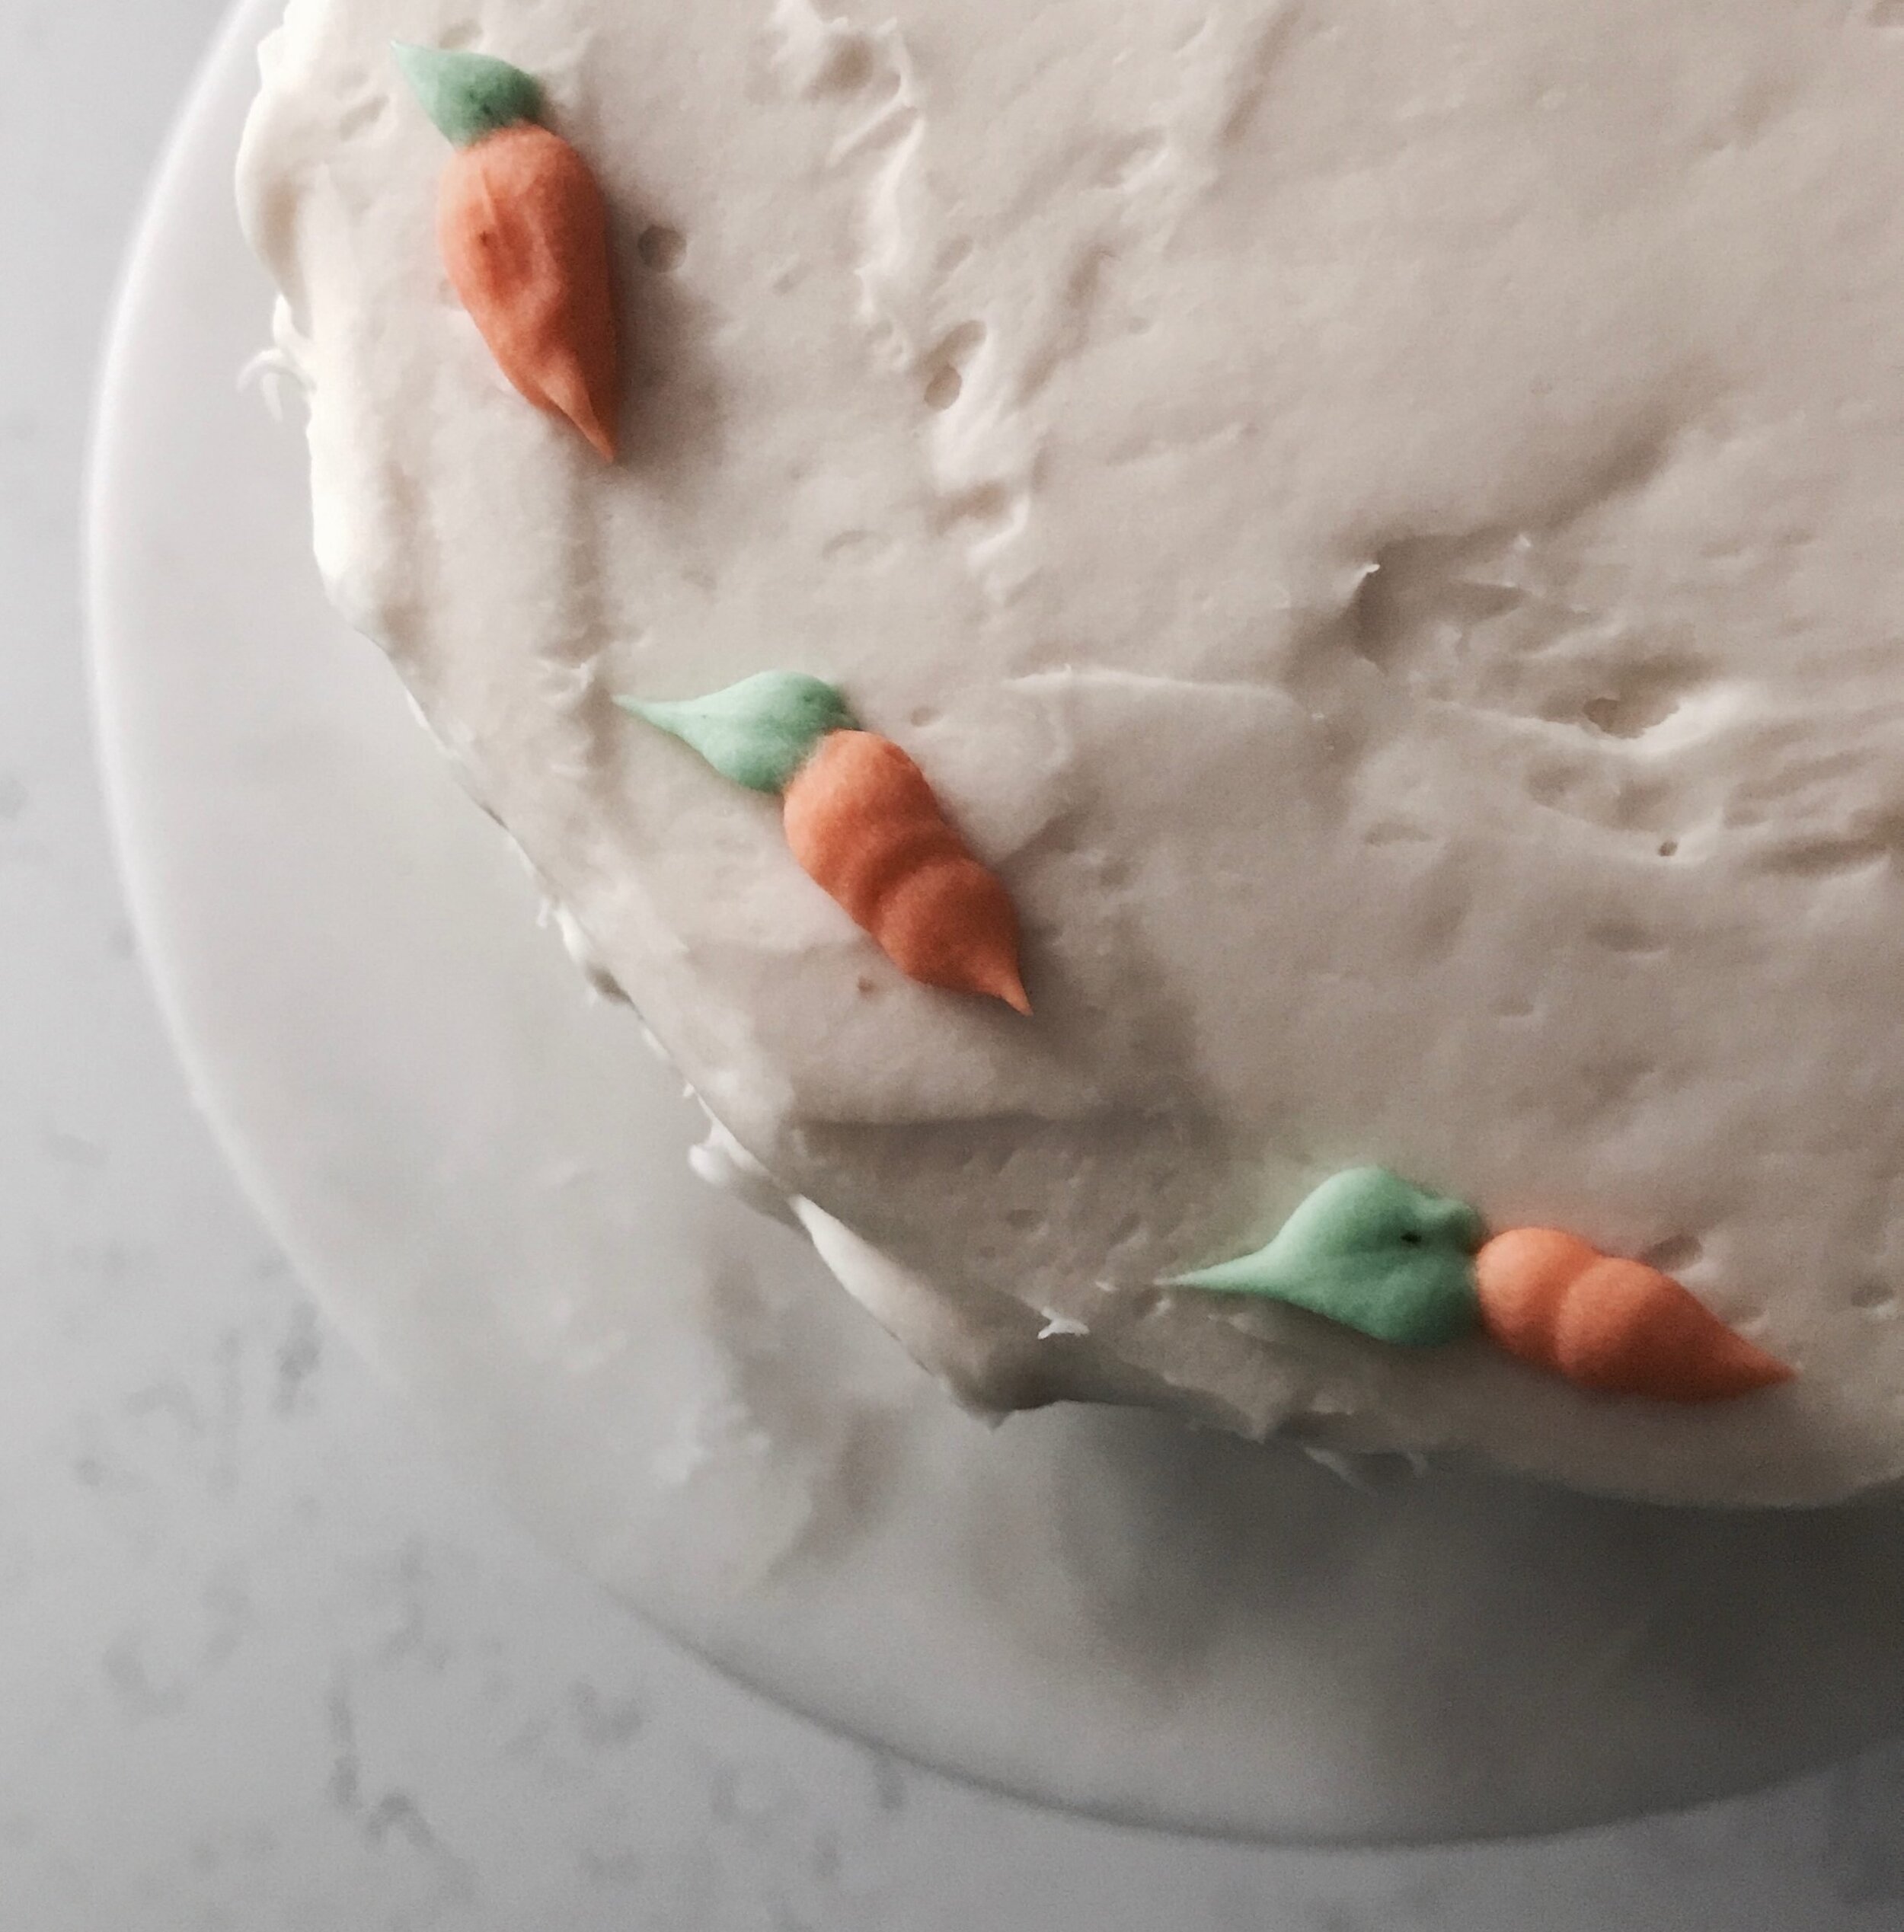
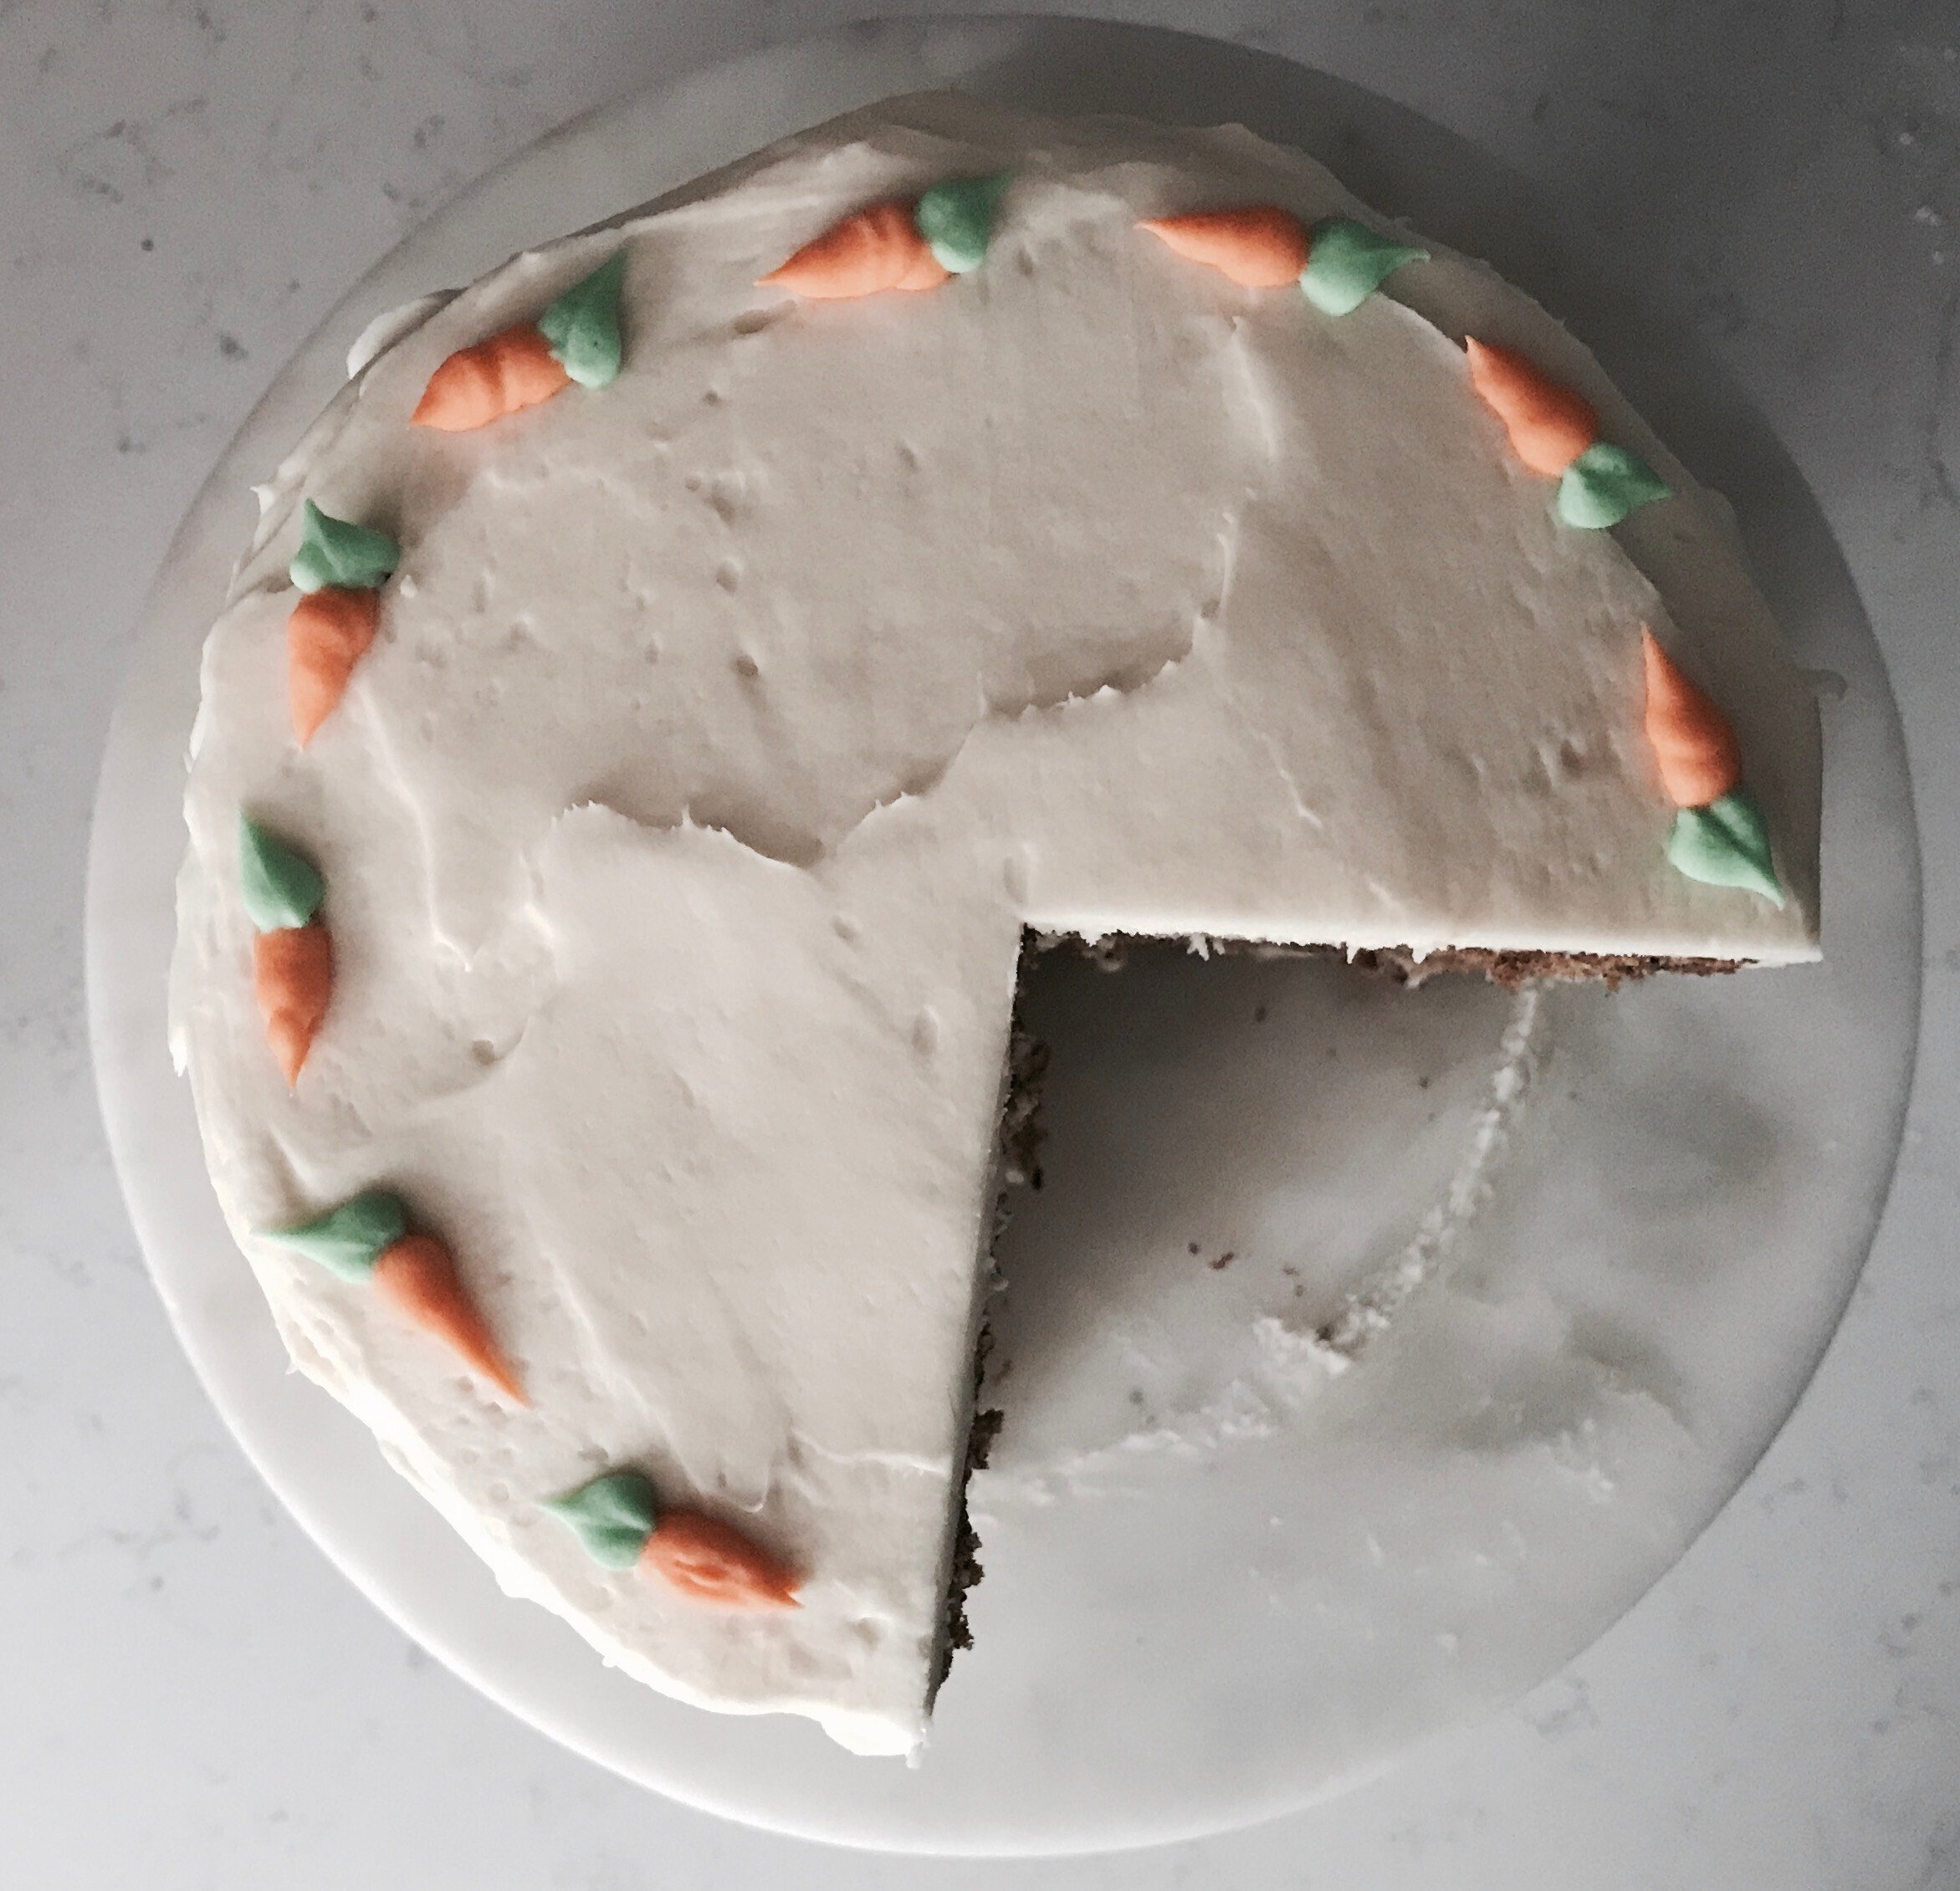
This brown butter carrot cake has an added depth of flavor to it that makes it go to the next level. Brown butter. You really cannot go wrong with adding some brown butter into baked goods. Then you throw in the spices, carrots, coconut, some nuts and you know it's going to be even better. A carrot cake is such a simple cake, and since the flavors are so prominent in this cake the decoration can be really incredibly simple. So I stuck to just frosting it rustically and then adding a cute little carrot wreath on the top. Sometimes simple is better and you can't go wrong with that.


Products I recommend
Above are some products that I personally use and recommend for this recipe and to have for everyday use. My absolute favorite is the BlueQ oven mitts. I have a collection of them and I love them! They are great quality and it’s nice to have a kitchen item with a sense of humor.
_______________________________________________________________________
brown butter carrot cake
this carrot cake is full of flavor from the brown butter to the coconut. a fall favorite with a little twist
cake
- 2 sticks butter (browned)
- 3/4 cup brown sugar
- 1/2 cup granulated sugar
- 4 eggs
- 1 tbsp vanilla extract
- 1 cup shredded carrots
- 1/2 cup shredded coconut
- 4 oz chopped walnuts
- 2 tsp cinnamon
- 1 tsp nutmeg
- 2 cups all-purpose flour
- 1 1/2 tsp baking soda and baking powder
- 1 tsp salt
- 3/4 cup milk
buttercream
- 1 8 oz package cream cheese
- 3 sticks butter
- 5 cup powdered sugar
- 1 tsp vanilla extract
- 2-3 tbsp heavy cream
cake
- place the butter into a small saucepan and place over medium-high heat. let the butter simmer until it starts to turn a dark brown and has a nutty aroma to it. (if you would like a detailed tutorial on browning butter, go here)
- preheat the oven to 375 degrees F and prep three 6-inch cake pans. in the bowl of an electric mixer fitted with a paddle attachment, cream the butter and both sugars for about a minute. scrape down the sides of the bowl and add in the eggs and vanilla. add in the shredded carrots, coconut, and walnuts and mix until combined. in another bowl, combine the flour, cinnamon, nutmeg, baking soda and powder, and salt. gradually add the dry into the wet. add in the milk and mix until incorporated. divide the batter among the cake pans and bake for 30-35 minutes or until a toothpick comes out clean. let the cakes cool 10 minutes and then carefully remove from the pans. continue cooling and then wrap in cling wrap until ready to use.
buttercream
- place the butter and cream cheese into a bowl of an electric mixer fitted with a paddle attachment. mix until smooth. scrape down the sides of the bowl and add in the rest of the ingredients. mix on slow speed and gradually increase the speed. let mix until fluffy and lighter in color, about 3 minutes.
Bloody Brain Cake Tutorial

*This post contains affiliate links. Please read disclosure to learn more
It is officially almost Halloween! Ugh, I can't wait! This bloody brain cake tutorial is super fun and perfect for Halloween with a very fun surprise when you cut into it. It will both please and gross out anyone and everyone and although it takes some time to make, it is easy to do. Maybe a little messy as well. but isn't that what Halloween is about? To have some fun and do some tricks if you don't get any treats?
And there you have a lovely gory, bloody brain cake tutorial. Perfect for Halloween or even just because!
Have fun with it!
Let's be honest. Making a cake is no feat but the edible blood is super easy to make and fool proof. If you aren't one for carving cakes than make some cupcakes instead and fill it with edible blood. Use it as a filling in a cake and make it ooze out for a vampire theme party.
Change it up!
The edible blood calls for strawberries to give it a better flavor. But if you would rather use a different fruit than by all means, give it a try! I suggest cherries or raspberries. But be careful since the ratios may be different as well as the water content in the fruit. The water content can make the edible blood more runny and not as thick as the original recipe.


Products I recommend
Above are some products that I personally use and recommend for this recipe and to have for everyday use. My absolute favorite is the BlueQ oven mitts. I have a collection of them and I love them! They are great quality and it’s nice to have a kitchen item with a sense of humor.


bloody brain cake

tutorial on making this gory brain cake covered in edible blood
- 4 layers red velvet cake
- 1 batch buttercream
- 1 batch edible blood
- 1 bag white candy melts
- The very first step is to make the cake! And you can make any kind of cake you want, but the requested, and I highly suggest, was red velvet. The red velvet adds the "bloody" aspect to the cake. I used this recipe from Hummingbird High and I doubled the recipe. I used a large, square cake pan for this cake, and made 6 layers but only ended up using 5 of the layers and put the extra in the freezer for something else.
- Once the cake is baked and ready to go, fill and stack the cakes with a plain vanilla frosting. I also did a crumb coat then placed the cake in the fridge for about 30 minutes until the cake is cold to make it easier to carve.
- Carving the cake was interesting. I was trying to figure out how to make the shape of a brain and concluded to base is off the shape of a football. I carved the cake on the diagonal of the square shape and rounded it until I was happy with the look.
- Using a paring knife, I carved out a decent sized round at the top of the cake. Carefully remove the piece that you carved and set it on a piece of wax paper or a plate.
- Melt white candy melts and using a small off-set spatula, carefully coat the inside of the cake that was carved out to create a shell. Once the candy has set, do a second coat. The piece of cake that was removed, carefully remove a layer or two of the cake and do a coat of the candy melts on there as well.
- Now the fun part is making the surprise that goes into the part that you just carved out in the cake! Blood! Now this is an edible blood and it's quite an interesting mixture of ingredients that actually worked out really well to make this blood (recipe at end of post).Fill the cake with as much blood as you can or want and once you have it filled, but make sure to leave a little bit leftover, take the piece of cake that you took out and coated with the candy melts and carefully insert back into the cake. I melted more candy melts and did a little coating along the edges of the re-inserted cake piece to prevent some blood back splash.
- Once the chocolate has hardened to a quick crumb coat on the whole cake, make an indentation line across the center of the cake and then put into the fridge to let harden and set.
- With a piping bag fitted with a large, round tip and filled with a nude/peach colored frosting, start piping zigzag like designs on one half of the cake and then continue onto the other half. The center line is there to help create that brain look and keep the piping in line.
- With the leftover blood that you have, use a spoon and drop the blood onto the cake to give it the bloody look.
Edible Blood

edible blood flavored with strawberries and cocoa
- 1/2 cup light corn syrup
- 1 1/2 tbsp cocoa powder
- 2 1/2 tbsp cornstarch
- 3 small strawberries
- 1 tbsp milk
- Red food coloring
- Blend the strawberries and milk into a food processor or blender.
- In a bowl, combine the light corn syrup, cocoa powder, cornstarch, and strawberry mixture. Once combined add in the red food coloring until just the right coloring of blood.
NOTE: i suggest using a hot knife to cut into this cake. the chocolate can be hard to cut through so a hot knife will help. just boil some water, stick the knife in and wipe with a towel.
Pumpkin Spice Cut Out Cookies
[wprm-recipe-jump]
*This post contains affiliate links. Please read disclosure to learn more.
October is my favorite month of the year, partly because of all the scary movies that are on. I love a good horror movie, from the classics to the supernatural and all of the slasher gore. It's especially fun when you go on Netflix to see what kind of scary movies that you've never even heard of is available to watch.
Pumpkin spice is also a fall thing. You always start to hear about pumpkin spice lattes and other weird pumpkin flavored thing. So I figured I'd try making some fun cutout cookies in the pumpkin spice fashion. These cookies feature pumpkin puree and the various amount of spices like cinnamon and cloves. Now I love a pumpkin and chocolate combination as well, so I did a chocolate royal icing to go with these.
Change it up!
These pumpkin spice cookies are soft and chewy and perfect for decorating with royal icing. But if you aren't into the whole royal icing game, than I'd try just going all Lofthouse sugar cookie on these guys. Make them round and thick and add either some cream cheese buttercream or even better, chocolate ganache on top with lots of sprinkles!
Learn everything there is to know about edible printing!
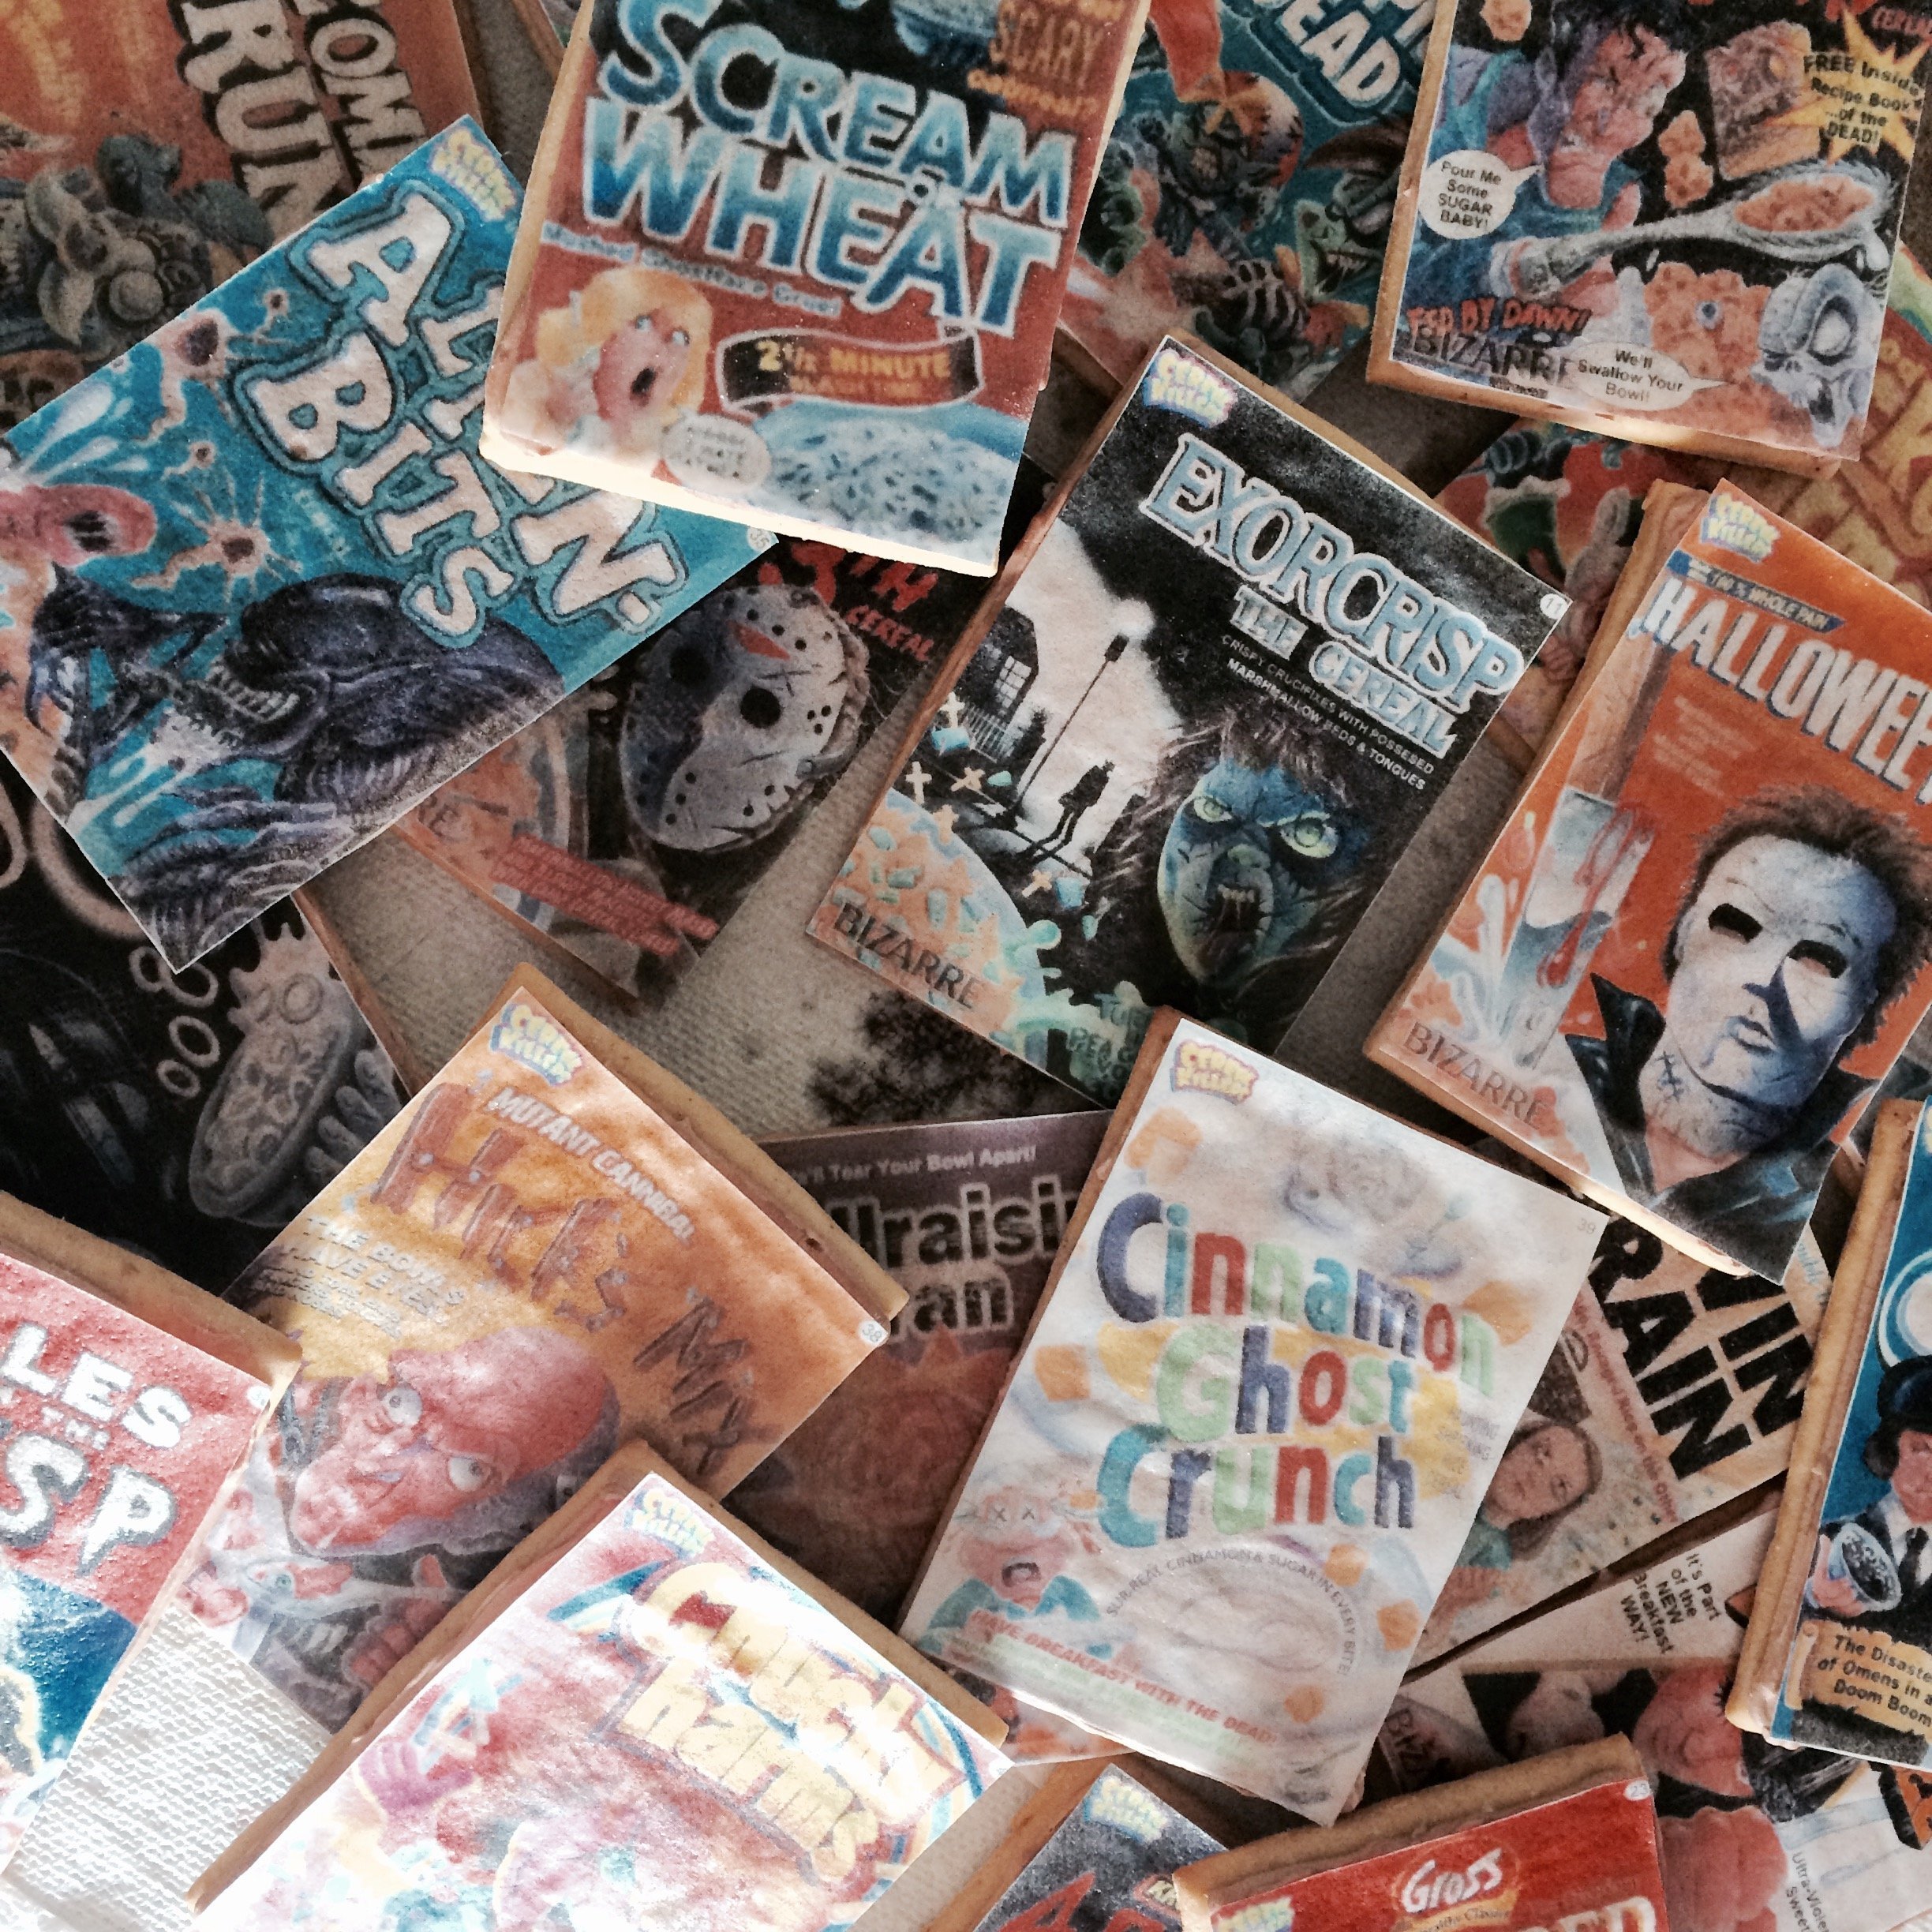
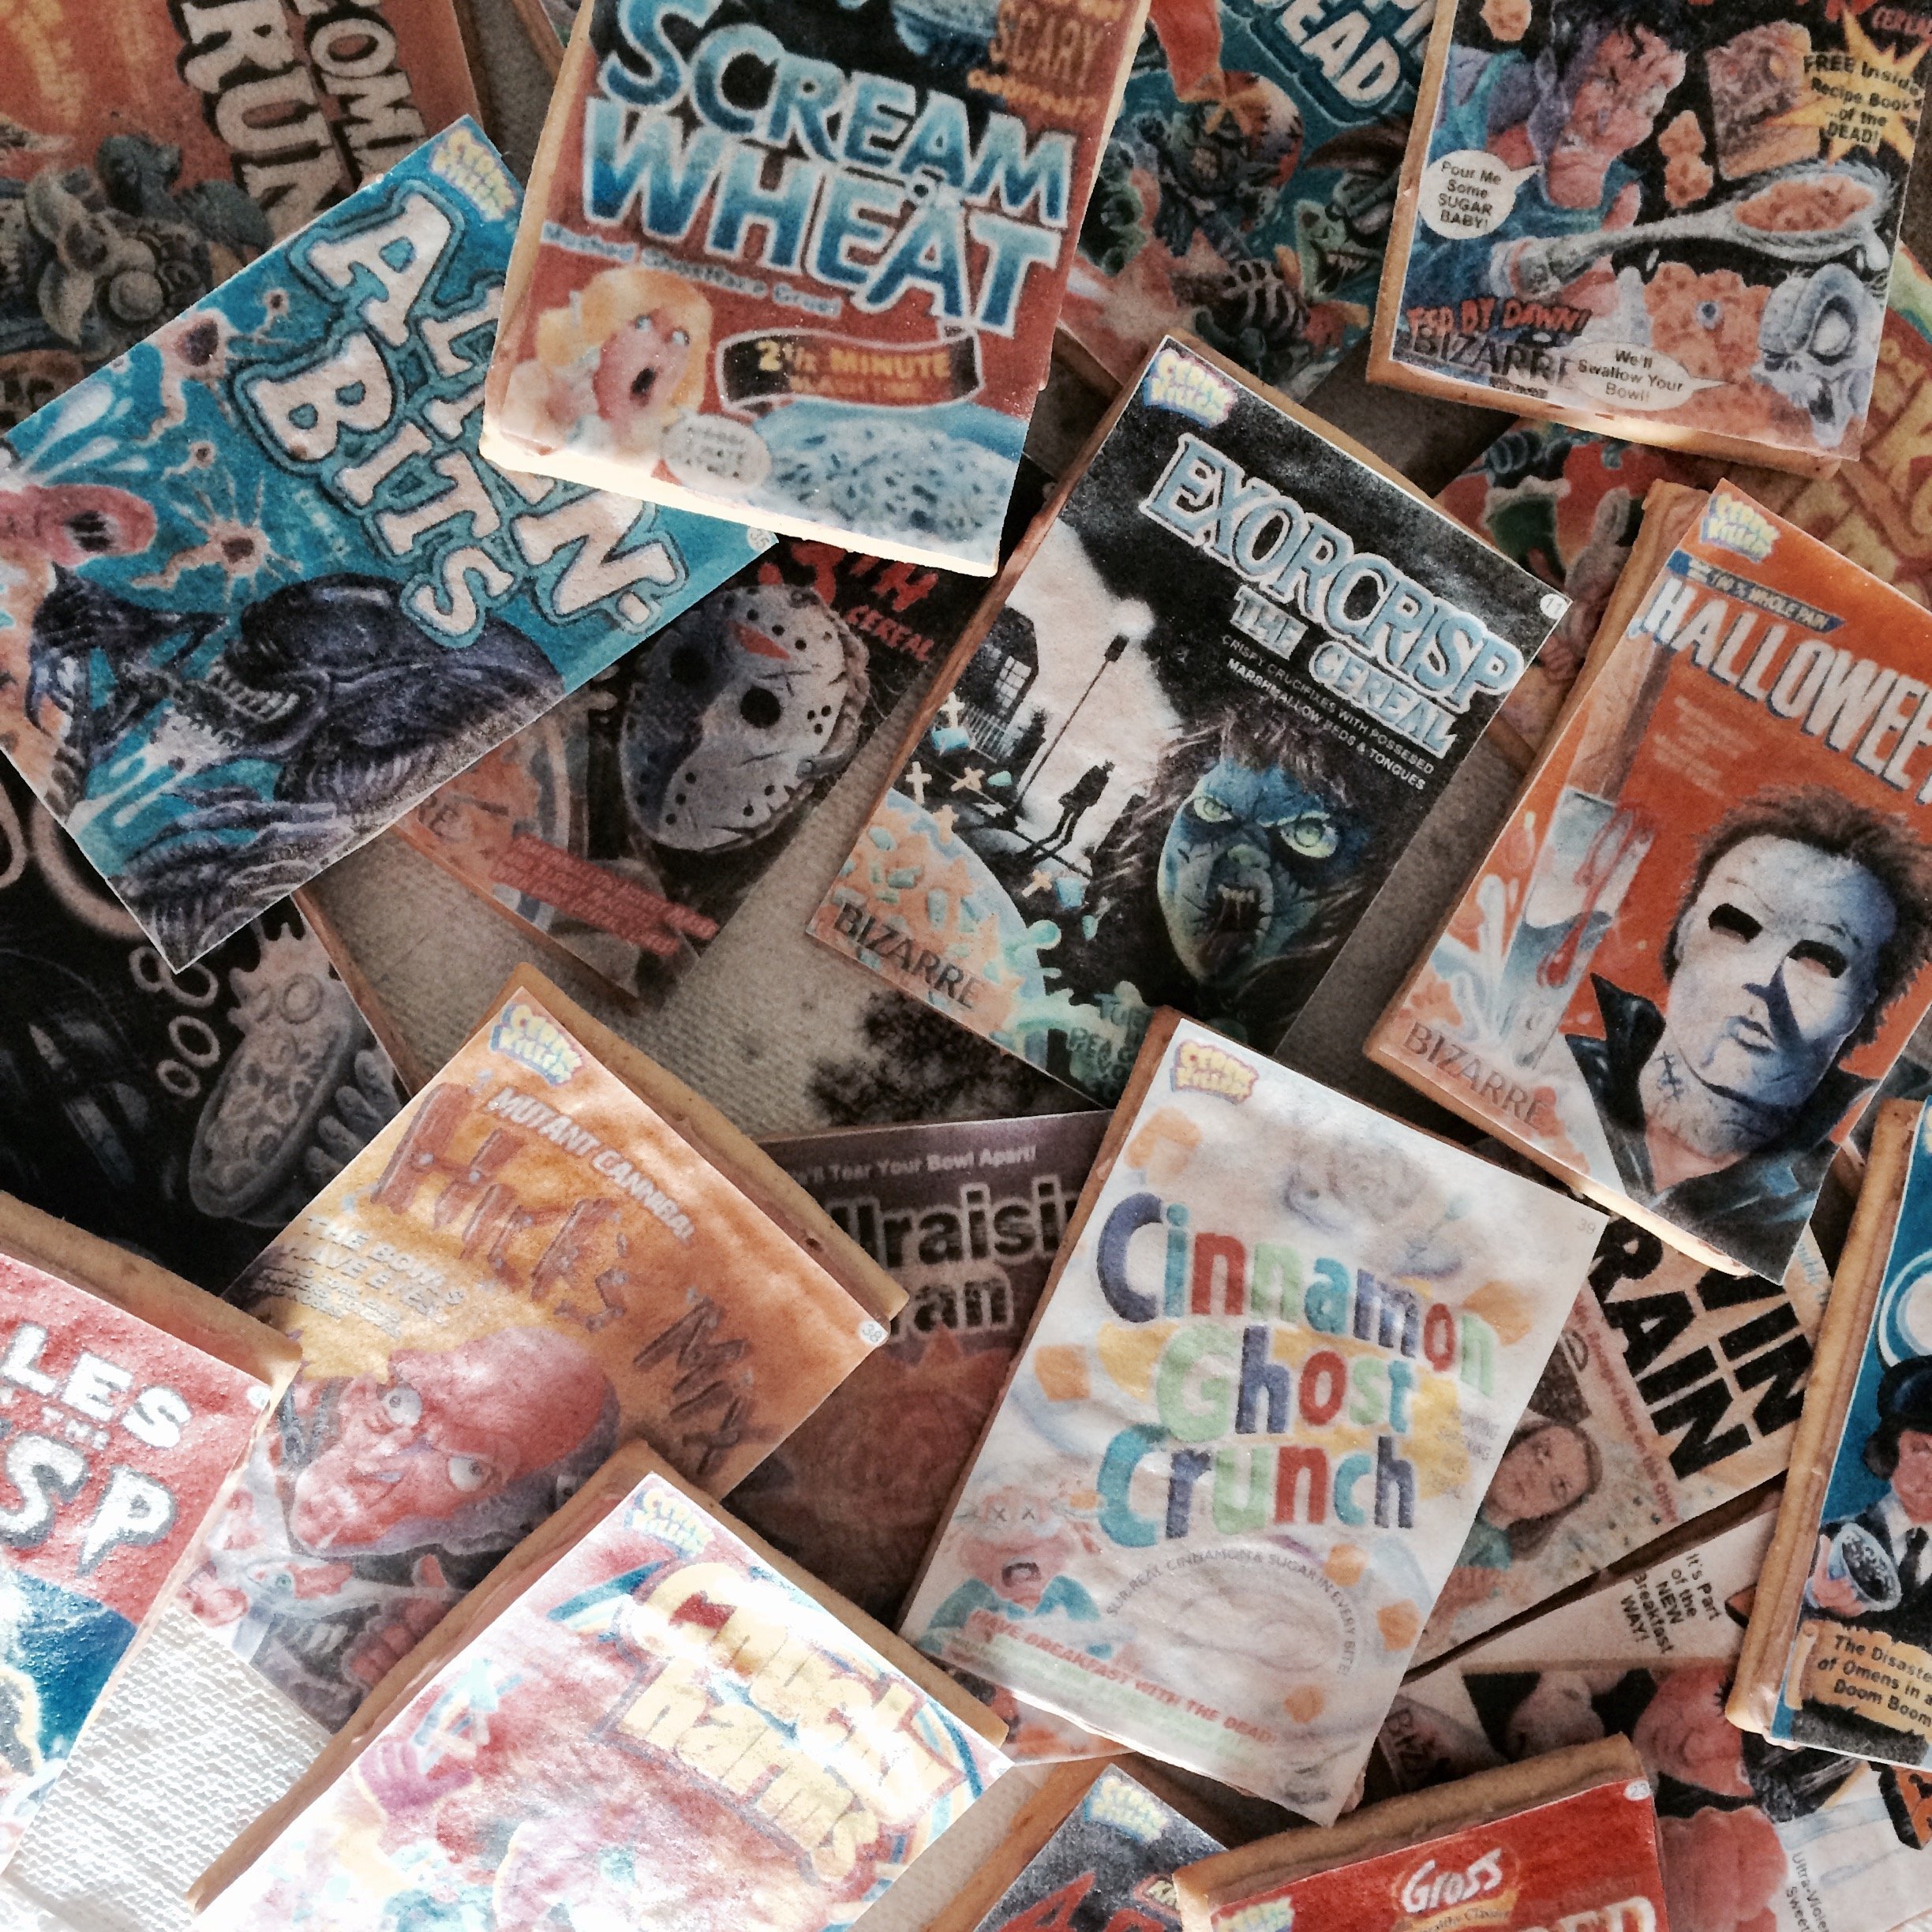
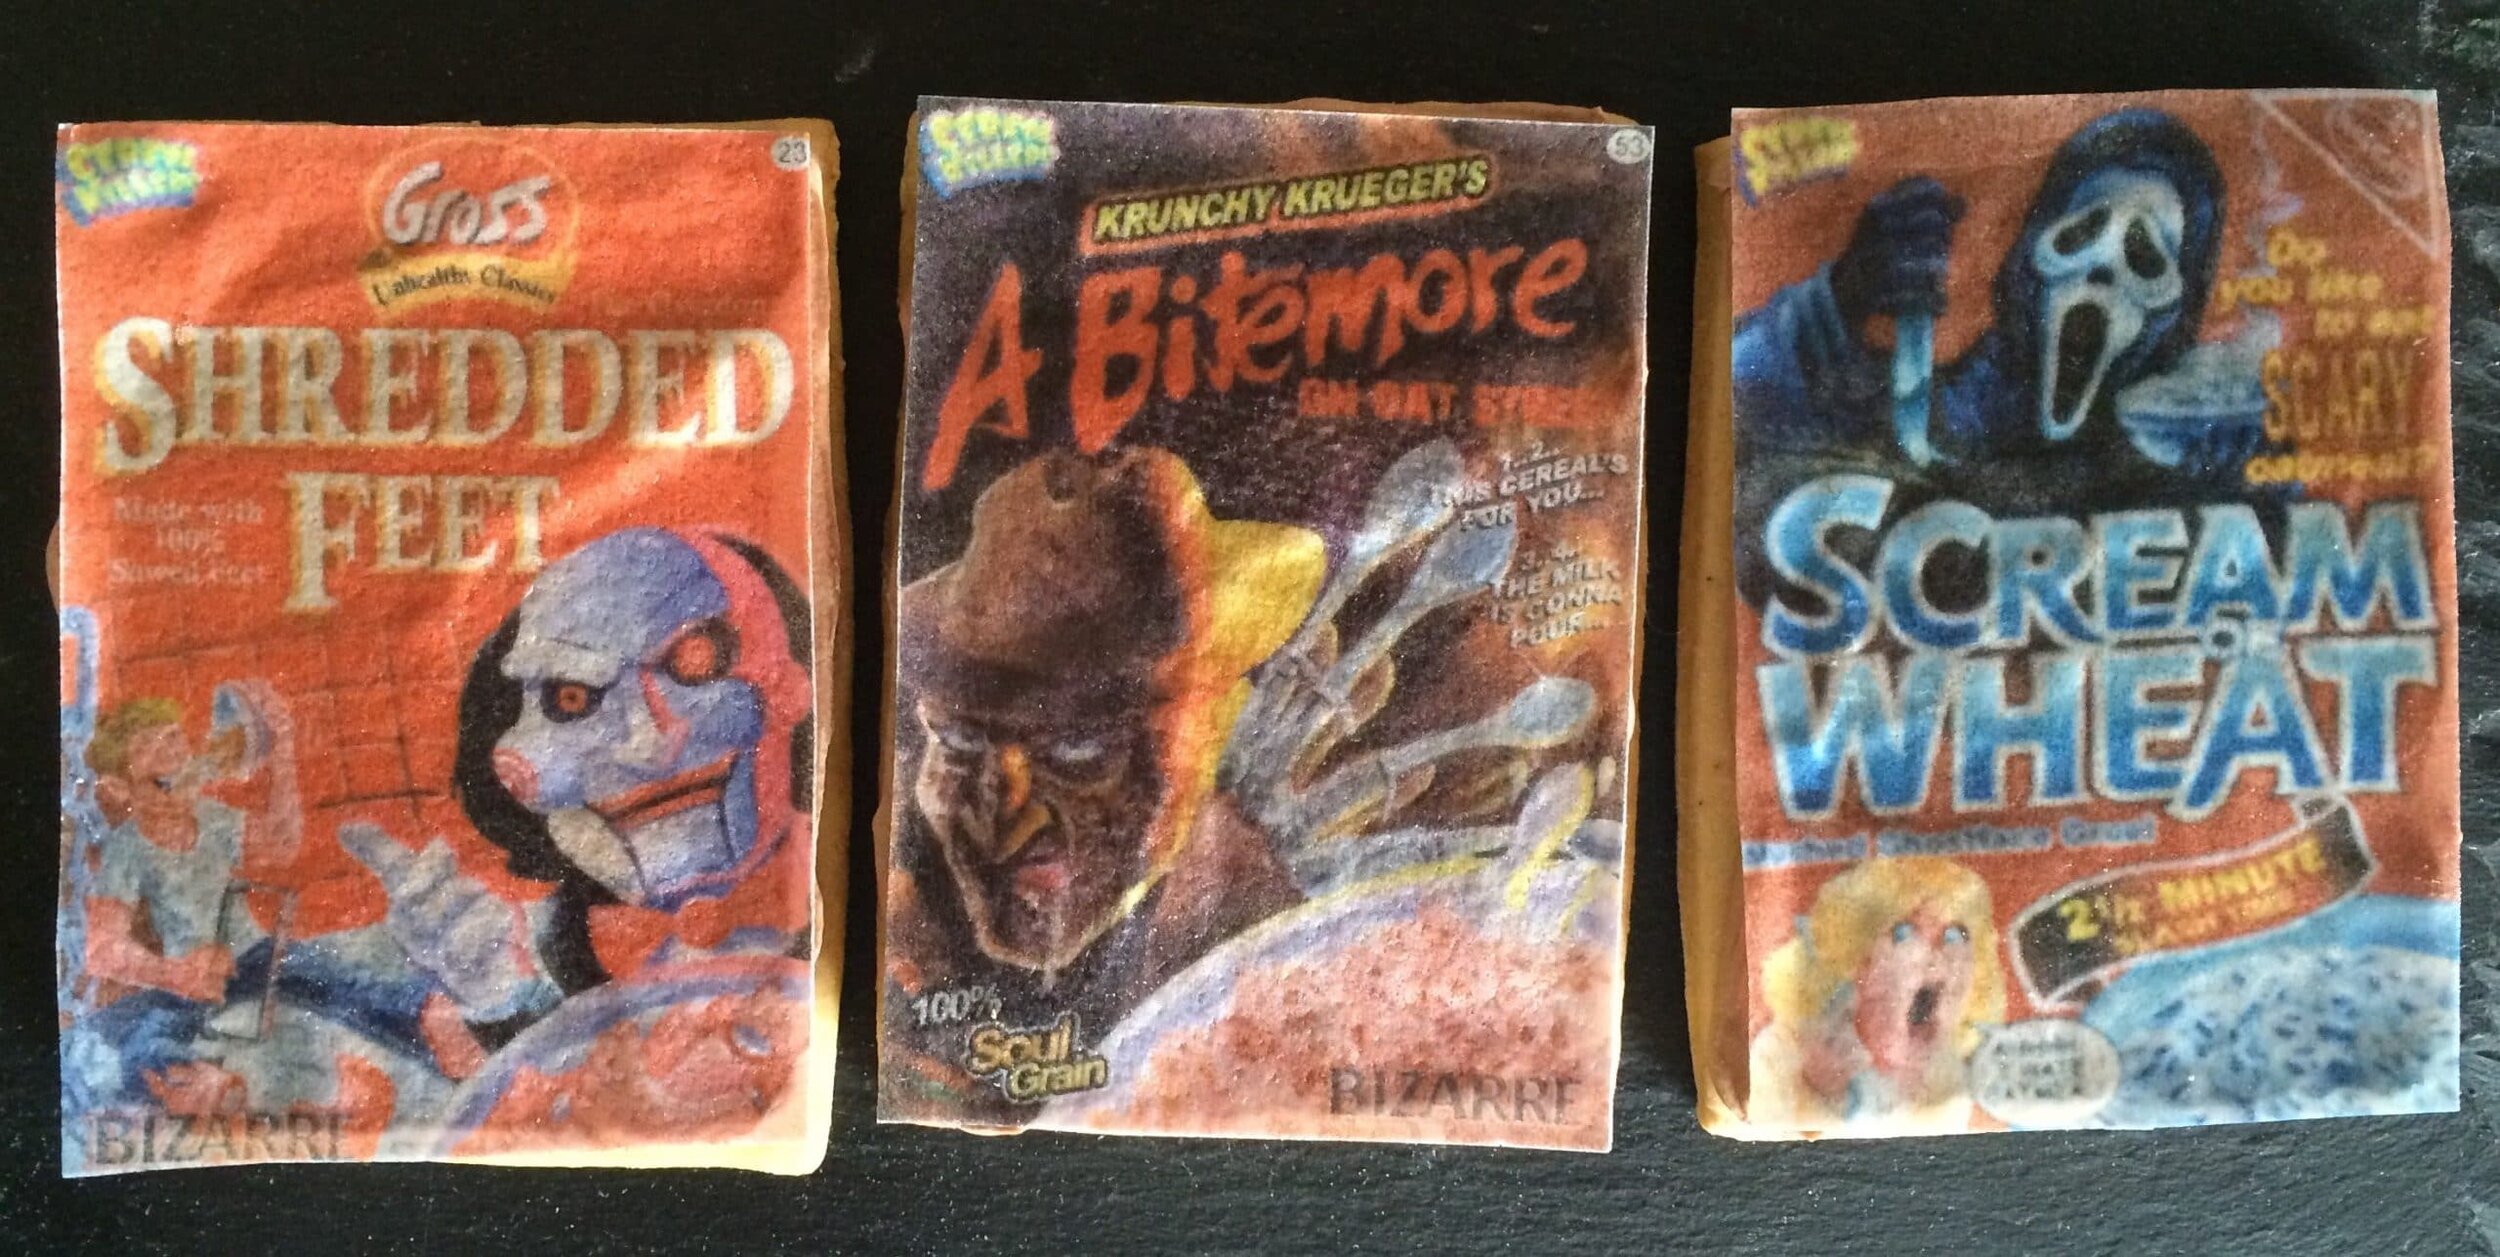
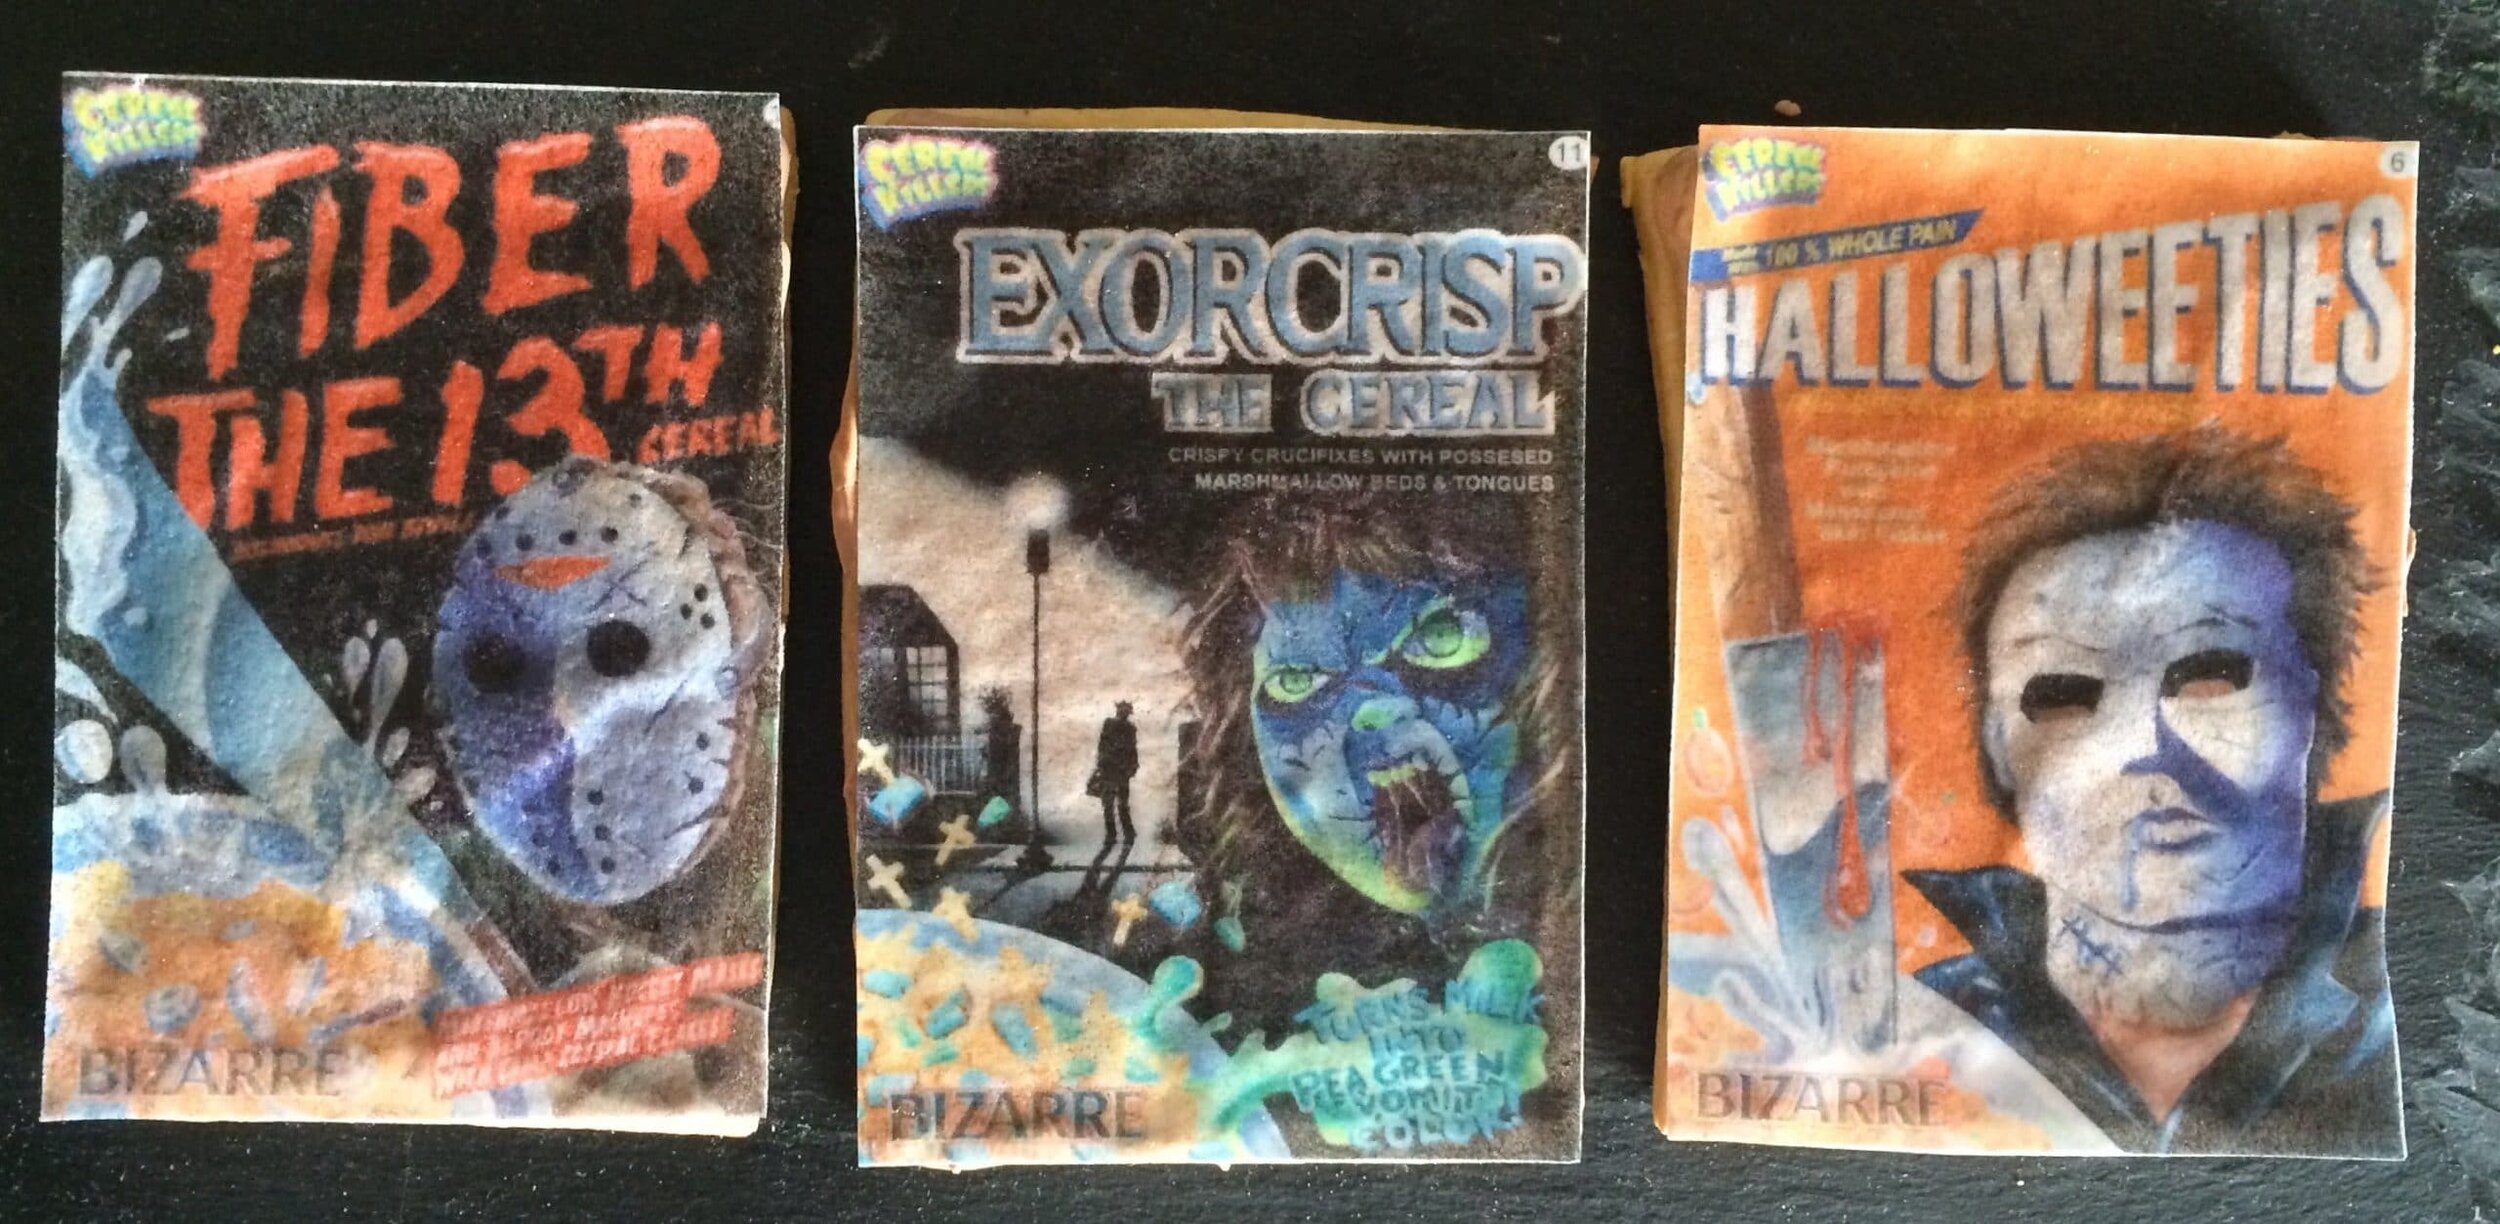
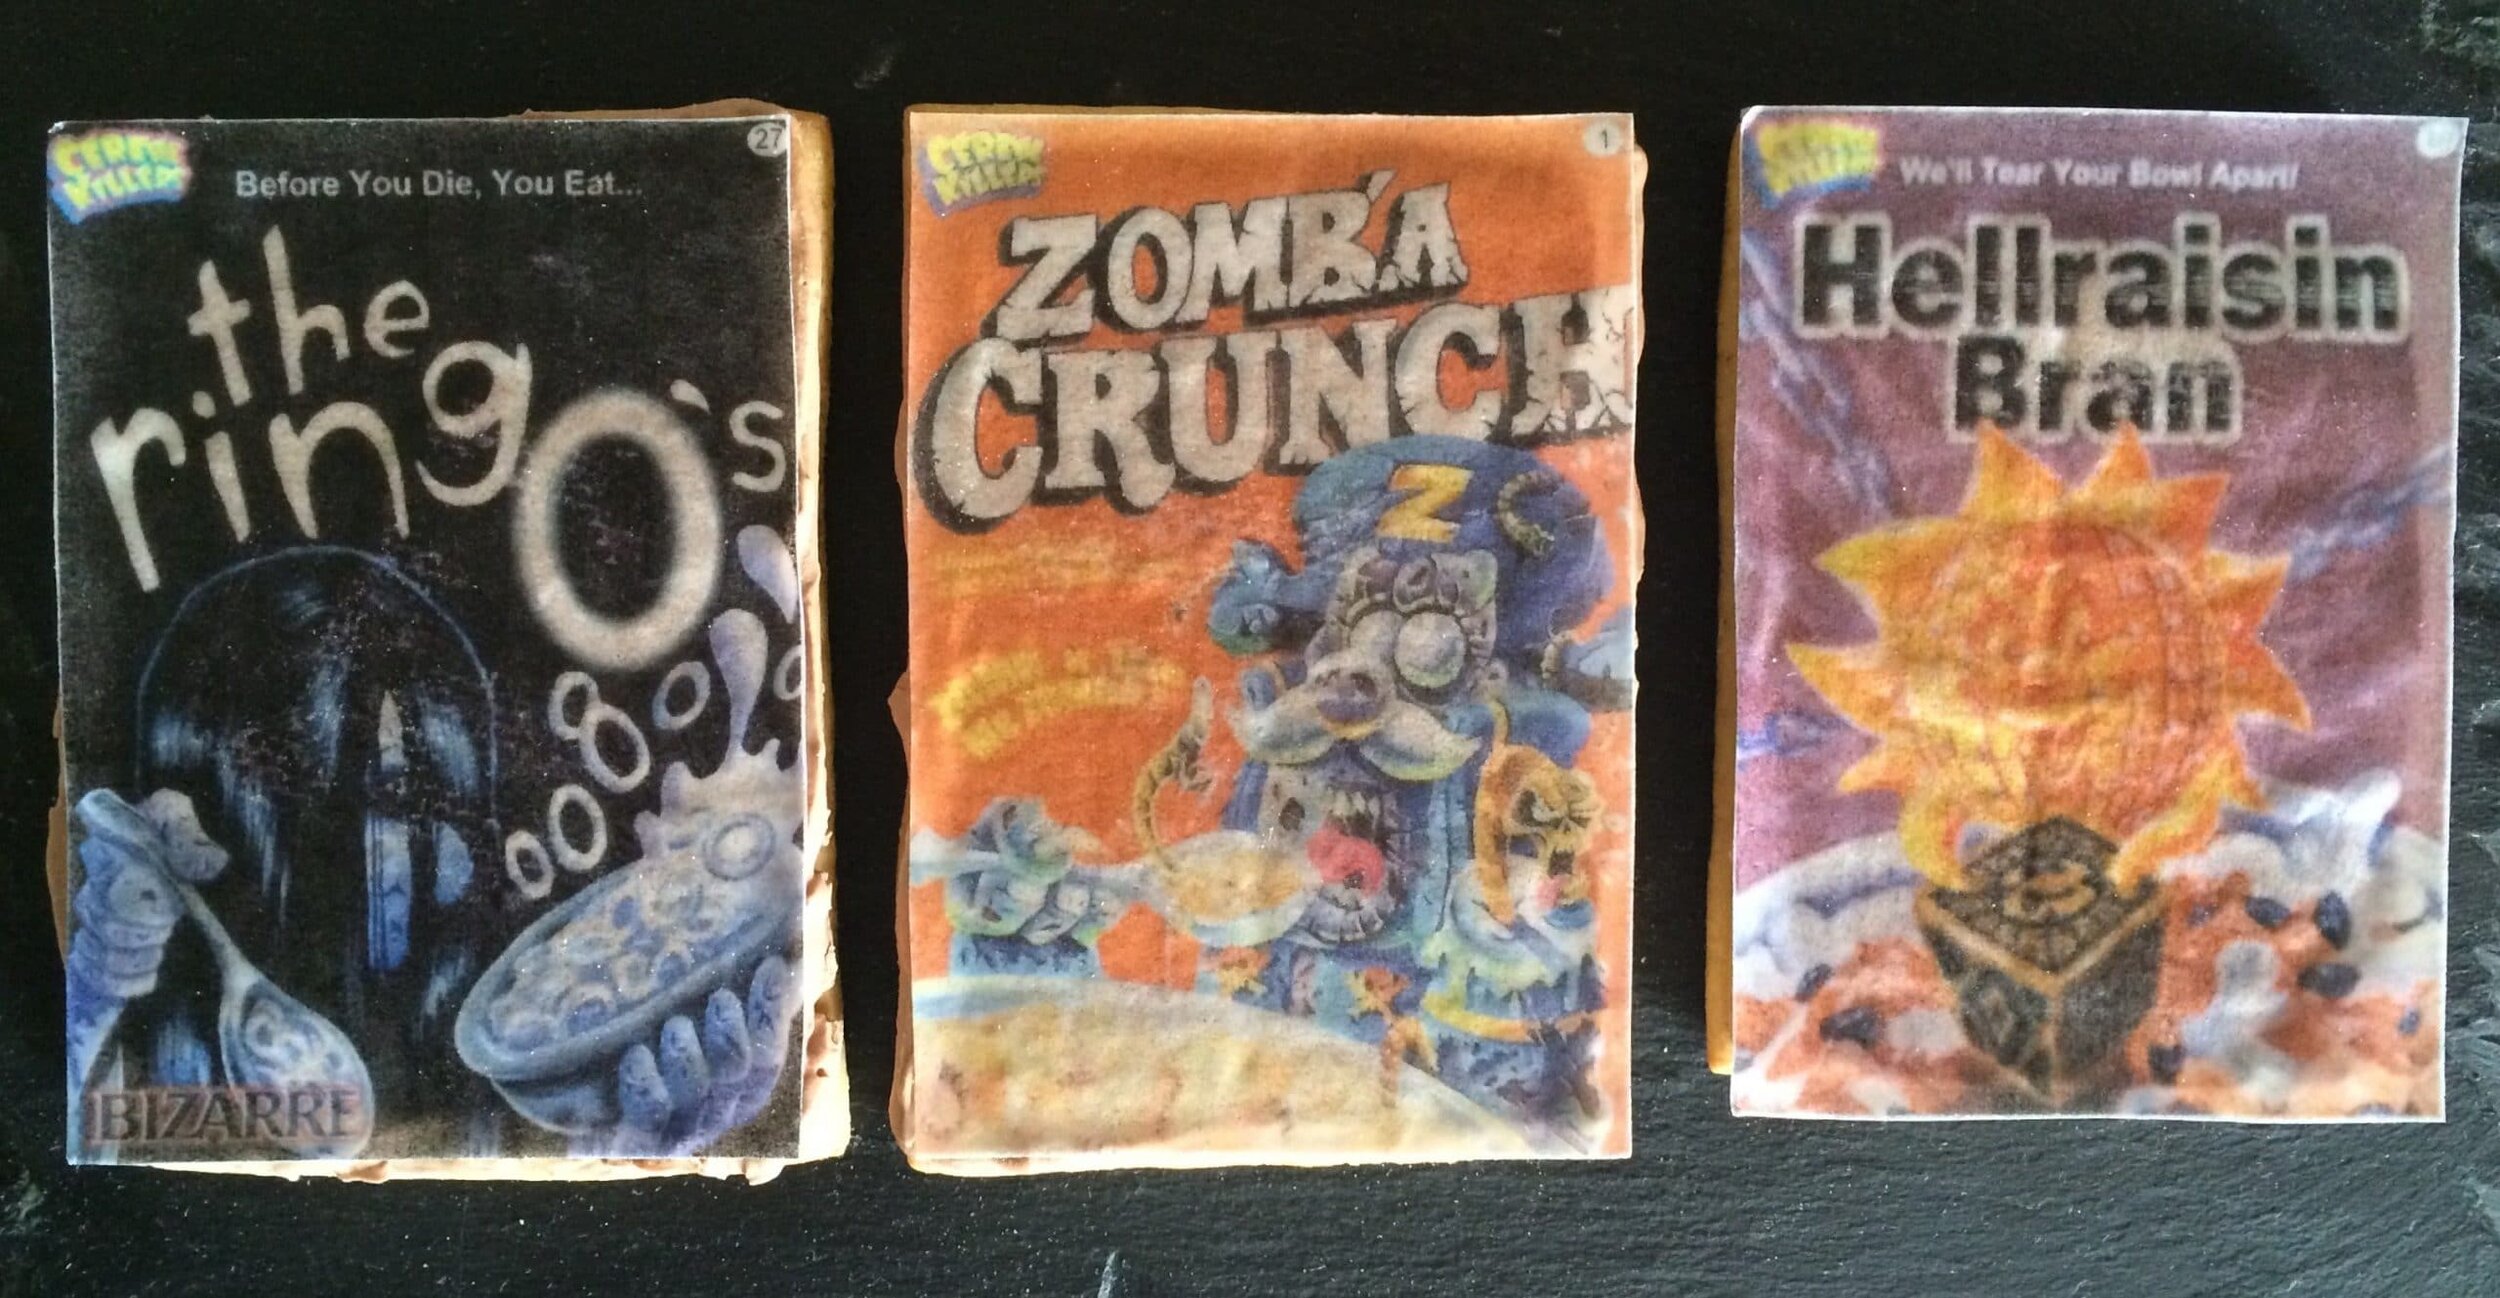
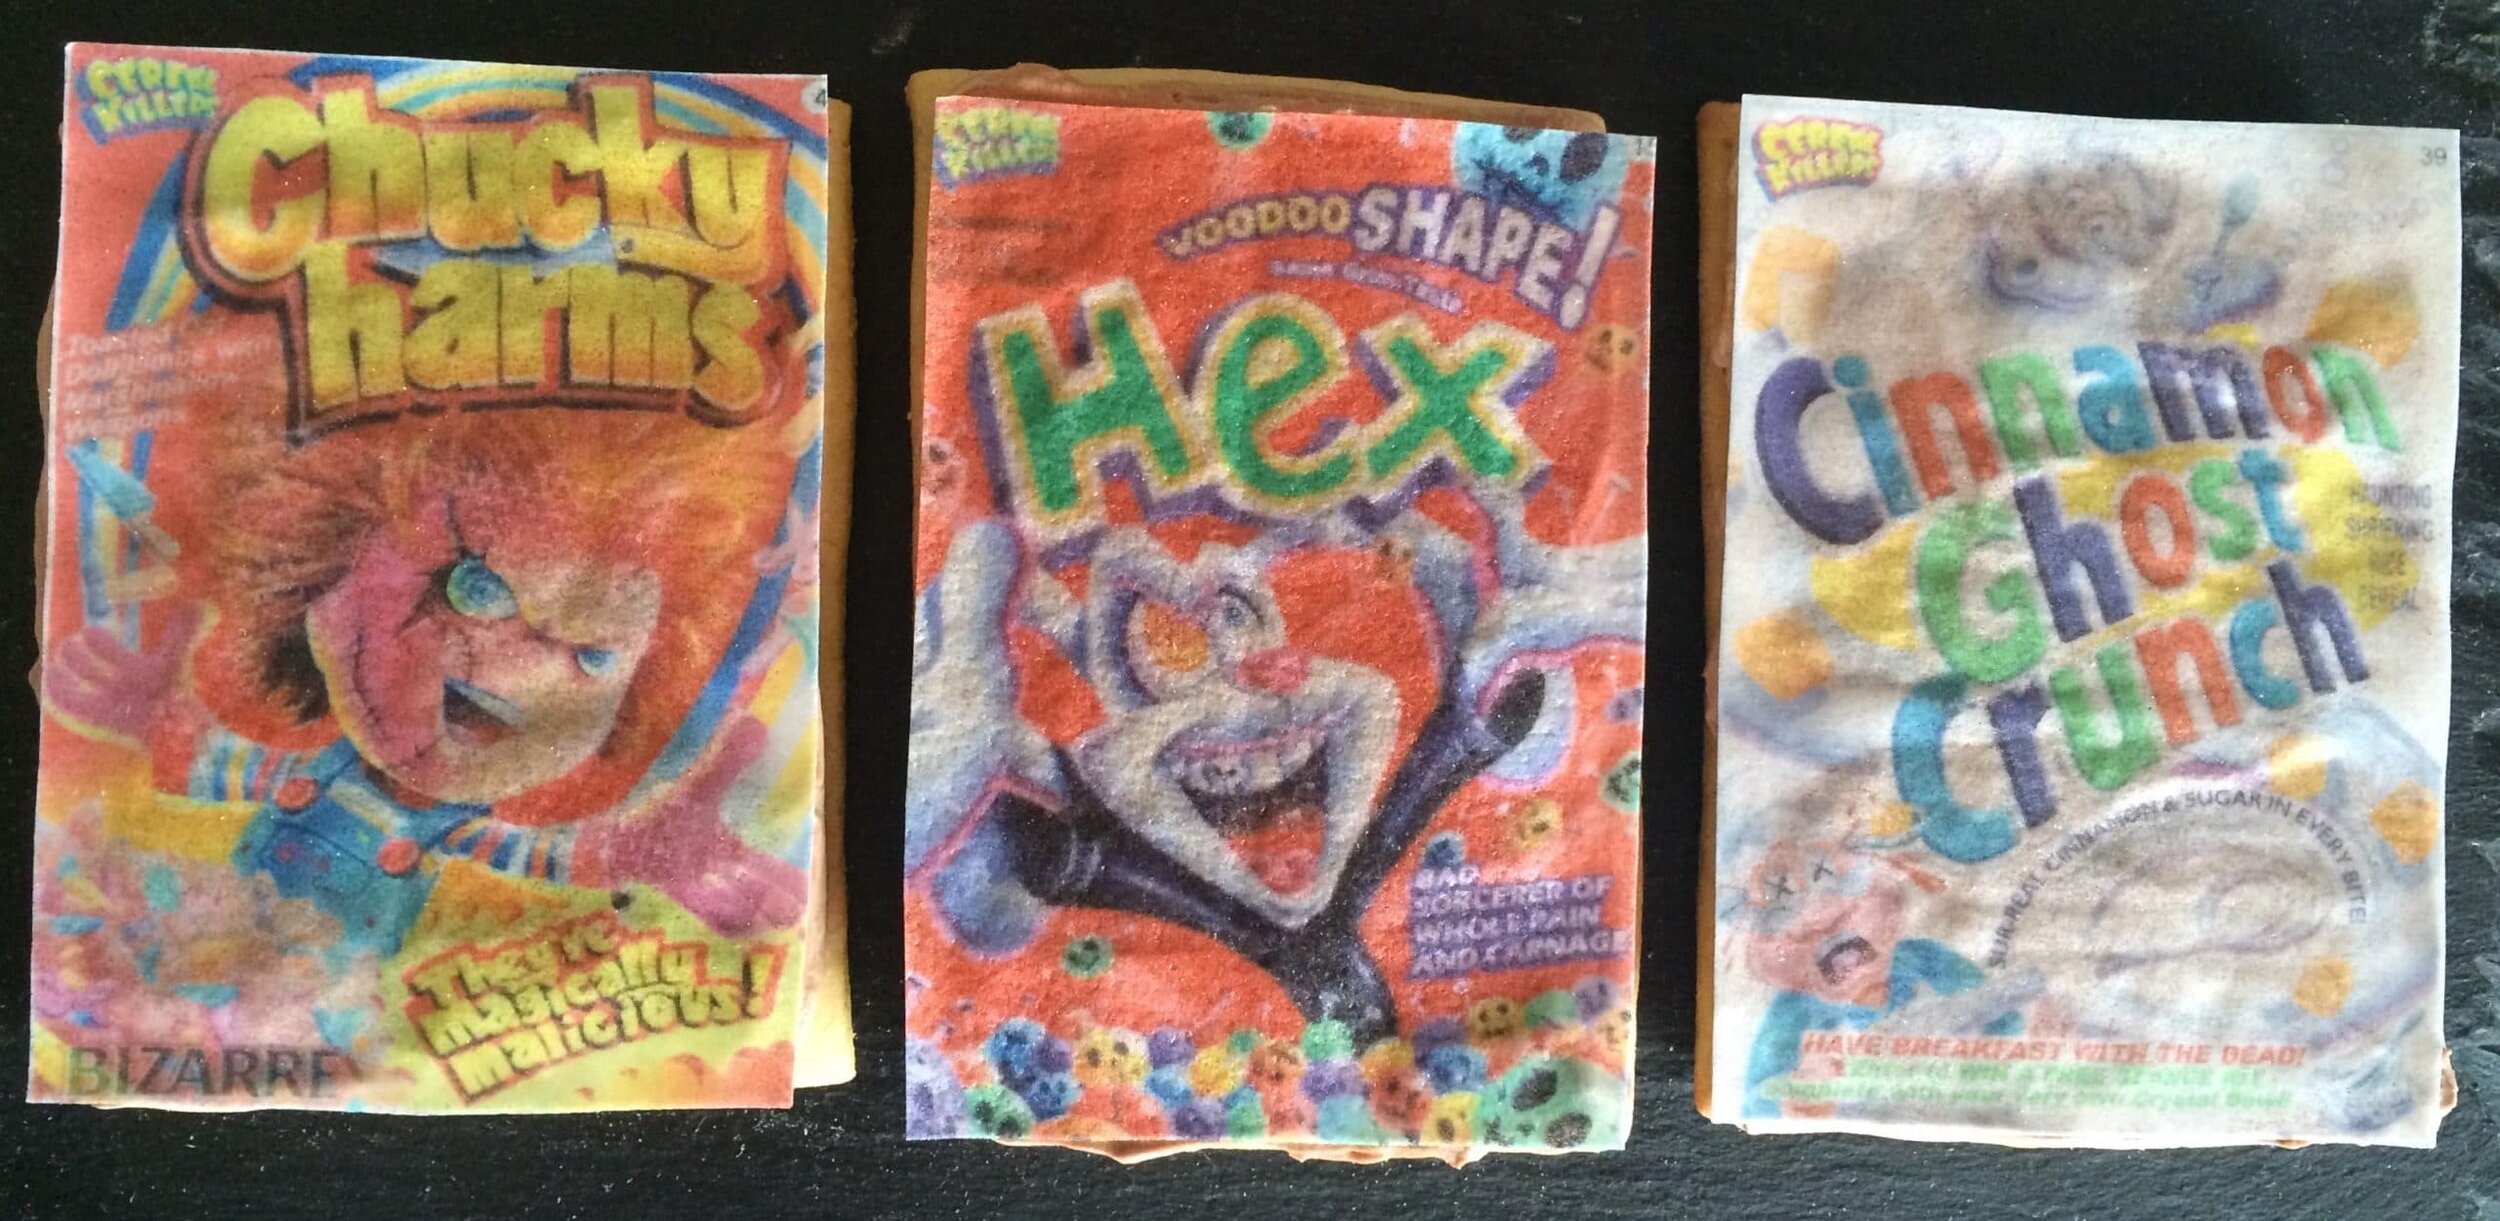
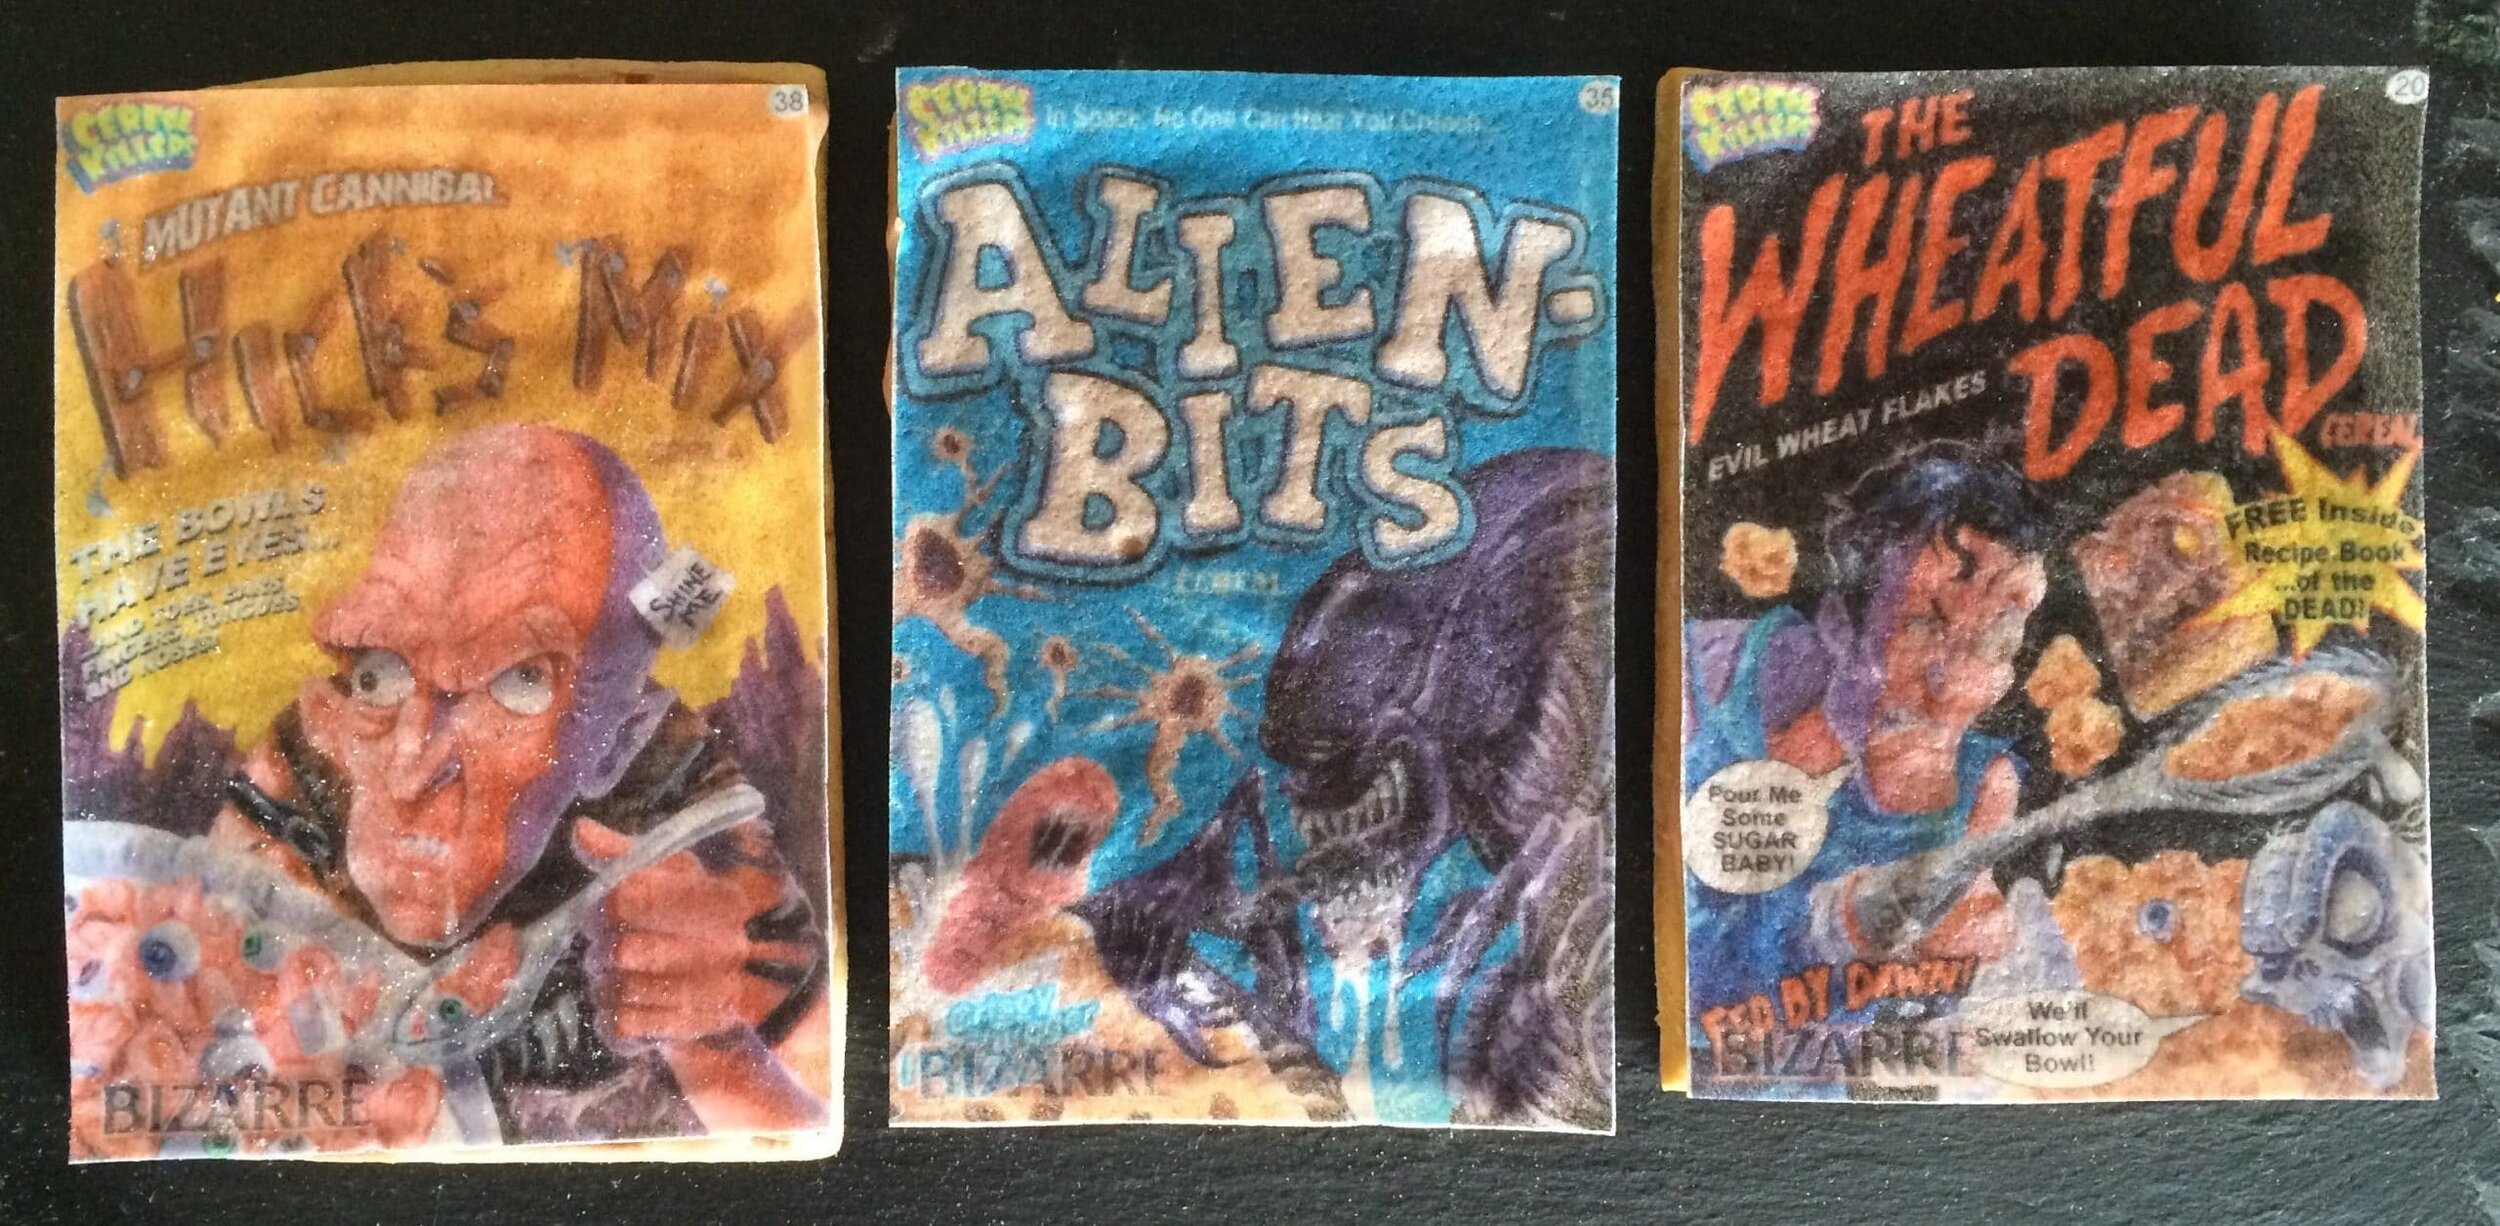
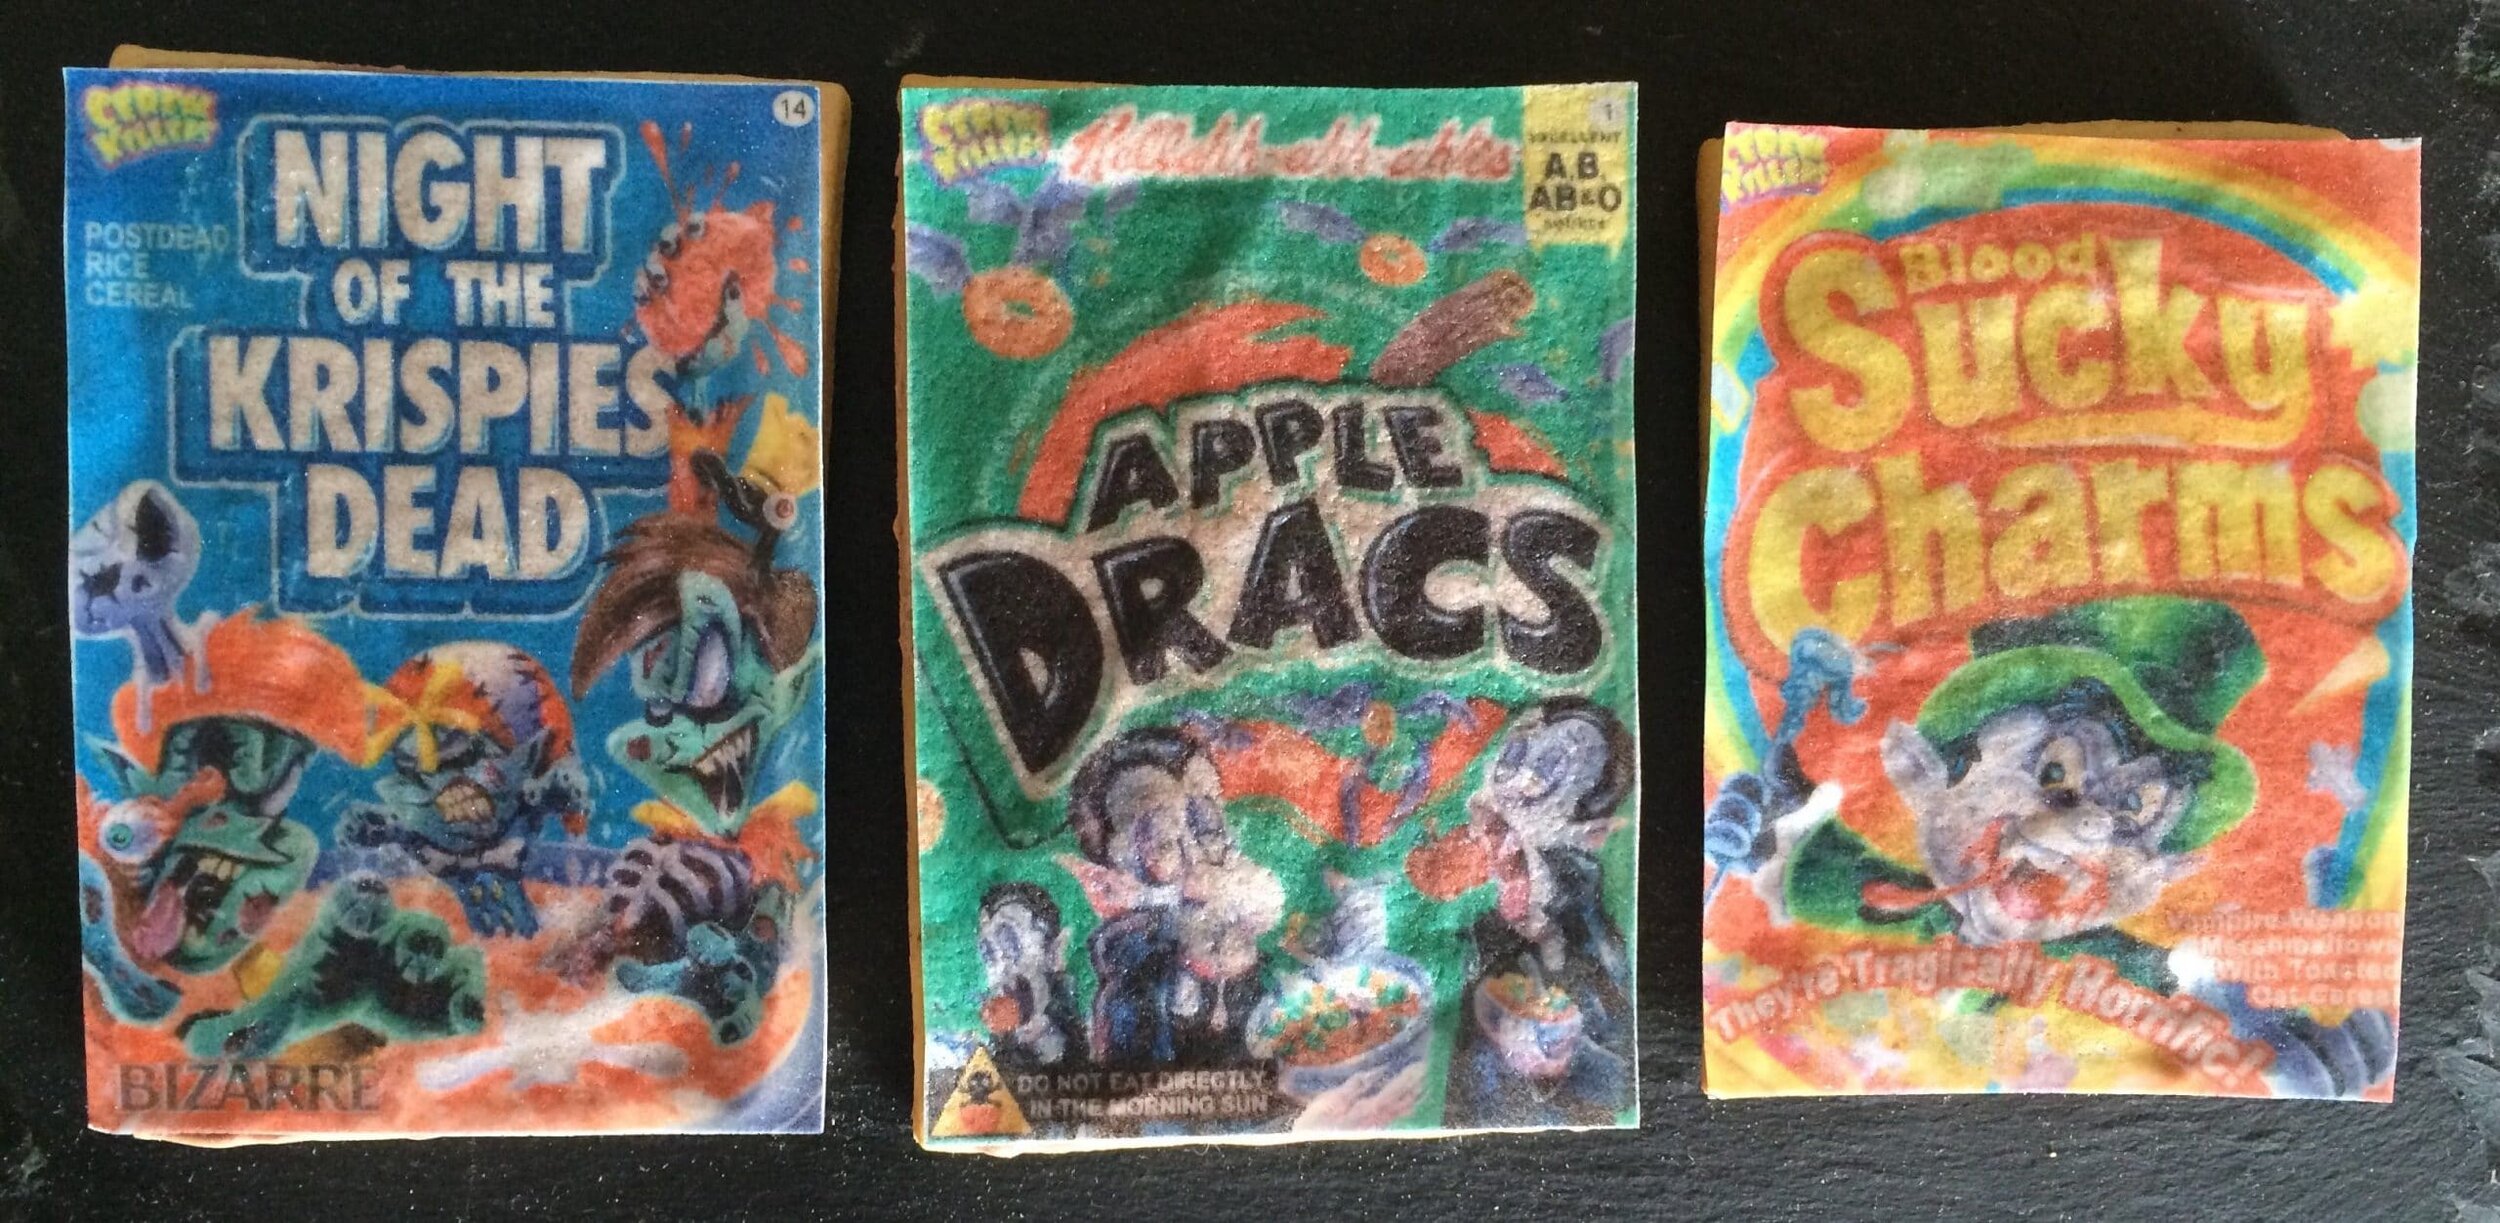
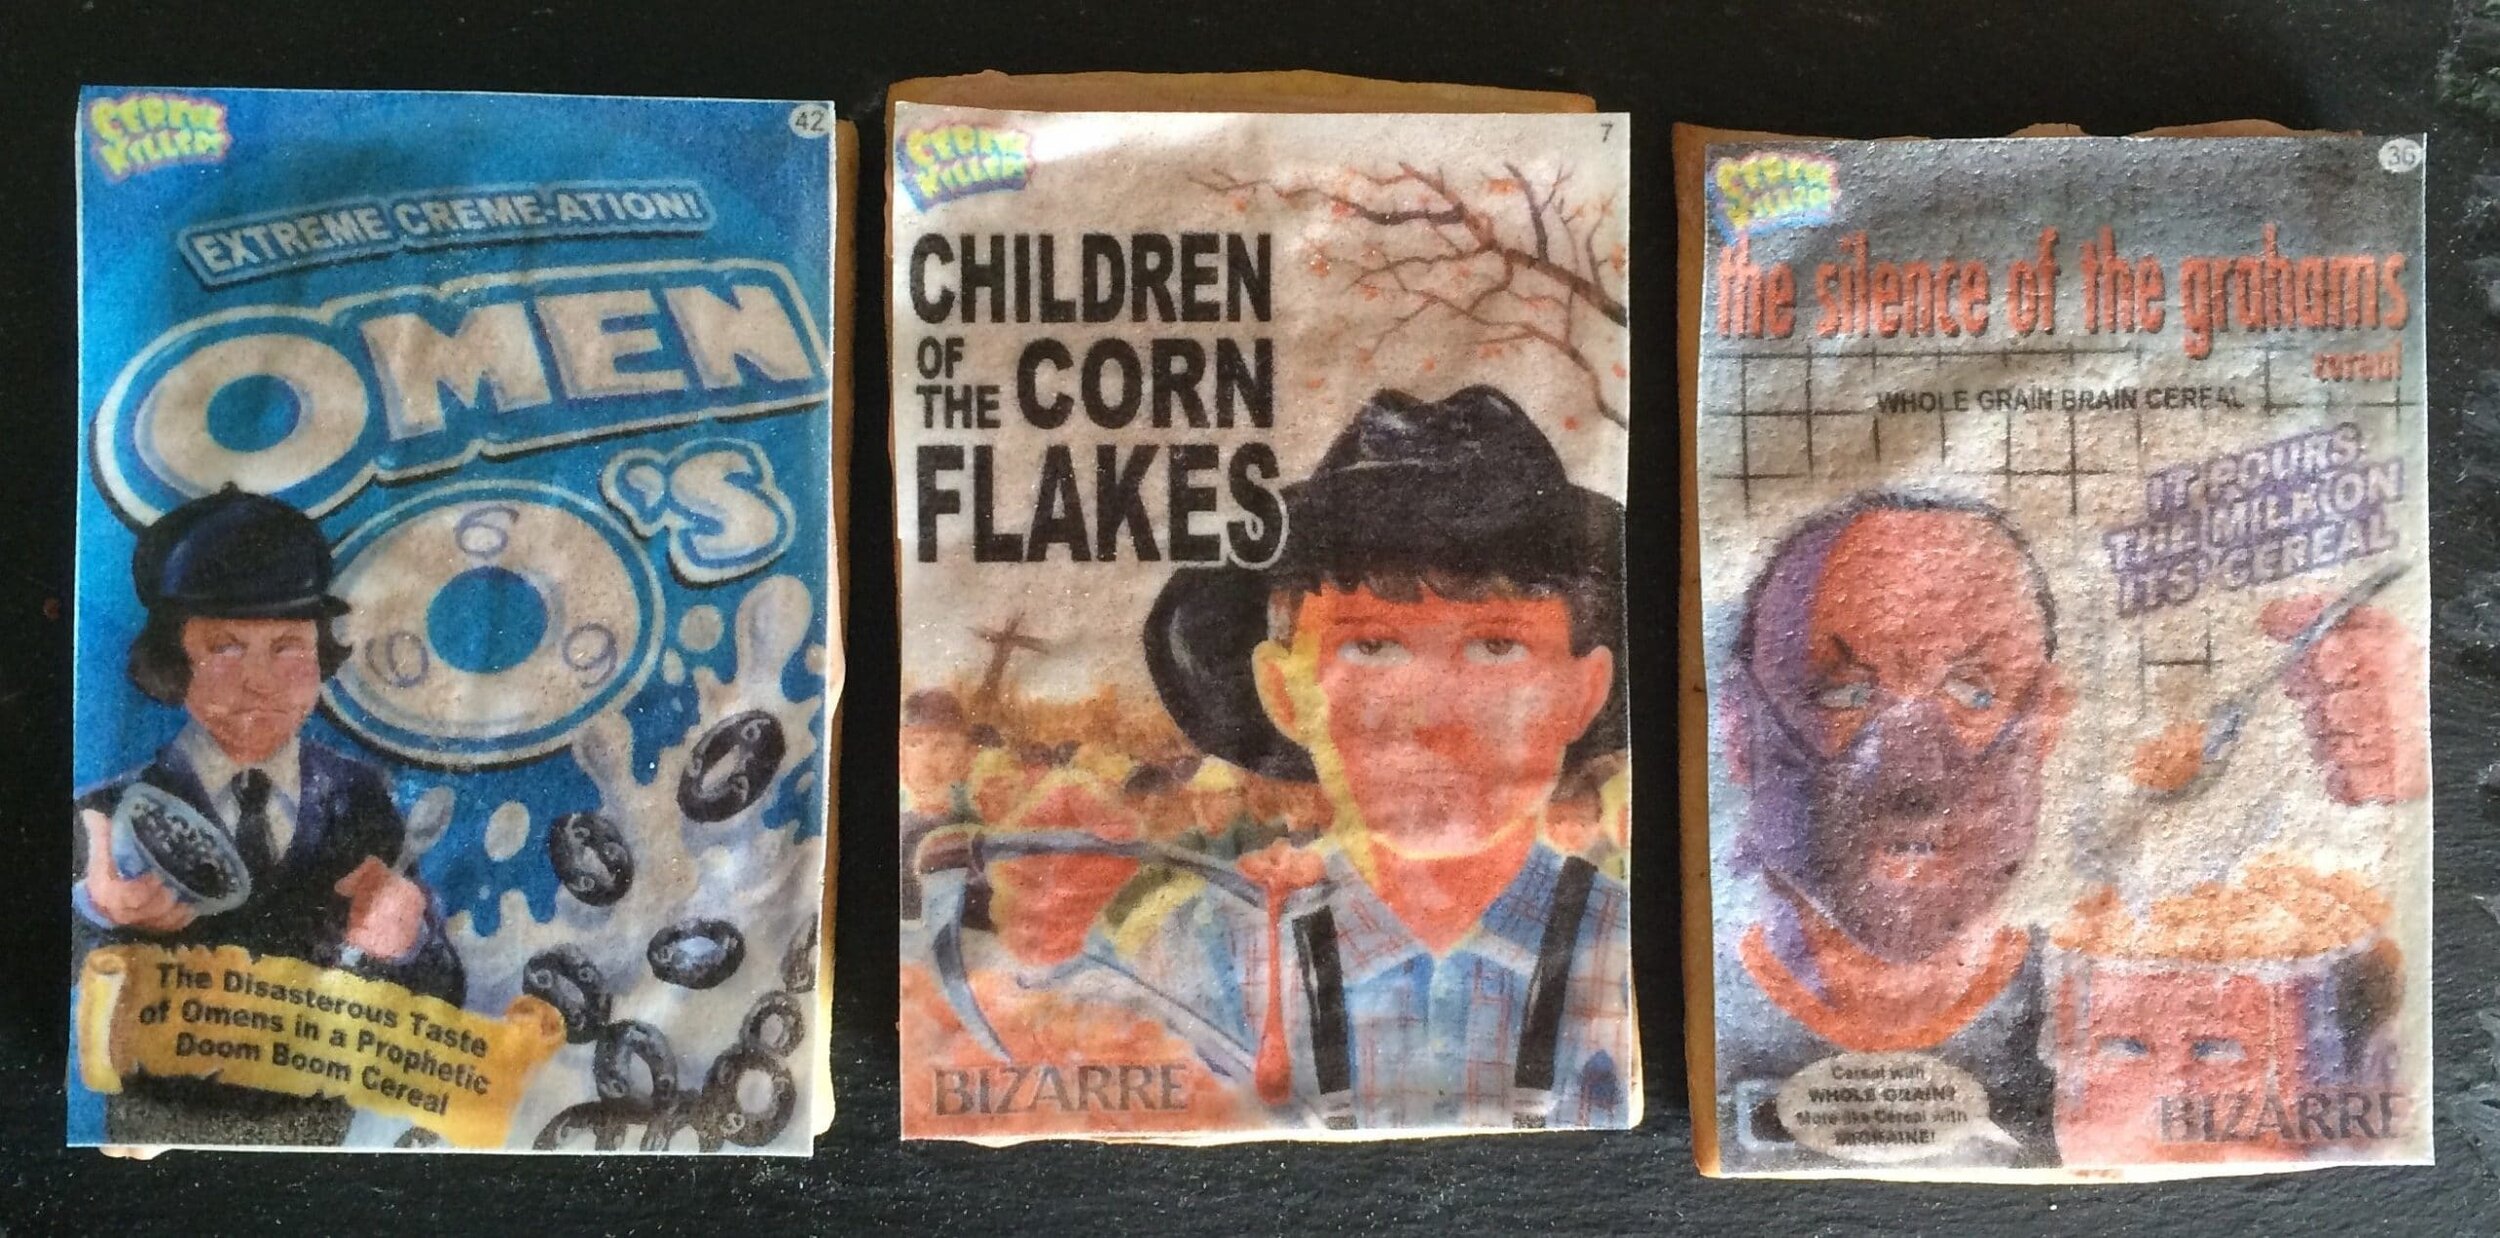
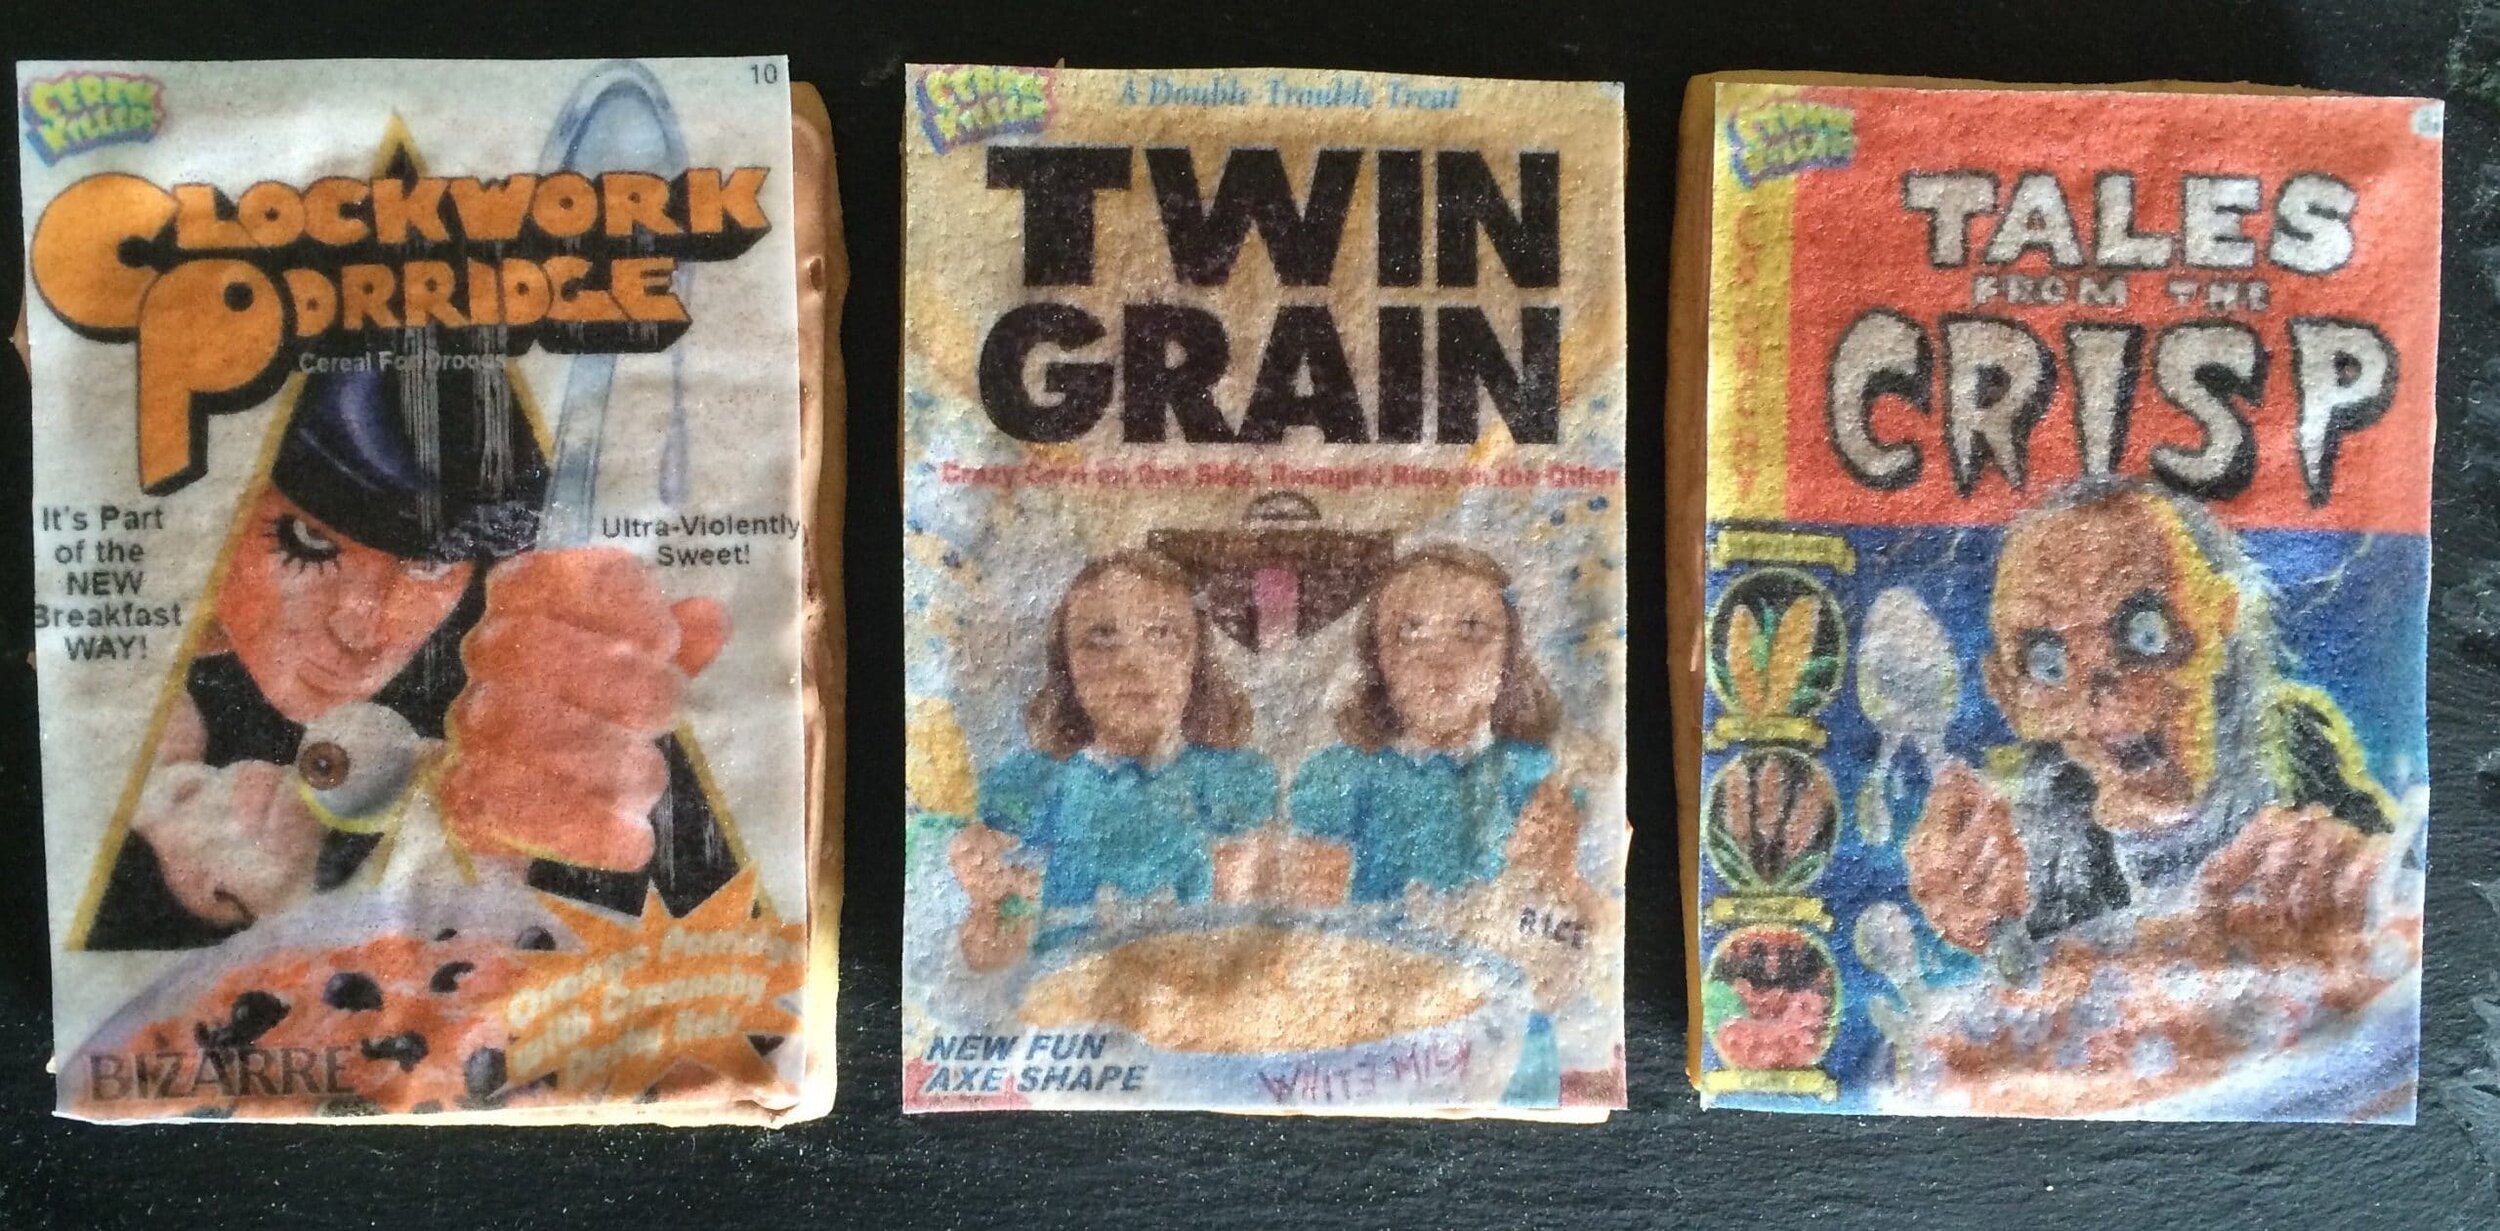
now i found these sweet images on Pinterest called cereal killers. so essentially they are cereal boxes with funny puns on all of the horror movies and even cereal box characters. i thought that these were super hilarious and just had to add them to my list of projects for this halloween season.
want to learn how to get images onto cookies and even cakes and chocolates? then check out my new online edible printing course that will guide you through everything you need to know about edible printing, from start to finish! you won't regret it! not too sure if you want to buy something so pricey if you aren't sure you'd like it? then you can certainly check out my array of edible paper images you buy and try out before making such a huge purchase. you can even buy these specific cereal killer images too!
Products I recommend
Above are some products that I personally use and recommend for this recipe and to have for everyday use. One main thing that you will need in this recipe is the meringue powder for the buttercream. Meringue powder helps make the buttercream form a crust so that it won't make a mess and smudge everywhere. If you prefer to not use meringue powder, than I suggest making a crusting buttercream or a royal icing.
____________________________________________________________________________________
pumpkin spice cookies

these pumpkin spice cut out cookies are perfect for fall! full of flavor and lots of spices, just add some buttercream or royal icing and you have a delicious treat.
- 1 stick butter
- 3/4 cup granulated sugar
- 1/2 cup brown sugar
- 2 eggs
- 1/2 cup pumpkin puree
- 3/4 tsp vanilla
- 4 cups all-purpose flour
- 1 tsp baking powder
- 1/2 tsp baking soda
- 1/4 tsp salt
- 1 tsp cinnamon
- 3/4 tsp ground ginger
- 1/2 tsp ground cloves
- 1/2 cup milk + 1 tbsp vinegar
- Combine the milk and vinegar and let sit 5 minutes until the milk has curdled. In the bowl of an electric mixer cream together the butter and sugars, making sure to scrape the sides of the bowl along the way. Gradually add in the eggs and mix to combine. Add in the vanilla and pumpkin puree. In another bowl, combine the flour, baking powder, baking soda, salt, cinnamon, cloves, and ginger and mix together. Gradually add the dry ingredients to the pumpkin mixture. Slowly add in the milk/vinegar until the dough comes together. Wrap the dough in plastic wrap and put in the refrigerator for at least an hour.
- Preheat the oven to 350*F and line a sheet pan with parchment paper. Dust the work surface with flour and the rolling pin and start rolling the dough until about 1/4 inch thick. Cut out the shapes desired and place on the lined sheet pan. If the dough that has been cut out has become too warm, place in the fridge for at least 15 minutes. Bake for about 10-12 minutes, remove from the oven and let cool. Decorate as desired.
Mystery Machine Cake Tutorial

*This post contains affiliate links. Please read disclosure to learn more.
This is the most fun cake that I've made so far. My sister and I love Scooby Doo. We grew up on it and other old cartoons thanks to our dad. So for her birthday she had requested a cake featuring the Scooby gang. And a surprise guest too of course! So here is a scooby doo mystery machine cake tutorial for you all!
Fondant or not to fondant?
Personally I think this scooby doo mystery machine cake would've been 100% better if it had been decorated with just fondant. But my sister hates fondant. And since it's her birthday cake I couldn't use it to decorate the cake. Well except for the two small pieces that I painted the gang and Mr. Hyde on. Thankfully she lived with it after complaining for a few minutes. The chocolate did come out very well though after a few trial and errors. It's definitely not the best looking cake, but it is the most fun. It being Scooby Doo makes it even better.
Make it extra!
I made this cake into a pinata cake and filled it with a bunch of sprinkles and some chocolate chips too. But I think it would be even more fun if it had had some of those graham cracker Scooby snacks and fruit snacks too! Make it completely a Scooby Doo theme I think! Or you could go for the glutenous ways of Scooby and Shaggy and filled it with fun food shaped gummy candy. Little pizzas and ice cream cones would have been a hoot in this mystery machine cake!
Stencil
Use these stencils to accurately carve out the mystery machine into the correct shape. I also included stencils to draw out the gang and Mr. Hyde as well if you want to make it look exactly like I made the cake. This is completely optional though! The stencils also include notes on what each stencil is used for and how to use them.


Products I recommend


mystery machine cake tutorial

leanr how to make a fun scooby doo mystery machine cake featuring the gang and mr. hyde!
- candy melts (light blue, green, white, black, and orange)
- 4 layers cake (use a 9 x 13 inch cake pan. any flavor)
- 1 batch vanilla frosting (tinted light blue)
- white fondant (optional)
cake filling ideas
- candy
- scooby snacks graham crackers
- scooby doo fruit snacks
- sprinkles
- candy
- once the cakes are cooled, start by filling and stacking the first 3 layers of cake. in the center, cut out a decent sized whole. fill this whole with whatever you like, or use some of my ideas!
- place the last layer of cake on top and do a crumb coat. place the cake into the fridge for about 30 minutes to chill.
- use the stencils i've provided to cut the cake to be the exact shape. i used some pins to help keep the stencils in place while i trimmed. if you make a mistake, just use the cake trimmings mixed with frosting (like making a cakepop) and form it into the shape you want.
- once the cake is formed, do another crumb coat and place the cake into the fridge to chill.
- while the cake is chilling, use the other stencils and the candy melts to trace the mystery machine designs to put onto the cake. let dry
- while the chocolate is drying, take the cake and do a final thick coat of frosting on the cake.
- carefully peel the chocolate designs off the wax paper and place onto the designated areas of the cake.
- if you have the artistic ability or a projector then paint the scooby gang on some fondant. do the same thing for the back of the cake with mr. hyde.
- eat and enjoy!
Devil's Chocolate Cake

*This post contains affiliate links. Please read disclosure to learn more.
Making this devil's cake was crazy fun. As I've mentioned before and will mention again, October is my favorite time of the year. When all of the scary creatures come out to play, the devil among them. It's fun seeing all the creative costumes that people come up with. I love seeing all the fun homemade ones for kids and couples.
No kids allowed at this party
This cake is a twist on the original devil's food cake, but with much more excitement. Sorry, no kids allowed on this chocolate goodness because it is jam packed with chocolate, cayenne, cinnamon and a lot of whiskey. I just kept on pouring the whiskey in because clearly there is no steady hand here. Let's just say that I could only smell whiskey, but I don't have a problem with that.
Too hot to handle
There is a lot of cayenne pepper in this devil's chocolate cake, but don't worry you can change the spice level to your preference. Or you can totally omit it completely and just have it be a chocolate whiskey cake instead.
Change it up!
If you aren't feeling the whiskey in this cake as much as I do, than you can substitute it for some fresh orange juice. Chocolate and orange is a great combination because the flavors compliment each other perfectly. Because let's face it, not all people like whiskey. Unless it's peanut butter whiskey because that's my jam!
The devil's chocolate cake is definitely the devil's delight. All that chocolate, a lot of spice, and a ton of booze makes it perfect for that grown up Halloween party!


Products I recommend
Above are some products that I personally use and recommend for this recipe and to have for everyday use. My absolute favorite is the BlueQ oven mitts. I have a collection of them and I love them! They are great quality and it’s nice to have a kitchen item with a sense of humor.
_______________________________________________________________________
Devil's cake
this cake is spicy, chocolatey, and even has lots of whiskey. It's the perfect combination that even the devil himself would love
cake
- 1 stick butter
- 1 cup 8oz dark chocolate chips
- 3 eggs
- 2 tsp vanilla extract
- 1/3 cup vegetable oil
- 2/3 cup whiskey
- 1 1/4 cup buttermilk
- 3/4 cup granulated sugar
- 1/3 cup brown sugar
- 1 3/4 cup all-purpose flour
- 2/3 cup cocoa powder
- 1/2-1 tsp cayenne pepper (use as much as you can handle!)
- 1/2 tsp cinnamon
- 1 tsp salt
- 1 1/2 tsp baking soda and baking powder
buttercream
- 6 oz boiling water
- 4 sticks unsalted butter
- 5 cups powdered sugar
- 1/3 cup black cocoa powder
- 2 tsp vanilla extract
- 3-5 tbsp heavy cream (or whiskey!)
cake
- Preheat the oven to 350 degrees F. Spray and line three 6-inch cake pans. Place the butter and chocolate into a small pot over low heat and melt. Add in the eggs, oil, whiskey, vanilla, and buttermilk. In a bowl, combine the flour, sugar, brown sugar, cocoa powder, baking soda, baking powder, cayenne pepper, cinnamon, and salt and whisk to combine. Add the wet mixture to the dry mixture and whisk until incorporated. Add in the boiling water. Divide the batter among the cake pans and bake for 30-35 minutes or until a toothpick comes out clean. Let cool.
buttercream
- put the butter, powdered sugar, cocoa powder, and vanilla into the bowl of an electric mixer fitted with a whisk attachment. whip on low and gradually increase speed, whipping for about 2 minutes or until light and fluffy. add in the heavy cream and continue whipping, about a minute. add in some red food coloring if desired.
Vanilla Cake with Pumpkin Spice White Chocolate Ganache

[wprm-recipe-jump]
*This post contains affiliate links. Please read disclosure to learn more.
It is officially October, which is my favorite month of the year! I love October; the weather starts to get cooler so sweaters and cute boots can be worn and leaves start to turn colors and start falling to decorate the ground. Pumpkins can be carved and the seeds roasted for a snack; but you can't forget the obvious though! All the candy and the scary movies; my favorite part! The best part though? This vanilla cake with pumpkin spice white chocolate ganache!
I don't know where this flavor idea came from for this cake, but I'm super glad it did. It's super easy to make and really delicious. The flavors really remind me of fall as the pumpkin spice white chocolate ganache filling reminds me of pumpkin pie! It tastes exactly like pumpkin pie and I had to resist real hard to not eat it by the spoonful. It is that delicious and I'm not even a pie person! I know, shame on me dissing pie.
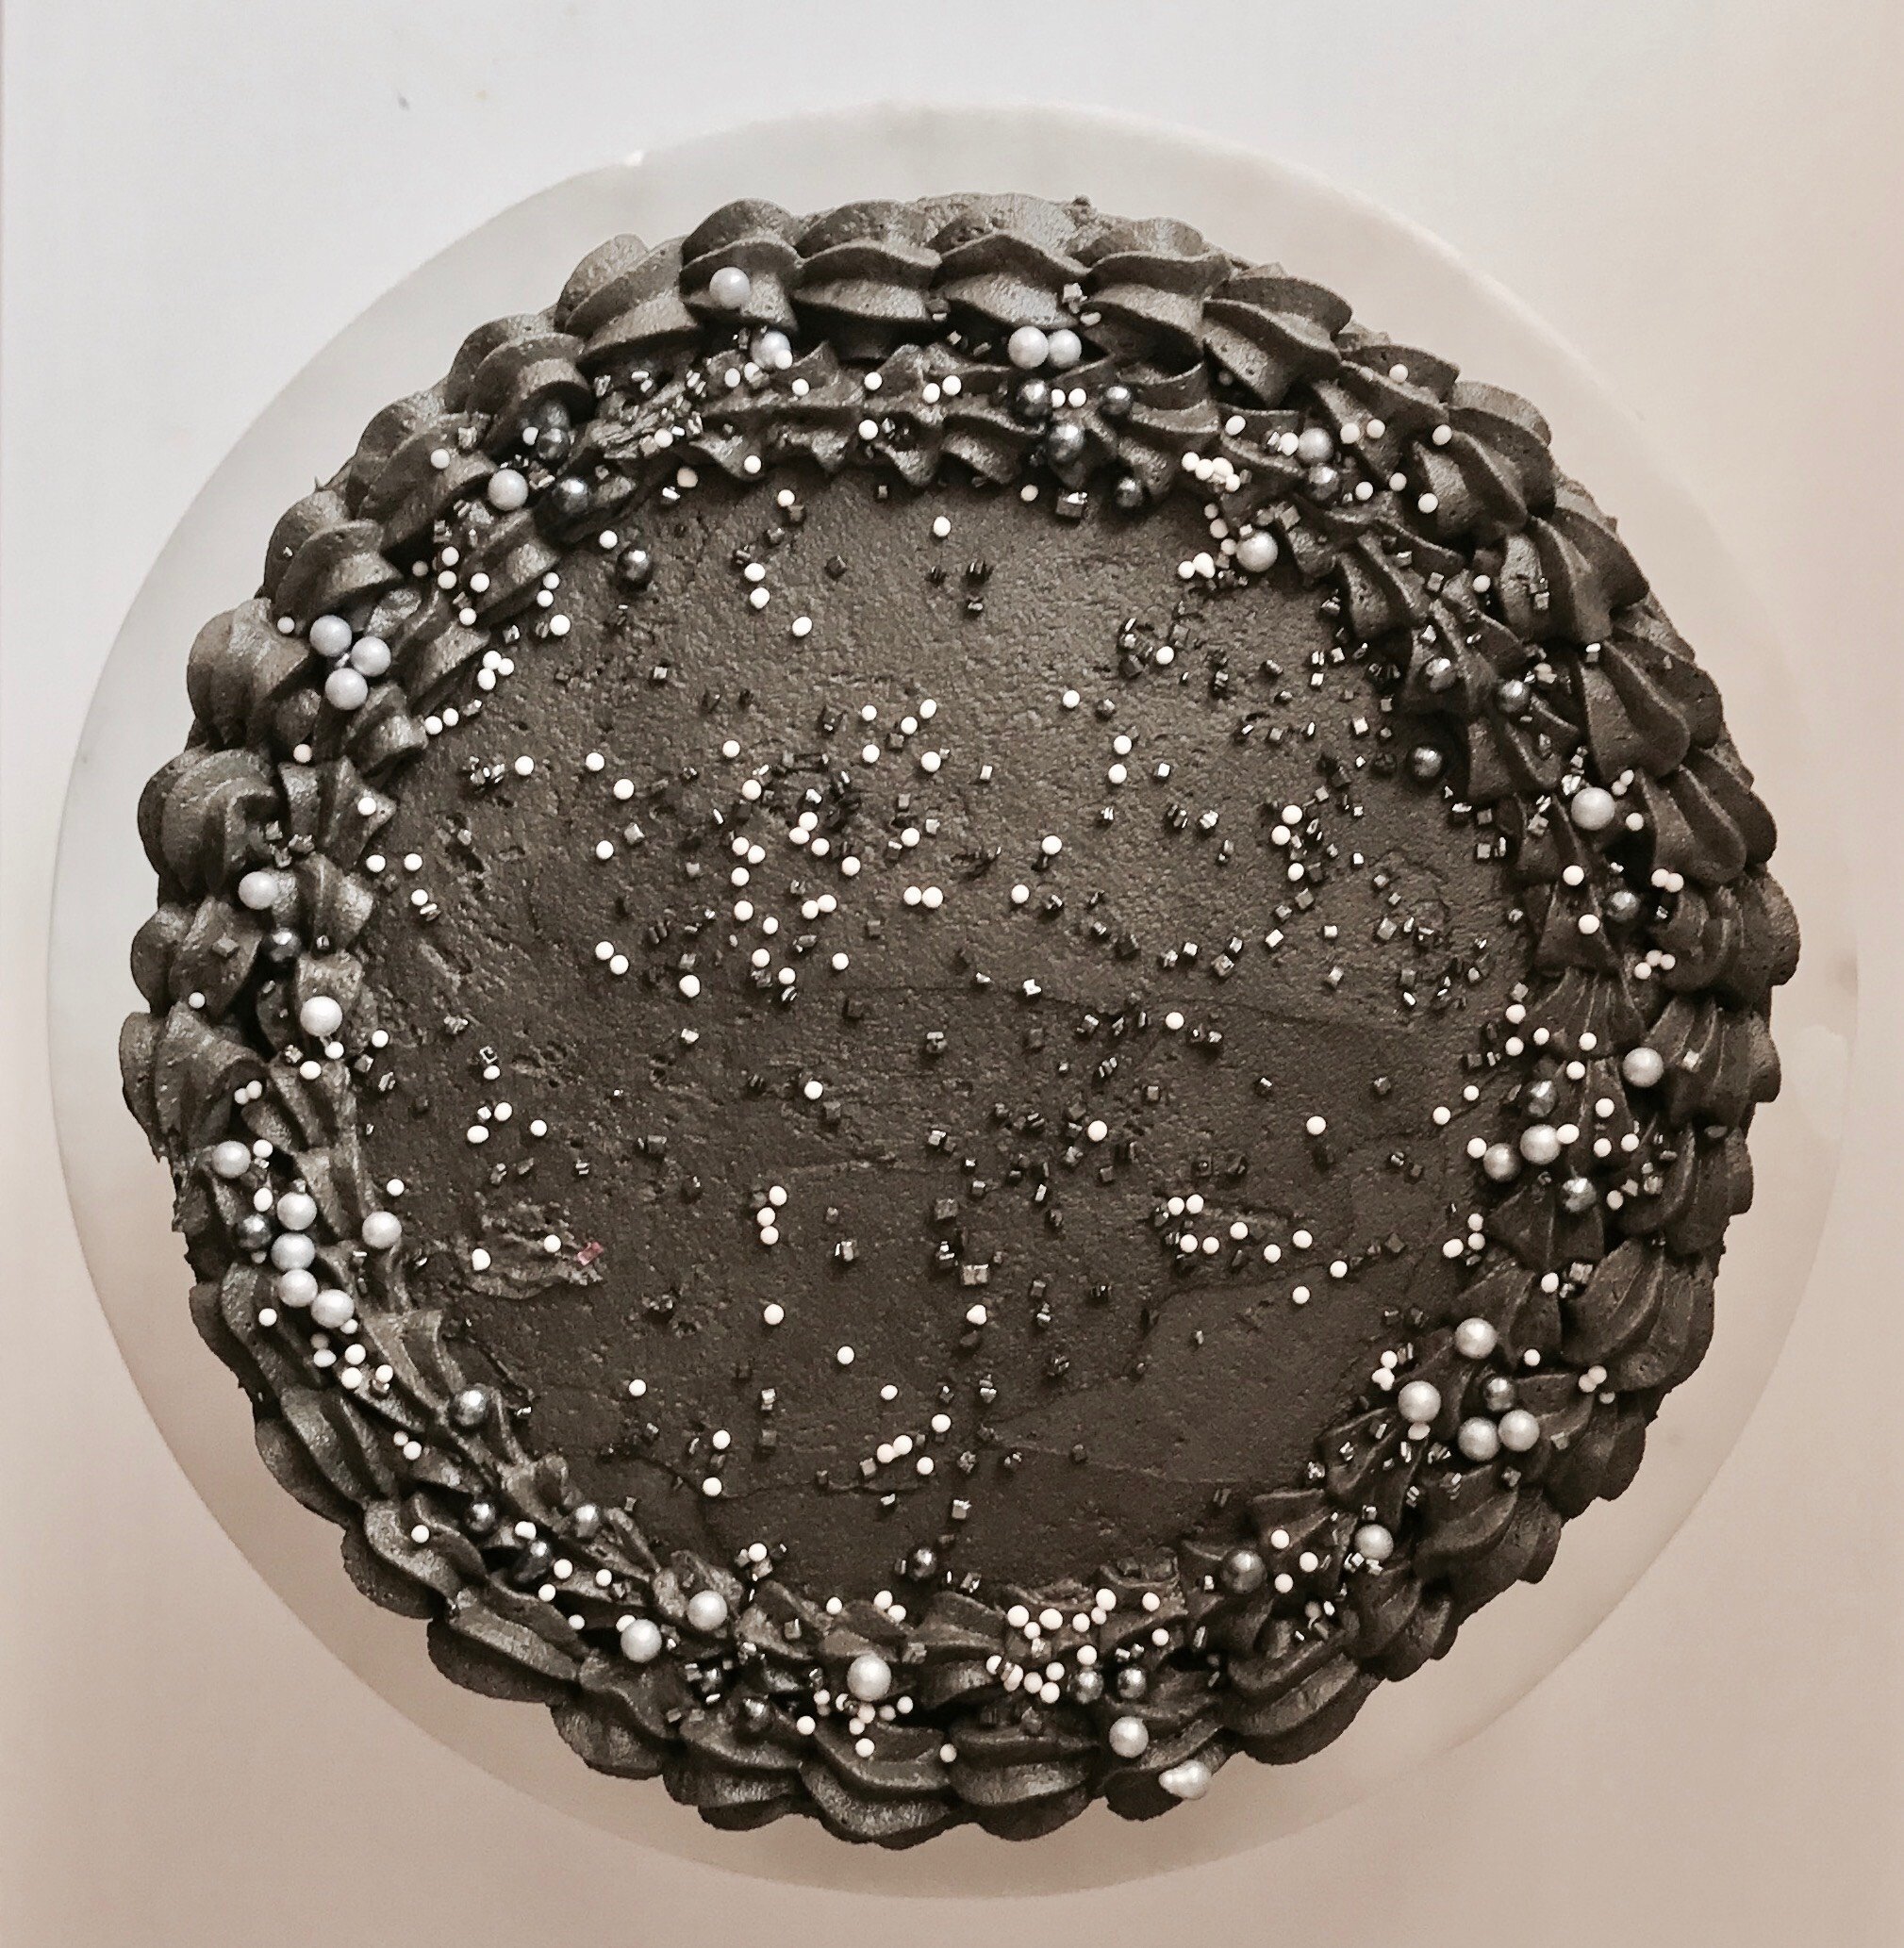
This is a really simple cake. That doesn't mean it doesn't have lots of flavor to it though. It has sweetness from the white chocolate, flavor from the pumpkin, cinnamon, ginger, and cloves, and the chocolate buttercream ties it all together! Now I wanted this cake to say Halloween, so I added some black food coloring into the frosting. This isn't necessary though, as it would be just as pretty without the food coloring. If you think about it, without the food coloring the colors would be great for thanksgiving.
Make it extra
If you want it to really say Halloween, then you could add in some orange food coloring into the ganache to really make it pop! Then add some orange and black sprinkles and maybe even some of those candy corn pumpkins on top.


Products I recommend
Above are some products that I personally use and recommend for this recipe and to have for everyday use. My absolute favorite is the BlueQ oven mitts. I have a collection of them and I love them! They are great quality and it’s nice to have a kitchen item with a sense of humor.
___________________________________________________________________________________
vanilla cake with pumpkin ganache
a simple vanilla cake that is filled with a white chocolate pumpkin spice ganache and covered in a dark chocolate buttercream
cake
- 2 cups all-purpose flour
- 3/4 cup granulated sugar
- 1/3 cup brown sugar
- 1 1/2 tsp of baking powder and baking soda
- 1 tsp salt
- 3/4 cup vegetable oil
- 3 eggs
- 1/2 tbsp vanilla extract
- 1 cup buttermilk
ganache
- 1/2 cup + 2 tbsp heavy cream
- 1/4 cup pumpkin puree
- 12 oz bag white chocolate chips
- 1/2 tsp cinnamon
- 1/4 tsp ginger
- pinch cloves
buttercream
- 4 sticks unsalted butter (room temp)
- 5 cups powdered sugar
- 1/3 cup black cocoa powder
- 6 oz melted dark chocolate
- 2 tsp vanilla extract
- 3-5 tbsp heavy cream
- black food coloring (optional)
cake
- preheat the oven to 350 degrees F and line three 6-inch cake pans with parchment paper. in a large bowl, combine all of the dry ingredients and mix until incorporated. make sure that the brown sugar isn't in clumps. in another bowl, combine the oil, eggs, vanilla, and buttermilk and whisk together. pour the wet ingredients into the dry and mix until fully combined. divide the batter evenly among the cake pans and bake for 30-32 minutes or until a toothpick comes out clean. let the cakes cool for 10 minutes then carefully remove them from the pans to continue cooling. wrap in cling wrap until ready to use.
ganache
- place the white chocolate and all of the spices into a heat proof bowl. in a small pot, combine the heavy cream and pumpkin puree and place over low heat (i use a gas burner, so if you are using an electric one you can increase the heat to medium-low). constantly whisk the mixture until it starts to simmer or creates steam. when the pumpkin mixture is hot enough, pour over the white chocolate. constantly whisk the mixture until all of the chocolate is melted. put cling wrap over the bowl and place into the fridge to chill.
buttercream
- melt the chocolate in a microwaveable bowl. put the butter, powdered sugar, cocoa powder, melted chocolate, and vanilla into the bowl of an electric mixer fitted with a whisk attachment. whip on low and gradually increase speed, whipping for about 2 minutes or until light and fluffy. add in the heavy cream and continue whipping, about a minute. add in some black food coloring if desired.
Almond Butter Cake with a Pear Filling

[wprm-recipe-jump]
*This post contains affiliate links. Please read disclosure to learn more.
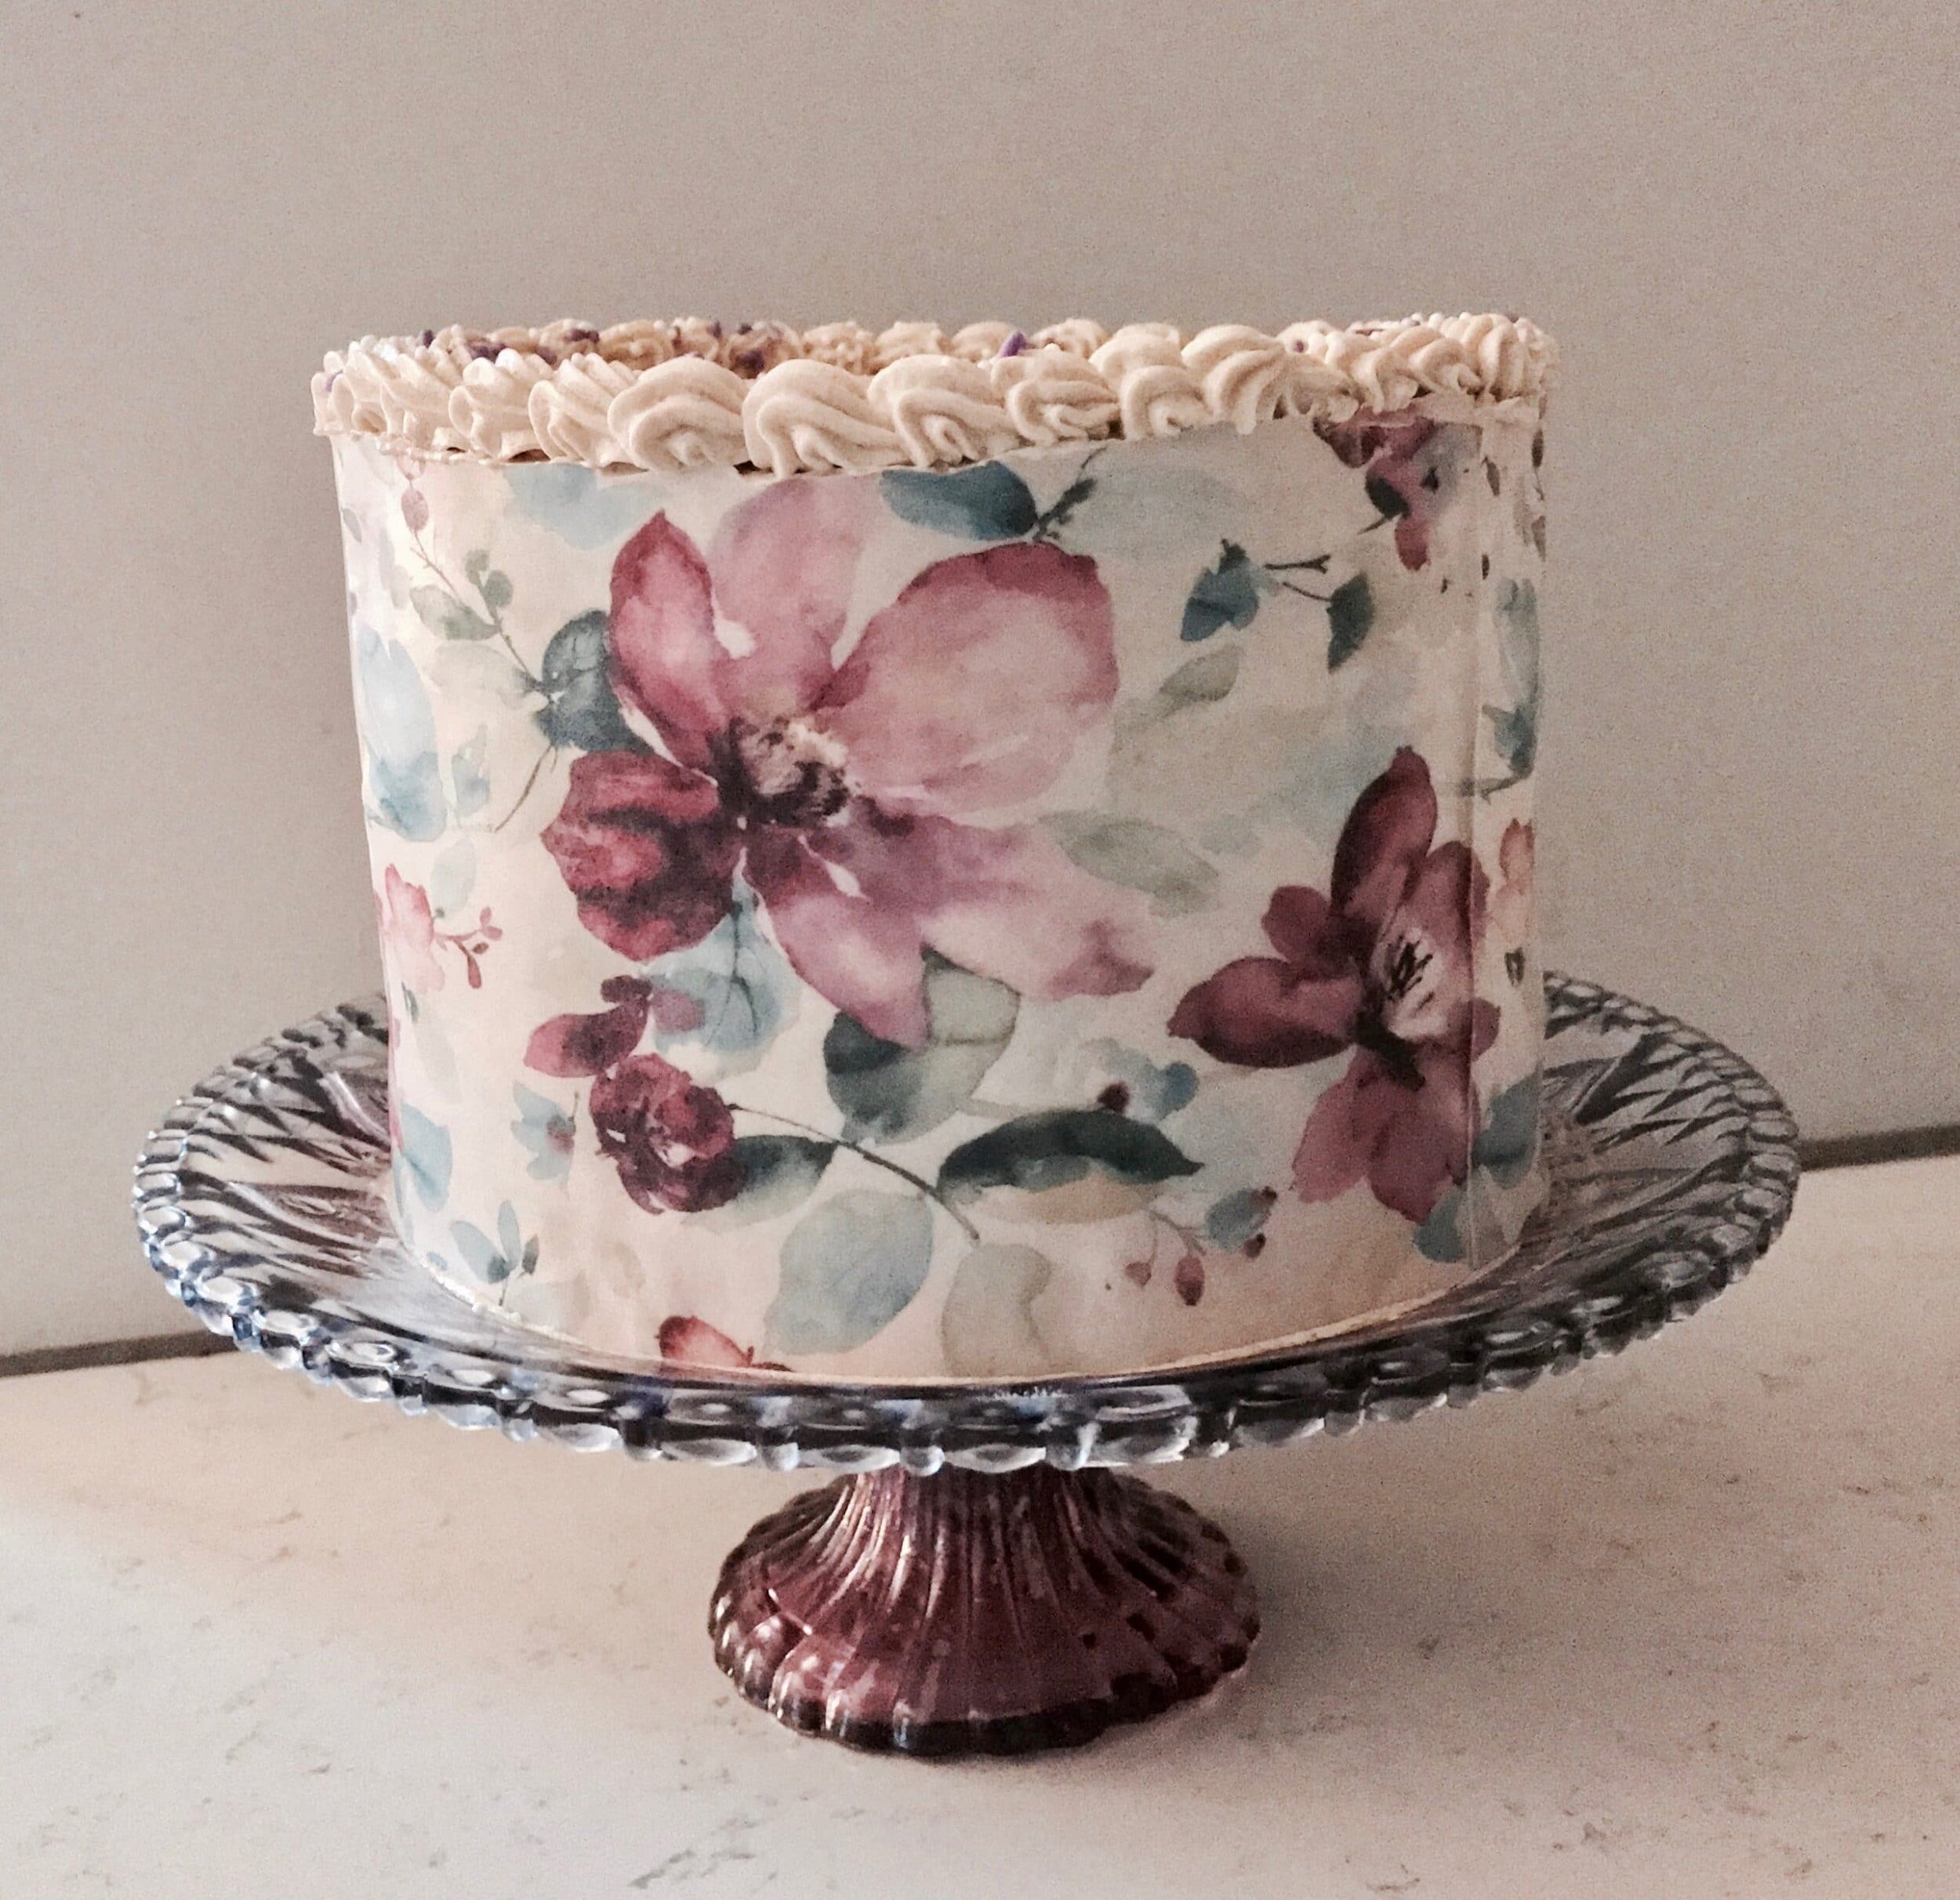
The idea for flavors just randomly pop into my head and sometimes I get so excited about a certain flavor combination that I just automatically have to make it right then and there. This almond butter cake is one of those cakes. The combination is packed with flavor from the almond butter, caramelized pears, and the brown sugar buttercream. It is so good! Like really good. Especially the buttercream!
The best buttercream ever
This ermine buttercream though has got to be my new favorite. Ermine buttercream is super light and fluffy and I thought Swiss buttercream was great! Honestly, when you try this buttercream, I promise you will never go back to any other type of buttercream that's ever been created. And yes, it is made with flour, which I thought was odd. Who makes buttercream with flour? Whoever created this odd concoction obviously knew what they were doing. It's usually made with granulated sugar but I thought that for the flavor profile I was going for that brown sugar would fit better. And was I right! This brown sugar ermine buttercream pairs perfectly with this almond butter cake.
Learn everything there is about edible printing
Want to learn how to get images onto cookies and even cakes and chocolates? Then check out my new online edible printing course that will guide you through everything you need to know about edible printing, from start to finish! You won't regret it! Not too sure if you want to buy something so pricey if you aren't sure you'd like it? Then you can certainly check out my array of edible paper images you buy and try out before making such a huge purchase.


Products I recommend
________________________________________________________________
almond butter cake
this almond butter cake is filled with a caramelized pear filling and a light brown sugar ermine buttercream.
cake
- 1 3/4 cup all-purpose flour
- 1 cup granulated sugar
- 1/4 cup brown sugar
- 2 tsp baking powder
- 1 tsp salt
- 10 oz jar almond butter (2 tbsp reserved for later use)
- 3 eggs
- 3/4 cup vegetable oil
- 1 tsp vanilla extract
- 1 cup milk
- 1/2 cup boiling water
filling
- 2 pears (peeled, cored, and diced)
- 1/3 cup granulated sugar
- 1/4 cup brown sugar
- 1/2 tsp vanilla extract
- 1/4 cup water
buttercream
- 1/2 cup all-purpose flour
- 1 1/2 cup milk
- 1 tbsp vanilla extract
- 3 sticks unsalted butter (room temp)
- 1 3/4 cup brown sugar
- pinch salt
cake
- preheat the oven to 325 degrees F and prep three 6-inch cake pans. place a pot of water on the stove to boil. in the bowl of an electric mixer fitted with a paddle attachment, cream the almond butter, about a minute. scrape down the sides of the bowl. add in the eggs, oil, vanilla, milk and mix to combine. in another bowl, combine the flour, both sugars, baking powder and salt and whisk together. gradually add the dry ingredients into the wet. once the batter is fully mixed, add in the boiling water and incorporate into the batter. divide the batter evenly into the cake pans and bake for 30-35 minutes or until a toothpick comes out clean. let the cakes cool 10 minutes then carefully remove from the pans to continue cooling. wrap in cling wrap until ready to use.
filling
- place all of the ingredients into a small saucepan and place over medium-high heat. stir the ingredients together and then cover slightly with a lid. let cook, stirring occasionally, for about 15-20 minutes and until the sugar has become thicker and caramelized. the cook time also depends on the ripeness of the pears. make sure to try a piece at the 15 minute mark to see if they are soft and tender. (no one wants to bite into a hard piece of pear)
buttercream
- in a saucepan combine the flour and milk and place over medium-low heat. whisk the mixture constantly until it starts to thicken, about 8-15 minutes. (this depends on if you have a gas or electric stove top.) once thick remove from the heat. put the mixture into a bowl and mix in the vanilla extract. place cling wrap directly over the mixture so a skin doesn’t form. let cool until room temp. once at room temp, place the butter and sugar into the bowl of an electric mixer fitted with a whisk attachment. whip until light and fluffy, about 5 minutes. before adding the flour mixture, make sure there aren’t any clumps. if there are i suggest putting the mixture through a fine mesh sieve. add the flour mixture a spoonful at a time into the butter mixture. once the flour mixture is all added, whip on high for about a minute. the buttercream will resemble whipped cream.
assembly
- trim the tops off the cake to make it level. start with one layer and spread half of the reserved almond butter on top. i found it easier to heat it up in the microwave for a few seconds before hand. after the almond butter, spread a thin layer of the buttercream and then with a piping bag, pipe a dam around the sides of the cake. put half of the pear filling next. repeat with the second layer of cake. once the last layer of cake is stacked, spread a crumb coat on the whole cake. place the cake in the fridge to chill for at least 30 minutes or until the crumb coat has set. once set, spread a thicker layer of the buttercream on. pipe designs/boarders if desired.
Orange Almond Cake
*This post contains affiliate links. Please read disclosure to learn more.
This orange almond cake is light and fluffy, which makes it perfect for a spring or summer afternoon treat. With a subtle flavor of almond and hint of orange, it pairs well with the creamy texture of the ermine buttercream that surrounds the cake layers.

sometimes when i'm in the mood to bake something but don't want to go to the store to buy ingredients, i will just take a look into the cabinets and fridge to see what i have. usually i don't have much of anything, but this time around i found some oranges and some almond extract. that's a plus especially since i just recently moved into my own apartment and everything is still a very hot mess. it's not easy to unpack everything when you don't have everything. especially furniture. you need lots of shelves when your apartment is so small that there's no closet for your clothes and extras. major shopping trips are definitely in my future.
it's also fun though to just come up with something out of what you already have. you never know what kind of fun creative combinations you could come up with. the opportunities are endless! give it a try sometime and see what you can come up with. one thing i will always have in my fridge is almond milk. i never drink regular milk, i find it foul and disgusting. if i'm baking i will use regular milk when i need to, but usually it's buttermilk and the occasional almond milk. this time around it's almond milk, perfect for the orange almond flavor of the cake.

Ermine buttercream
this cake is super light and perfect for this time of the year. the cake is light with orange flavor and the almond buttercream is ermine buttercream, or flour buttercream, which adds to the light and fluffiness of this cake. it's a really great combination and i'm absolutely in love with it. now the ermine buttercream can be tricky and temperamental. you have to make it exactly as said, or else it just won't turn out and will turn into a curdled mess. i know because i've done it before. wasn't pretty. so just make sure to follow the directions exactly.
You can also sign up to receive my newsletter and by doing so you will get a free buttercream guide. My buttercream guide will tell you everything you need to know about ermine buttercream plus 6 other buttercreams too! Just sign up below to receive your buttercream guide today!
[mailerlite_form form_id=2]

Change it up!
You can easily replace the orange juice with another citrus fruit!
If blood orange is in season I would give that a try, otherwise grapefruit, lemon or even lime would be lovely in this cake.

Other recipes you may like
Blood orange sorbet
almond orange cake
a gorgeous almond orange cake made with almond milk that is coated in a fluffy ermine buttercream.
cake
- 1 1/3 cup granulated sugar
- 2 1/4 cup all-purpose flour
- 1 tsp salt
- 1 1/2 tsp baking soda and baking powder
- juice and zest of 1 large naval orange
- 3 eggs
- 3/4 cup vegetable oil
- 1 tsp vanilla extract
- 1 cup almond milk (i used the organic 40 calorie almond milk from Silk)
- 1/2 cup buttermilk
buttercream
- 1/2 cup + 2 tbsp all-purpose flour
- 2 cups almond milk (or regular milk)
- 1 1/2 tsp almond extract
- 1/2 tsp vanilla extract
- 4 sticks unsalted butter (room temp)
- 2 cups granulated sugar
cake
-
preheat the oven to 350 degrees F and line three 6-inch cake pans with parchment paper.
-
in a large bowl combine the flour, sugar, salt, baking soda, and baking powder and whisk together.
-
in another bowl combine the orange juice and zest, eggs, vegetable oil, vanilla extract, almond milk and whisk until incorporated.
-
pour the wet mixture into the dry mixture and mix until fully combined. separate the batter evenly among the cake pans.
-
bake for 28-30 minutes or until a toothpick comes out clean. let the cakes cool for 10 minutes and then carefully remove from the pans to continue cooling. wrap in cling wrap until ready to use.
buttercream
-
in a saucepan combine the flour and milk and place over medium-low heat. whisk the mixture constantly until it starts to thicken, about 8-15 minutes. (this depends on if you have a gas or electric stove top.)
-
once thick remove from the heat. put the mixture into a bowl and mix in the almond and vanilla extract. place cling wrap directly over the mixture so a skin doesn't form. let cool until room temp.
-
once at room temp, place the butter and sugar into the bowl of an electric mixer fitted with a whisk attachment. whip until light and fluffy, about 5 minutes.
-
before adding the flour mixture, make sure there aren't any clumps. if there are i suggest putting the mixture through a fine mesh sieve. add the flour mixture a spoonful at a time into the butter mixture.
-
once the flour mixture is all added, whip on high for about a minute. the buttercream will resemble whipped cream.
Peanut Butter Cut Out Cookies
These peanut butter cookies can be cut out into the cutest shapes! They are even better when drizzled with dark chocolate and a sprinkling of sea salt on top.
*This post contains affiliate links. Please read disclosure to learn more.

These peanut butter cookies are for peanut butter lovers, because who doesn't love peanut butter?! Well, maybe some people. I guess there is the people who live for Nutella or even almond butter, but I honestly don't get why. Or the people over in Europe. Could never really understand why Europeans don't like peanut butter. Anyone care to elaborate?
Europe vs peanut butter??
A long time ago, well more like 6 years ago, I was an exchange student and lived with the nicest family in England for 4 months. One thing I learned is that peanut butter isn't a very popular thing and I have no clue why that is. If you wanted it, you'd have to buy it in the smallest jars of it because you can't exactly find it. Now I go through a jar of peanut butter like no one's business, and that's me being serious, because I will eat it by the spoon.
I literally took the two biggest containers of peanut butter to England with me and both jars were gone within a month. And I'm not talking about the typical 16 oz jar you would normally buy for a family of four. I'm talking about the 64 oz jars. Two of them. Both gone in a month. Maybe I have a peanut butter problem. And maybe I should go to peanut butter anonymous? Is that a thing? Or it's because peanut butter is life and you need a daily dose of a good PB&J sandwich. I will say though is that my host mom was surprised that it was all gone that quickly, and I should be horrified with myself, but to be honest I was more upset that I had ran out.

Main ingredients & variations
I bought this rooster cookie cutter and I thought it was just perfect to go with these cookies. Just add in a little chocolate drizzle and a dash of sea salt and you have a cute, delicious cookie. And who doesn't like to have a little chocolate with their peanut butter?
- Peanut butter- this is clearly a must have for these cookies. I used creamy peanut butter so I can't say what it would be like to use crunchy. Maybe it would add in a great crunch, or maybe it will make it difficult to roll the dough out. But you can always experiment with this.
- Dark chocolate- I used dark chocolate to drizzle on top of these cookies. It's pretty easy too, just put some chocolate into a piping bag and microwave it until melted. Then drizzle all over these cookies. You can use milk chocolate or even white chocolate though if that's what you prefer. White chocolate would be bomb on these!
- Sea salt- I use a high quality sea salt when I sprinkle it on top of desserts. It adds to the pretty factor but also has a better taste. This is completely optional but highly recommended for that extra pop of flavor.

Tools I used to make these cookies
You don't have to use the exact cookie cutter or rolling pin to make these cookies. Use whatever you have on hand! Make them into little circles or even use a knife and freehand it.
- Rooster cookie cutter- The cute little cookie cutter I used to make these cookies. Aren't they just adorable? You can get them via the link below on Amazon or if you can't find it via the link I would check eBay.
- Marble rolling pin- I used my favorite marble rolling pin to roll out the cookie dough and just because I use it for everything. Pie crusts, fondant, and especially cookie dough.

Other fun recipes for you to try!
peanut butter cookies
these peanut butter cookies are fun to cut into shapes and even better when you drizzle some chocolate and sea salt on top
- 2 sticks unsalted butter
- 1/2 granulated sugar
- 3/4 cup brown sugar
- 3/4 cup creamy peanut butter
- 3 eggs
- 1 1/2 tsp vanilla extract
- 3 cups all-purpose flour
- 1 1/2 tsp baking powder
- 1/2 tsp baking soda
- 1/2 tsp salt
- preheat the oven to 350 degrees F.
- in a bowl, combine all of the dry ingredients. in another bowl, combine the butter, peanut butter, and both sugars and cream together until smooth, about 1 minute.
- scrape down the sides of the bowl then add in the eggs and vanilla. mix until incorporated, about 1 minute.
- scrape down the sides of the bowl again and then gradually add in the dry ingredients.
- separate the dough in half and then wrap the halves into cling wrap. place the dough into the fridge for about 30 minutes.
- once chill, roll the dough out to 1/4 inch thickness. place the cookies onto a sheet pan lined with parchment paper. bake for 8-10 minutes. let cool.
- add a chocolate drizzle by melting some chocolate chips and using a fork to drizzle it on the cookies. then sprinkle some sea salt on top before the chocolate sets.
Buttermilk Cut Out Cookies
These buttermilk cut out cookies are soft and cake like; perfect with a dollop of buttercream and sprinkles. The homemade version of the grocery store frosted sugar cookie but on a higher level.

These buttermilk cookies from Taste of Home are my favorite go to cut out cookie recipe. They remind me of those cookies you buy at the grocery store. You know, those sugar cookies with the pink frosting and the sprinkles? Except this recipe is way better! I use this recipe whenever I get a request for sugar cookies because they are soft, chewy and just perfect.
Growing up as a kid Harry Potter was one of my all time favorite things. I read all the books at least twice, some more than that, and I own all of the movies, the first one so old that it's on VHS. My cousins, sister, and I grew up loving this series and when I found these cute images created by Casey Robin, I knew that they would make the most adorable cookies!


The recipe & ingredients
To make these cookies you need a lot of buttermilk. The buttermilk gives these cookies the soft cake like texture that these cookies are known for. Don’t substitute it for regular milk or dairy free milk because the odds will not be in your favor. Stick to the tried and true recipe given and you will fall in love with these cookies just as much as I have.
Decorating
Now I'm not the best at being able to do anything artistic, and the people out there that can paint and draw, you are the luckiest people and I wish I could have talent like that. In all honesty I have a secret weapon when it comes to painting images onto my baked goods, and for now I'm not willing to share quite yet on what the secret weapon is. I'll share it eventually but for now you'll just have to wonder and guess on what it could be.
Other recipes you may like
buttermilk cookies

soft and cake like cookies that are perfect topped with a simple buttercream and lots of sprinkles
- 2 sticks butter (room temp)
- 2 cups sugar
- 3 eggs
- 1 tsp vanilla
- 5 cups all-purpose flour
- 2 tsp baking powder
- 1 tsp baking soda
- 1/4 tsp salt
- 1 cup buttermilk
- Cream the butter and the sugar in a mixer for about 3 minutes and then scrape down the bowl. Gradually add the eggs and the vanilla. Combine the dry ingredients and sift into a separate bowl. Alternate between the dry and the buttermilk into the mixer, beginning and ending with the dry. When fully mixed, cover and refrigerate for an hour. Set the oven to 350*F. Roll out the dough to about 1/4 inch thickness and cut-out in desired shapes. Bake for about 8-10 minutes or until the edges are golden brown. Let the cookies cool and decorate anyway you desire.
frosted animal cookies
 *disclaimer: this post contains affiliate links. to learn more, please go here.a childhood classic treat. little cracker like cookies in the shapes of animals, covered in white and pink frosting glaze, and tons of sprinkles on top. frosted animal cookies!homemade honestly makes everything better. like really.
 these cute little guys also have a something extra added into it to give it even more flavor. ever hear of princess extract? it's honestly one of the best things that i have ever bought and i highly suggest that you get some. it's a three-in-one flavor combination featuring: lemon, almond, and vanilla.
 i also found these super tiny, adorable cookie cutters specifically for these cookies. it's not the typical zoo animals like the lion and the bear, but little critters. there's the fox, cat, dog, fish, rabbit, bird, duck, horse, bear, and then some unknown animal that i just can't seem to figure out what it is. anyone have any ideas? it's the one at the top right. i'm leaning towards a sheep but i'm still pretty unsure.
 anyways.these are also super addictive. just like the store brand, which is also super addictive, these were gone in a day when i made them. my family literally devoured them. but then again, who wouldn't. they're so small and taste so good!
 the only downside is that because the cutters i got are so small, it was a little time consuming. so be my guest and use different cutters that are bigger or any cutter you want in any shape you want.
__________________________________________________________________________
frosted animal cookies1 stick unsalted butter1 1/4 cup all-purpose flour1/2 cup granulated sugar1 egg1/2 tsp princess extract1/4 tsp salt1/2 tsp baking powderpreheat the oven to 325 degrees F. in the bowl of an electric mixer, cream the sugar and butter together, about 1 minute. add in the egg and princess extract and mix until incorporated. gradually add in the dry. divide the dough in half and wrap in cling wrap. place in the fridge for about half an hour to chill. roll the dough out to 1/4 inch thickness and use the cutters to cut out the shapes. place the cookies onto a sheet pan lined with parchment paper. bake for 8-10 minutes. let cool.glaze6 tbsp butter, soft2 cup powdered sugar4 tbsp meringue powder1/2 tsp princess extract1/4 cup + 2 tbsp milkmix the butter, powdered sugar and meringue powder until coarse and crumbly. add in the princess extract and milk. divide the glaze in half and color one batch a light pink.to glaze the cookies, have a wire rack placed over a sheet pan to catch excess glaze. using a fork, dip the cookies into the glaze and the tap on the side of the bowl. place the cookies on the wire rack, add sprinkles on top, and leave to let the glaze set.

